Introduction
Elevar is one of the most well-known, if not the de facto, solutions for setting up server-side tracking in Shopify. In our opinion, this is largely because it alleviates some headaches caused by limitations in Shopify’s new update, Customer Events, which we will discuss in the upcoming section.
Shopify’s Customer Events
Customer Events are the new way to set up tracking in Shopify. Although they offer some distinct advantages, in our opinion, the downsides outweigh any benefits due to the painstaking process of working with GTM.
Customer Events are the new way to set up tracking in Shopify. Although they offer some distinct advantages, in our opinion, the downsides outweigh any benefits due to the painstaking process of working with GTM.
Limitations of Browser-Based Tracking Post Customer Events Update
Starting on August 28, 2025, Shopify will discontinue the old method of setting up checkout tracking using theme.liquid. You will need to add Customer Events to ensure your tracking is not disrupted.
How Do Customer Events Work?
First, Shopify’s Customer Events operate in a sandbox environment. The best way to understand what this means is through the house analogy.
If Shopify is a house, a sandbox environment is like an insulated room. You can add scripts without running the risk of interfering with Shopify’s core functionality. It enhances the safety and stability of your website. If you mess up something in your tracking, it won’t spill over and crash the entire building!
Let’s discuss some challenges related to this new update.
1. GTM’s Preview Mode
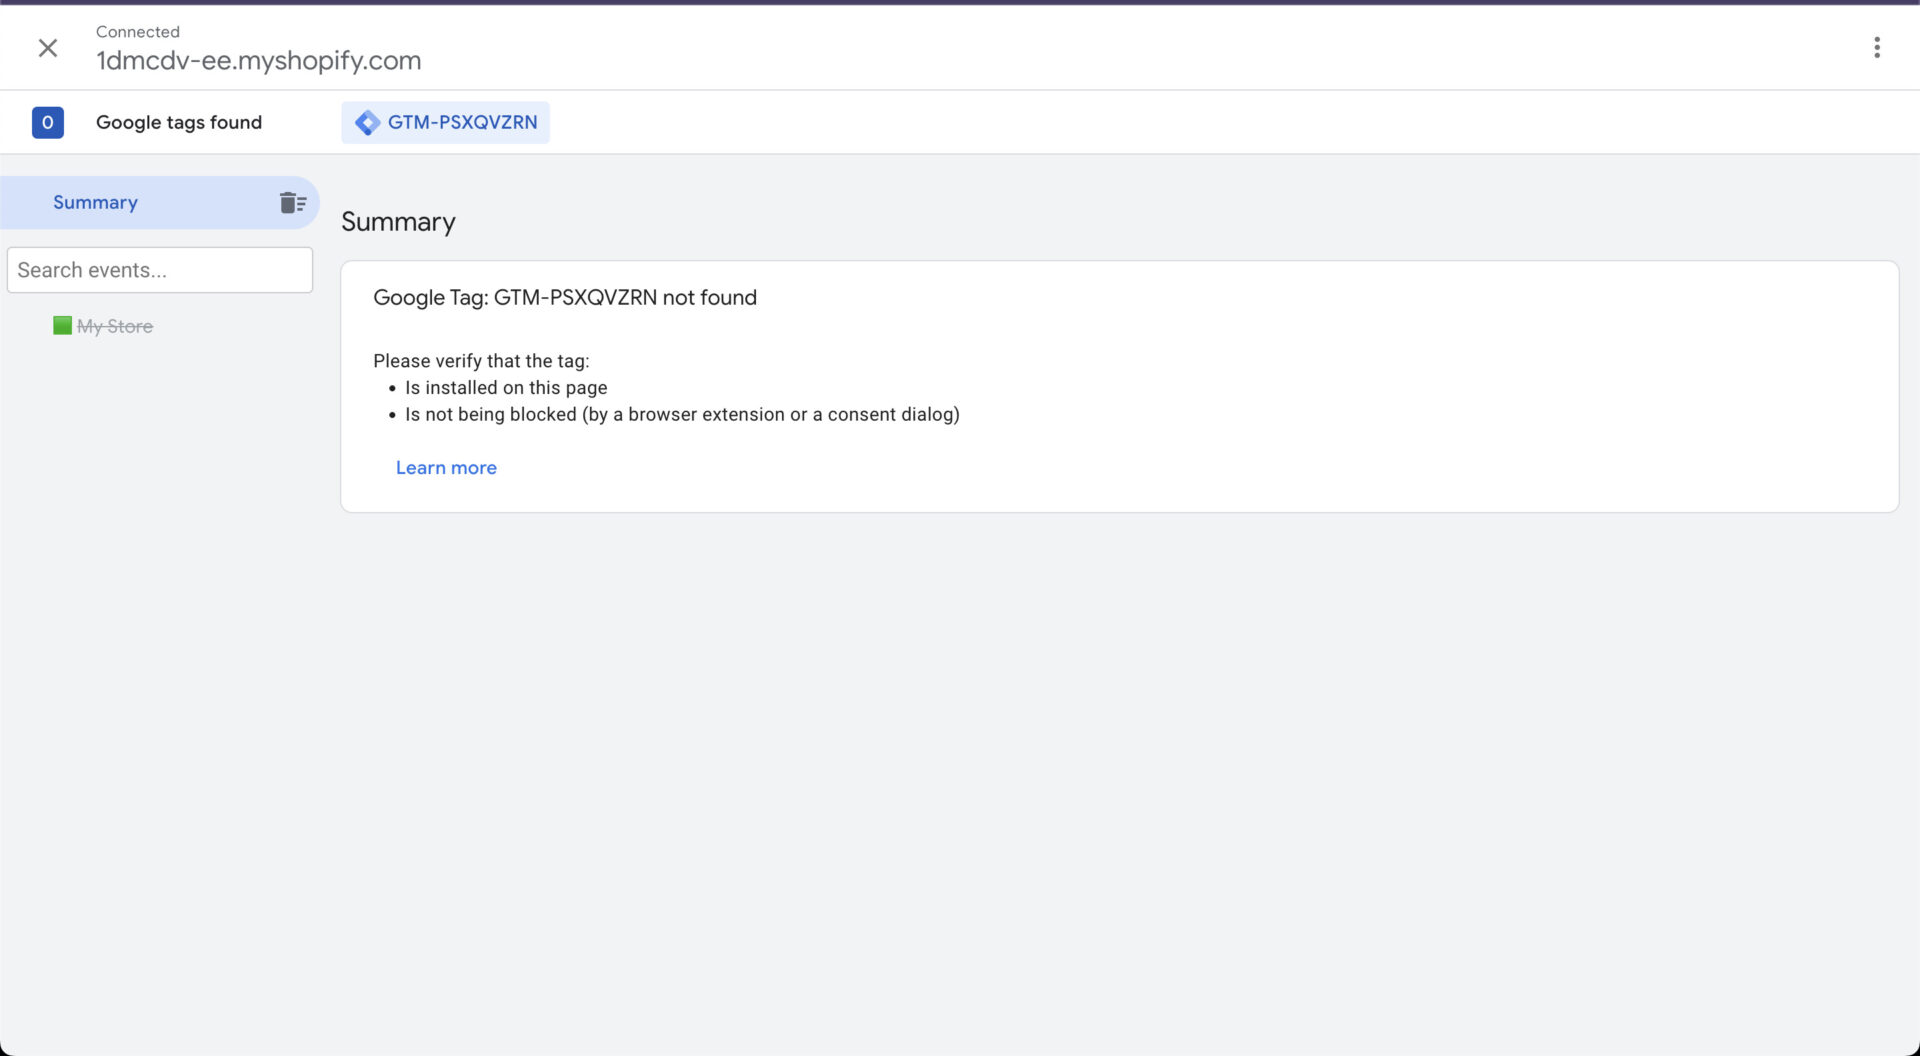
If you’ve tried to preview GTM after moving to Customer Events, you’ll find that you can’t preview (i.e., test) your container’s tags. This is one of the biggest limitations, especially as you try to implement more complex tracking.
2. Challenges with Setting Up Consent Mode
In a sandbox environment, you need to ensure your scripts are using Google’s Consent Mode. This becomes more challenging since you’ll be relying on the network tab to verify each of your tags.
Moreover, each CMP is different: how you set up Pandects will slightly differ from Cookiebot, for example, so you need to be extra careful when debugging your tags.
3. Data Quality Issues Post-Implementation
The sandbox environment, due to its inherent security features, limits access to the DOM. This means that using CSS selectors and built-in variables in GTM is very limited and might not work as expected.

Elevar: server-side tracking to Streamline Tracking
In our opinion, due to the limitations of Customer Events and the bugs we’ve noticed, we suggest moving to a server-side implementation. Elevar is a natural choice, but not the only option available, due to how well it integrates with Shopify.
We are generally against using apps/plugins if you want maximum control over your configuration, but this is a particular case where a fully managed setup through GTM is quite hard to pull off without noticing data quality issues.
Overview of Tracking Process with Elevar
Unlike Google Cloud, Stape, and other server-side solutions, Elevar has a very streamlined setup process.
- Configuring the Elevar app
- Setting up a GTM web container
- Configuring your marketing destinations and importing templates to the web container
Step #1: Elevar App Configuration
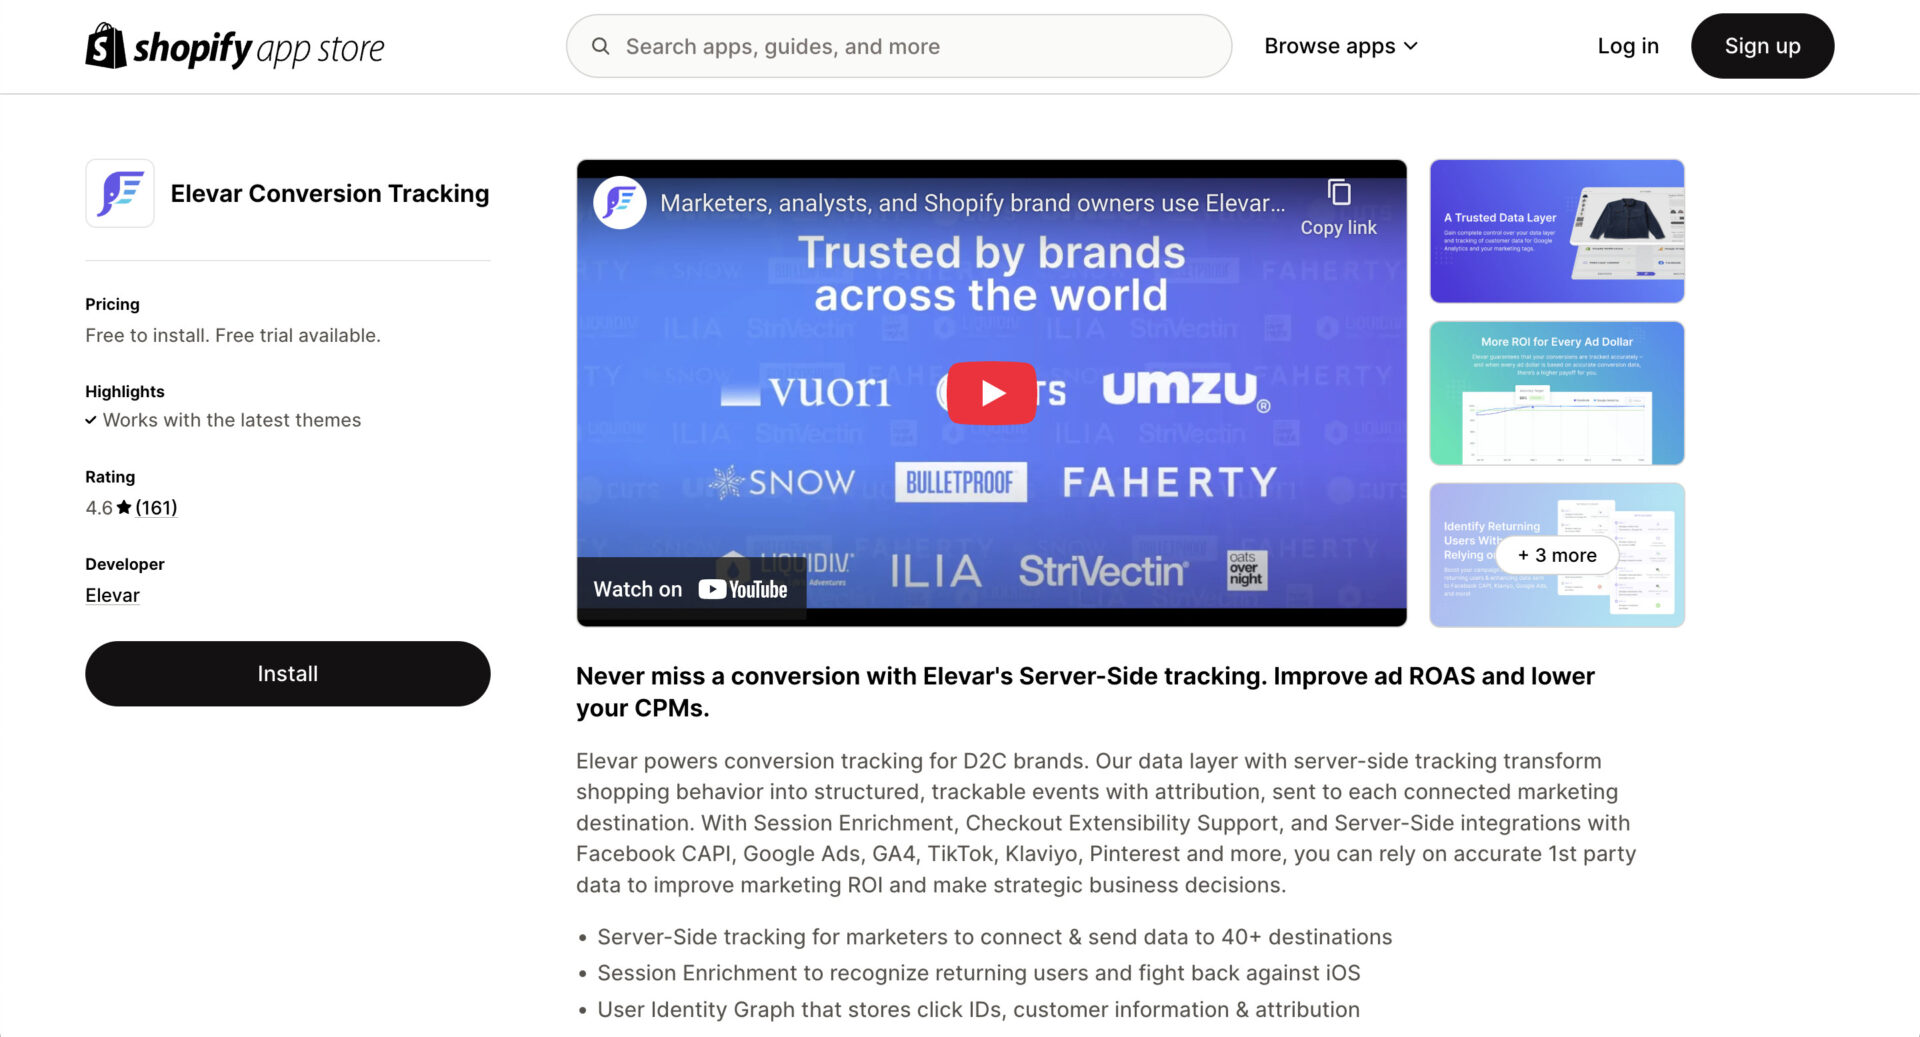
Go to the Shopify app store and add Elevar’s conversion app.
Once you have the app installed, you will have access to the main dashboard, where the majority of your configuration will be done.
Note
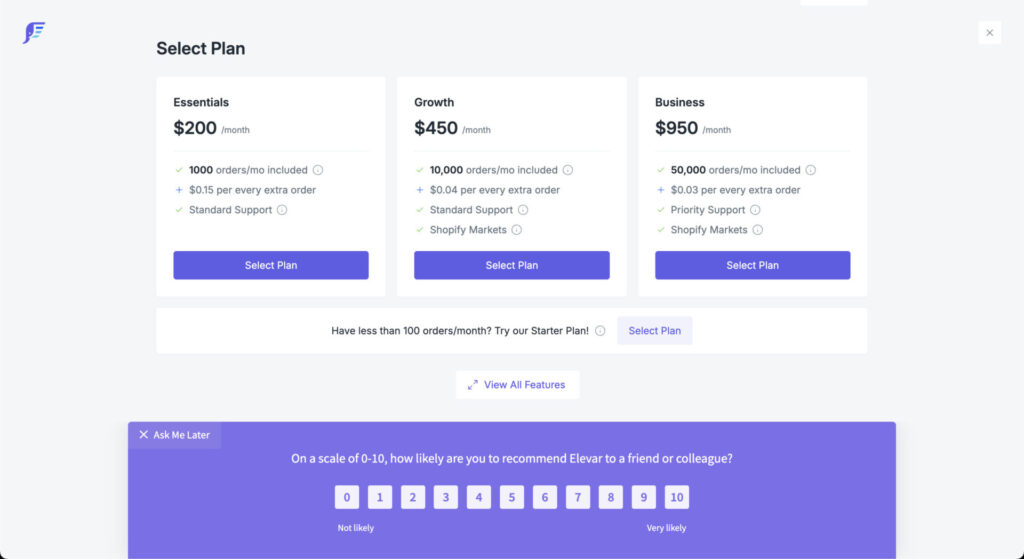
If you are just starting out or experimenting with server-side tracking, you can use the free plan. It has a limit of 100 monthly orders, which allows you to do enough testing before upgrading to production-level requirements or until you surpass the 100-orders-monthly limit.
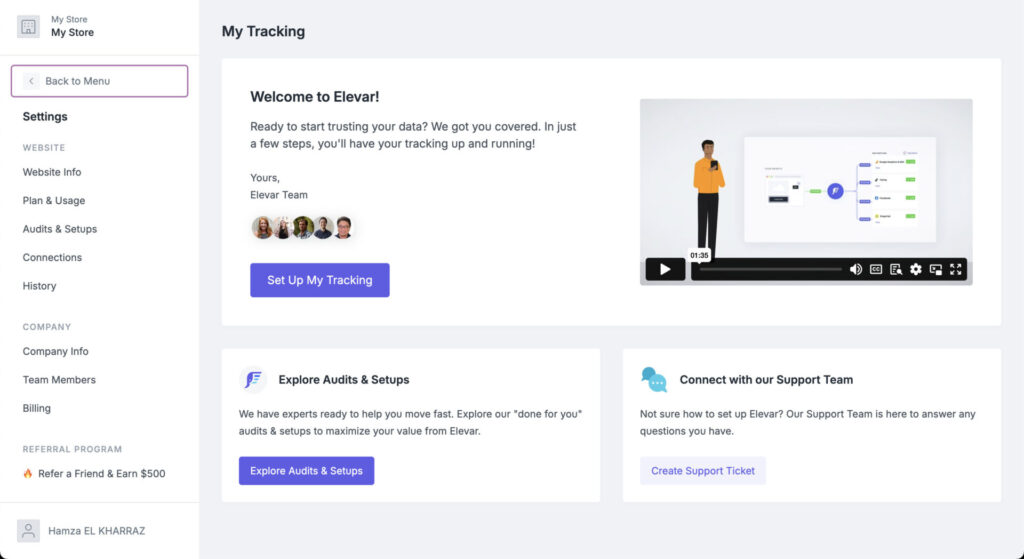
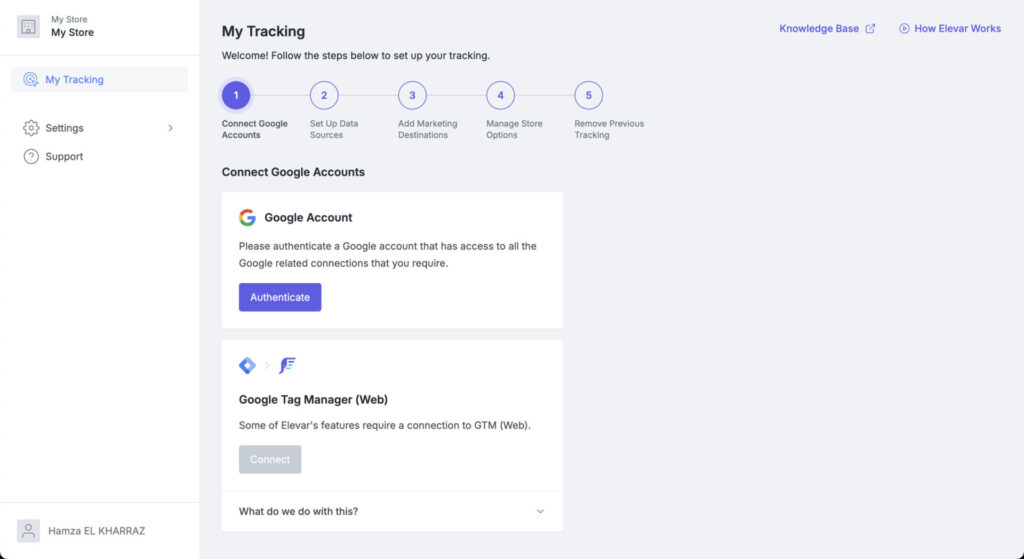
Let’s start setting up the account. Click on “Set Up My Tracking.” We need to go through the checklist to set up tracking.
After authenticating using your store, move on to adding a GTM ID.
Note
We recommend adding a staging GTM ID at this point to verify your setup. You can always change the ID later on.
Also, keep the same settings for the other steps.
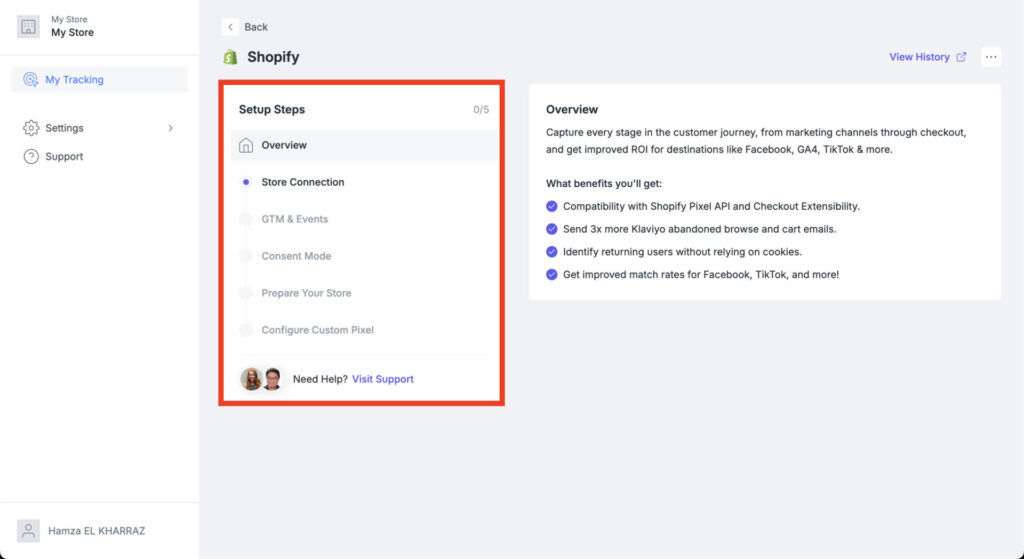
- GTM & Events
Elevar already sends the required e-commerce events by default.
- Consent Mode
The app integrates with Consent Mode as well, but it really depends on your CMP. Just make sure to select a CMP like Pandectes that works well with Shopify and test enough after publishing.
- Prepare Your Store
You can remove older scripts if you have any in:
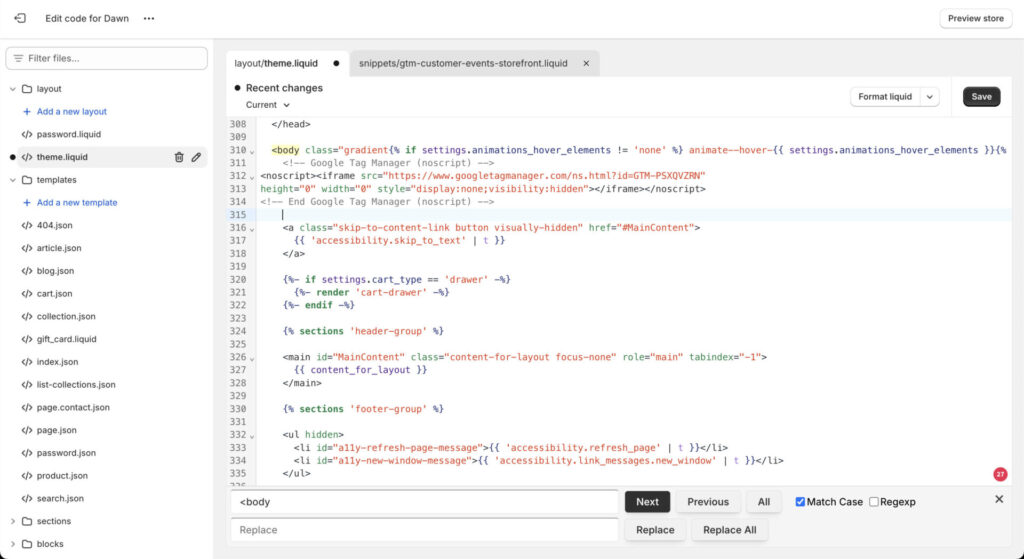
theme.liquid
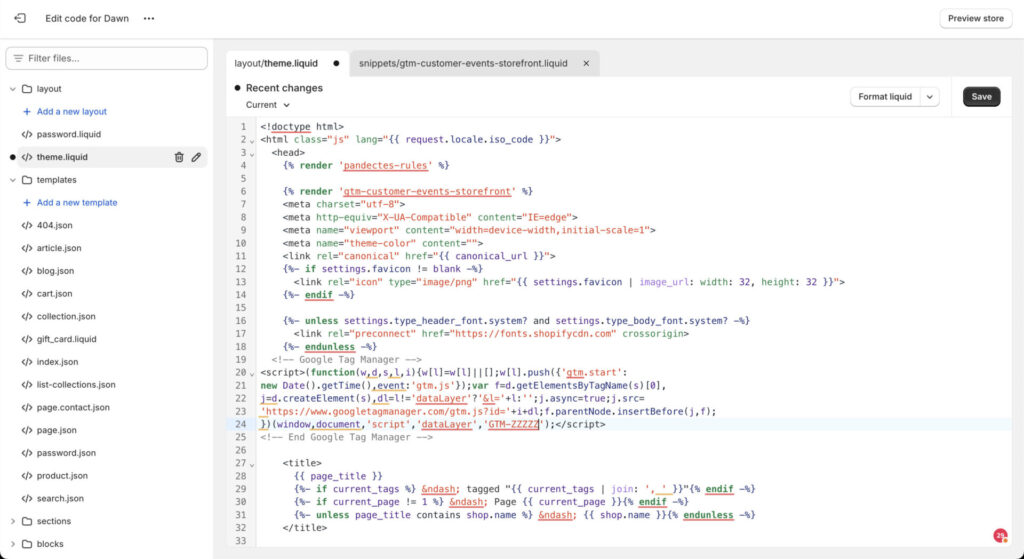
Look for “GTM-” and see if you have any GTM scripts in your theme.
Do a search using the left panel as well to double-check for any GTM tracking codes.
- Customer Events
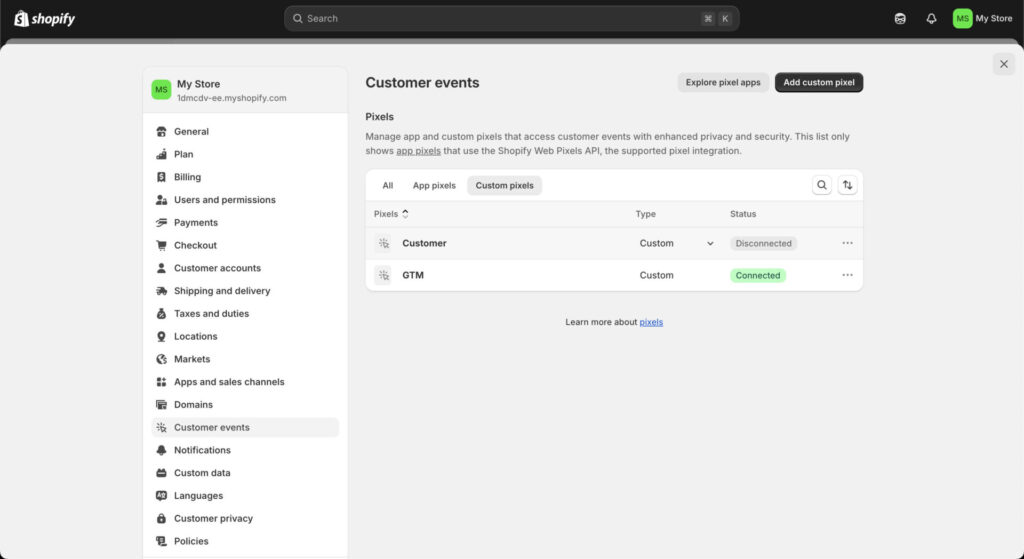
You might have already added Customer Events (Settings → Customer Events). If so, you can disable them. Elevar has its own data layers for tracking eCommerce events and first-party user data, typically prefixed with dl_, ensuring they won’t interfere with your existing data layers.
When to Keep Your Existing Script
We recommend keeping your existing tracking if you are planning to use the new setup initially for testing. You can then gradually move to production. Just make sure not to use any production IDs to avoid duplicate data.
- Add Elevar’s Custom Pixel
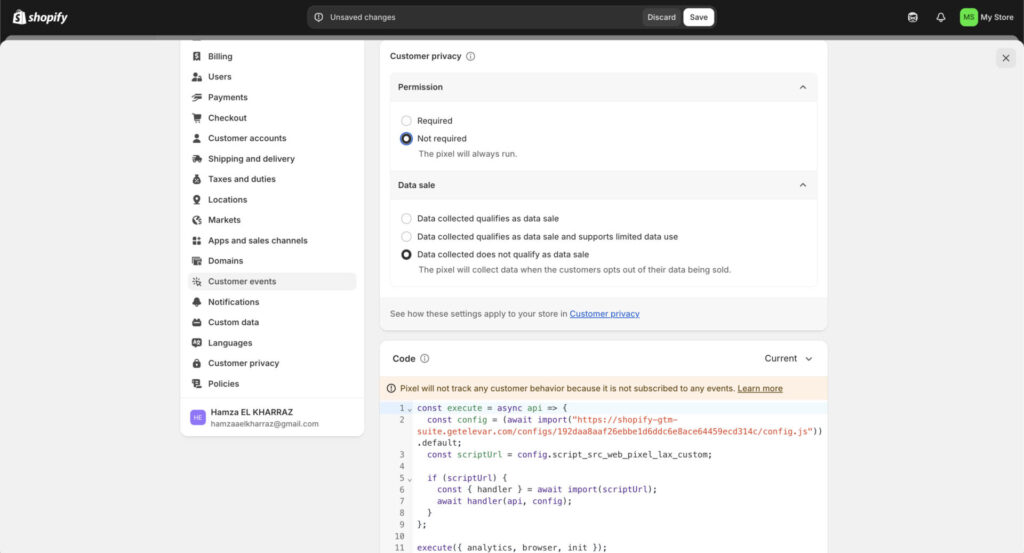
You will be prompted to add a custom pixel to your store. Copy it and browse to Settings → Customer Events. Click Save.
Note
Make sure to set customer privacy permissions to not required and data sale to “Data collected does not qualify as data sale”.
Step #2: Configure Your First Destination
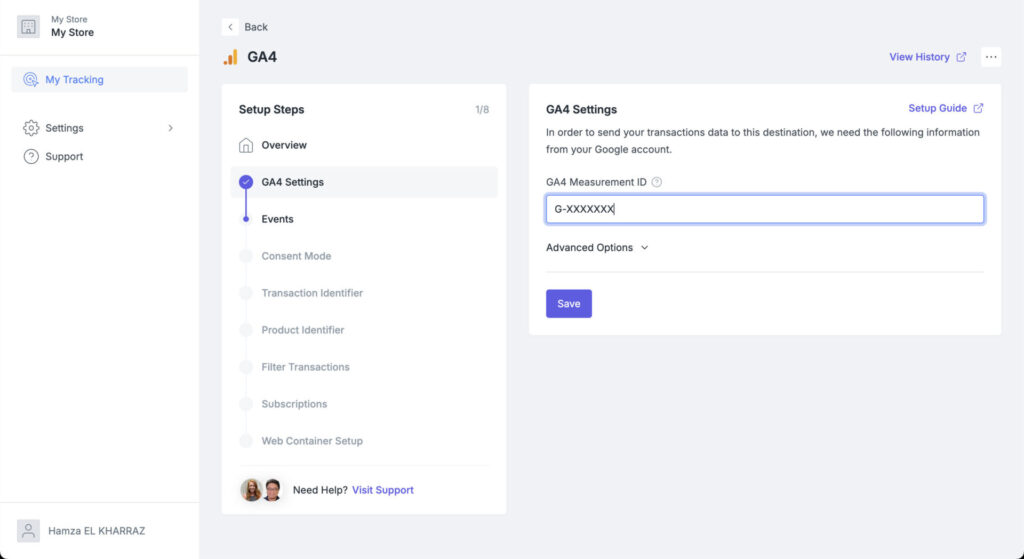
We will finally start configuring our marketing tools. GA4 is a good place to start. We recommend using a staging property initially to validate events before moving to your main property.
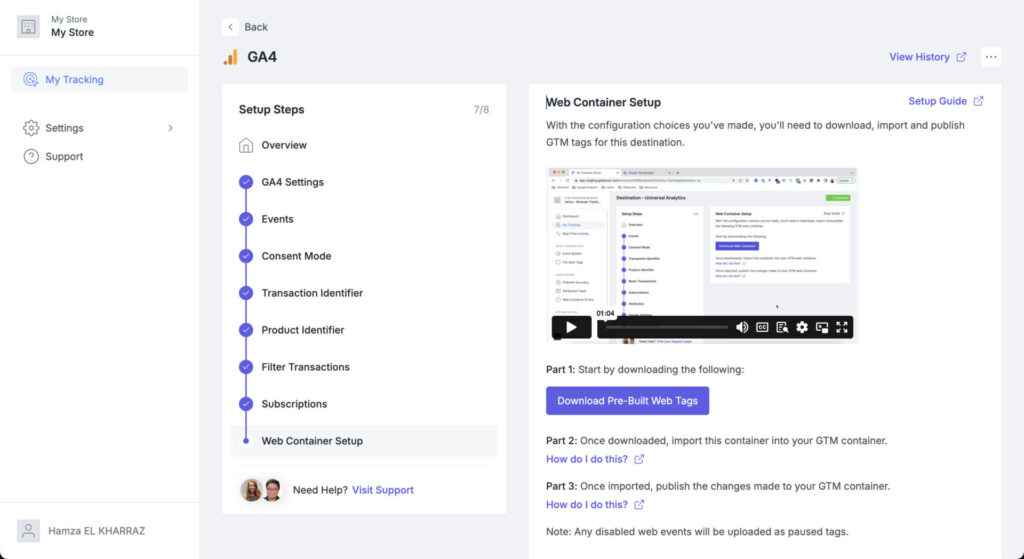
All you really need to do is follow the checklist and keep all settings at the recommended options by Elevar. Once you go through all the steps, you can import a template container to Google Tag Manager and customize it.
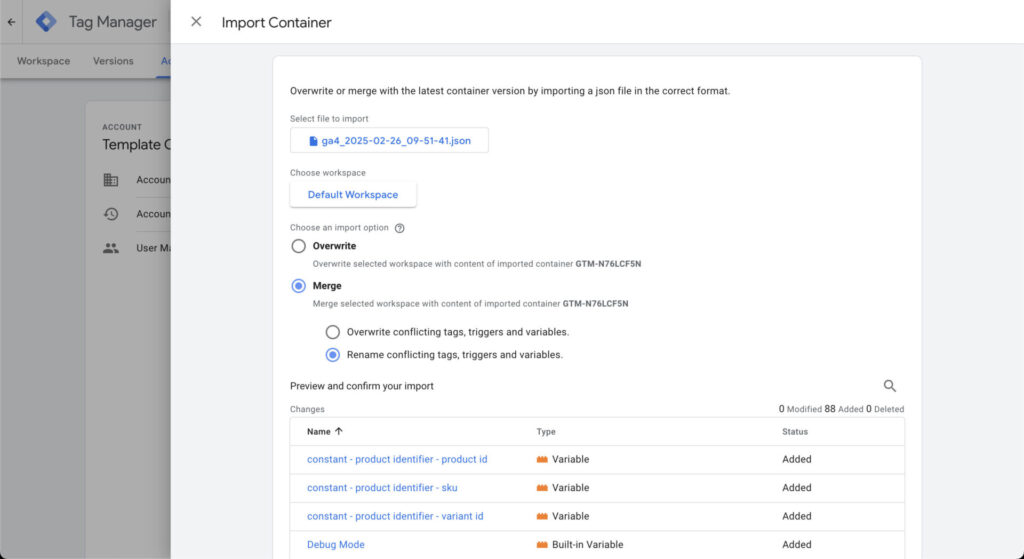
Make sure to select “Rename conflicting tags, triggers, and variables.” This will ensure you do not override any of your default settings. Once you import your container, use the top search bar and look for GA4 ID. Click on the variable and make sure the ID matches your GA4 ID (or the one you are using for testing purposes).
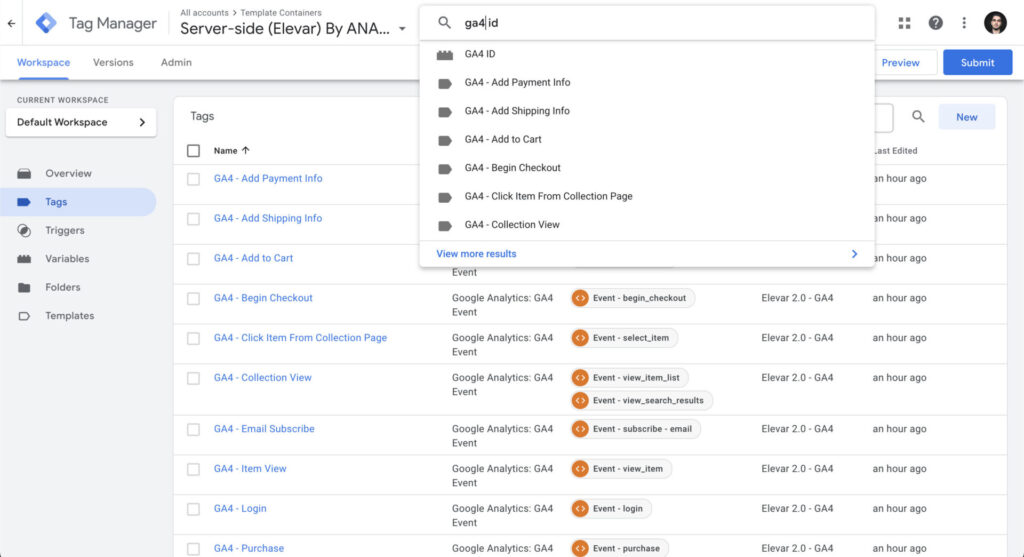
Also, some tags might be paused in the initial import. Go through the imported tags and make sure all the tags you want to push to production are unpaused.
When to keep tags paused
If you are using Elevar to send a purchase event directly to the platform’s servers, do not unpause the web purchase tag. Doing so will result in duplicated conversions for that measurement ID.
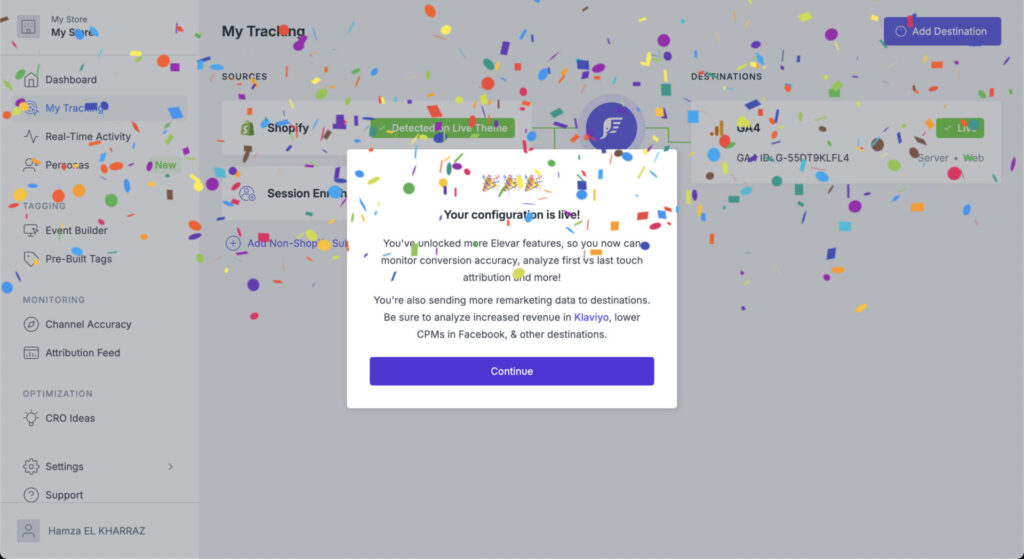
Finally, when you are ready, publish the container. In your Elevar GA4 destination dashboard, click on Go Live. This will make your changes officially live in production. But you’re not done yet. You need to ensure your events are working properly.
Step #3: Data Validation
The last step is where you should test your configuration.
1. Compliance and Consent Mode
Consent Mode is working properly: your marketing tags are either being blocked or executing, depending on the consent state. For Google tags, ensure that consent signals are being sent with each tag.
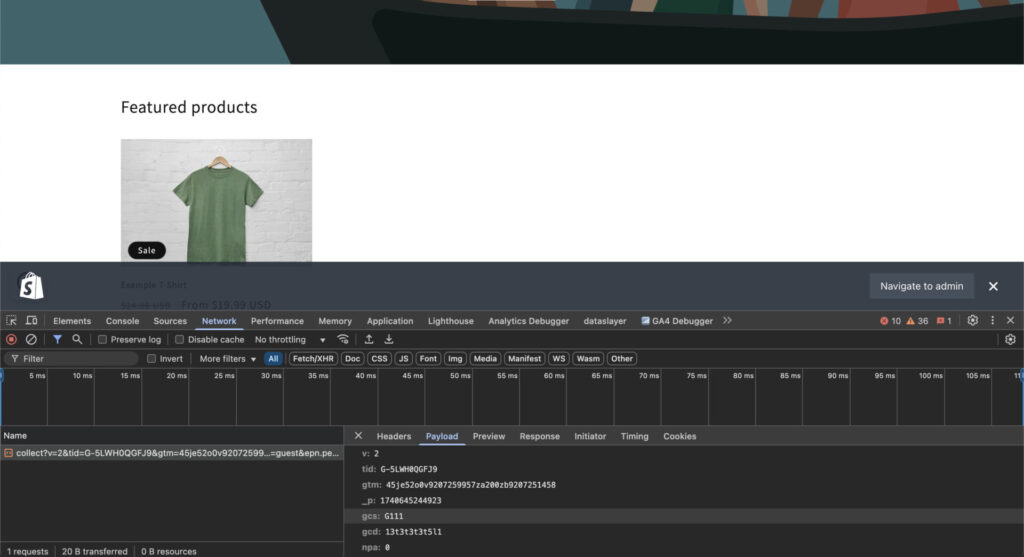
You can use the table below to help you understand what each consent signal means.
gcs Value | ad_storage | analytics_storage | Description |
|---|---|---|---|
| G100 | Denied (0) | Denied (0) | No consent for either. No cookies/identifiers; only cookieless pings sent. |
| G110 | Granted (1) | Denied (0) | Consent for ads (cookies enabled), but no consent for analytics. |
| G101 | Denied (0) | Granted (1) | Consent for analytics (cookies enabled), but no consent for ads. |
| G111 | Granted (1) | Granted (1) | Full consent for both ads and analytics; cookies/identifiers fully enabled. |
2. Events and Parameters
Next, make sure your events are working correctly as well. Focus on high-priority events related to the e-commerce funnel first, as they have a somewhat consistent structure.
Elevar generated data layers have a different structure than GA4 recommended e-commerce events with some extra keys. Just make sure that your product page reflects what you see in data layer.
{
  "event": "dl_view_item",
  "event_id": "d5cb3173-9e8c-4580-8346-64ccf33b2622",
  "event_time": "2025-02-27T08:37:25.231Z",
  "event_state": "OTHER",
  "user_properties": {
    "session_id": "1740645365",
    "session_count": "1"
  },
  "ecommerce": {
    "currencyCode": "USD",
    "detail": {
      "actionField": {
        "list": ""
      },
      "products": [
        {
          "id": "47649015922925",
          "name": "Example T-Shirt",
          "brand": "Acme",
          "category": "Shirts",
          "variant": "Lithograph - Height: 9\" x Width: 12\"",
          "price": "25.00",
          "list": "",
          "product_id": "8925594747117",
          "variant_id": "47649015922925",
          "compare_at_price": "0.00",
          "image": "https://1dmcdv-ee.myshopify.com/cdn/shop/files/green-t-shirt.jpg?v=1737453746"
        }
      ]
    }
  },
  "gtm.uniqueEventId": 7
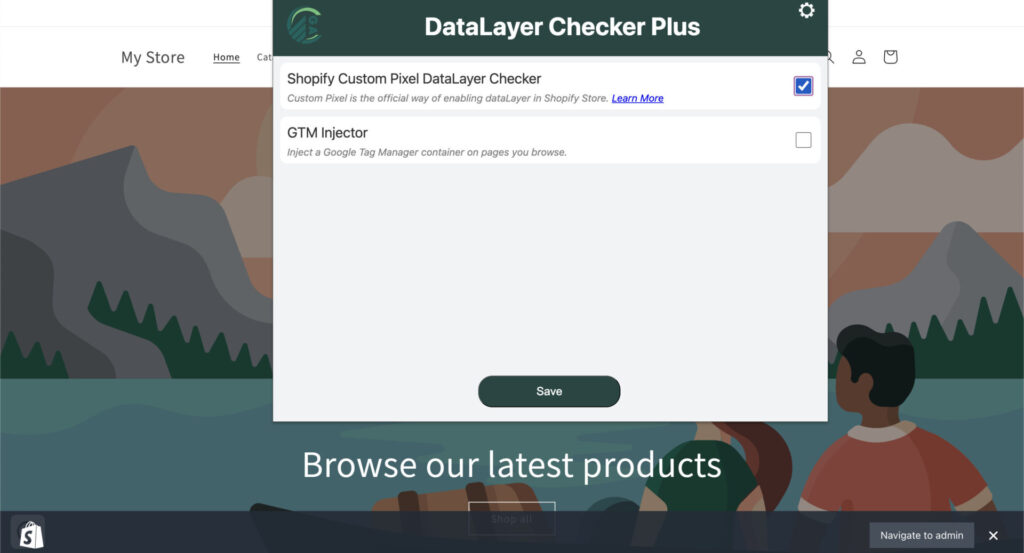
}We currently use an extension called DataLayer Checker Plus that you can add to your browser for an easier QA experience.
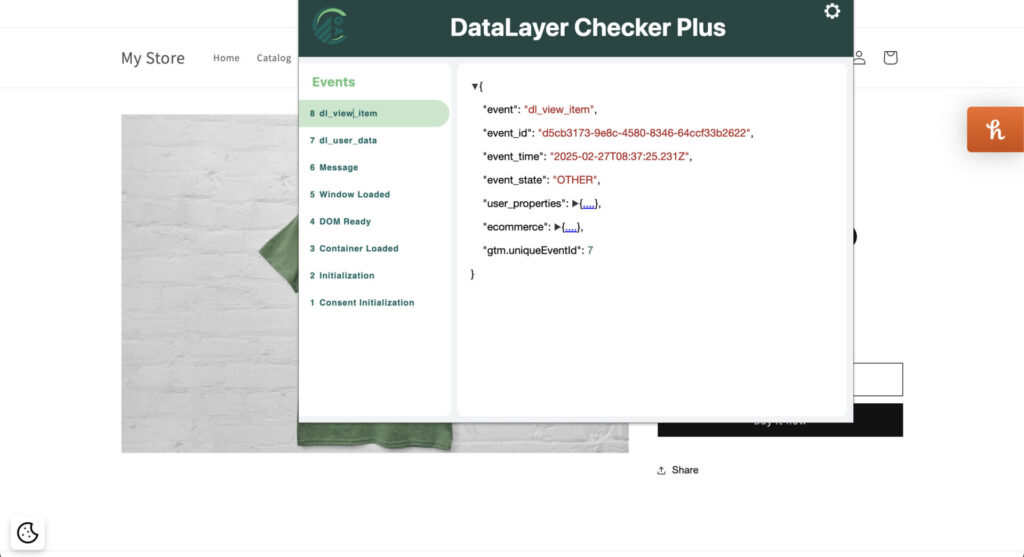
In the extension’s settings tab, you need to make sure the option “Shopify Custom Pixel DataLayer Checker” is toggled.
Final Words
Using Elevar, you’ll eliminate much of the headache related to moving to Customer Events. If the cost of using Elevar (or server-side tracking in general) isn’t an issue for you, now is a great time to move to server-side tracking as the deadline for Customer Events approaches.
If you’re a smaller business and still interested in server-side tracking, stay tuned for a new article where we’ll share how to set it up using other solutions, such as Stape.

