Google will require from you to configure Consent Mode v2 starting March 2024. If you don’t configure consent mode, you won’t be able to run Google Ads running before. You need to implement this feature to keep using essential like remarketing.
What Is Consent mode?
As you may know, people don’t like intrusion to their privacy. Displaying a cookie banner and expecting most of your users to accept being followed online is unrealistic. That’s at least what the data shows us. At least 30% of users will opt out.
Consent mode works by estimating the number of conversions for people who didn’t consent. This is possible using what Google calls conversion pings.
Google uses Pings to send data without any identifiers. When a users opts-out, Google doesn’t rely on cookies, but instead uses pings to respect the user’s choice.
What has changed with Consent mode V2
Consent Mode v2 introduced two additional parameters: ad_personalization and ad_user_data. In the first iteration of consent mode, we had two signals analytics_storage and ad_storage. Their Goal is to store data to use it in your analytics tool (i.e, Google Analytics) and Ad manager (Google Ads).
The updates in Consent Mode v2 are mainly relevant to Google Ads.
ad_personalization
When a user allows ad_personalization, you can display personalized ads based on his unique profile.
ad_user_data
The setting allows using the user’s data if consent is granted for advertising purposes.
Implement Consent Mode v2 for Google Ads
You need two ingredients for the implementation to work.
Step 1: Configure The Consent Management Platform (CMP)
Aim for a CMP that integrates well with Google Tag Manager. A decent solution can send consent signals to GTM and thus minimizing the time you have to spend on implementation. While there are dozens of CMPs to choose from, I recommend choosing from this list provided by Google.
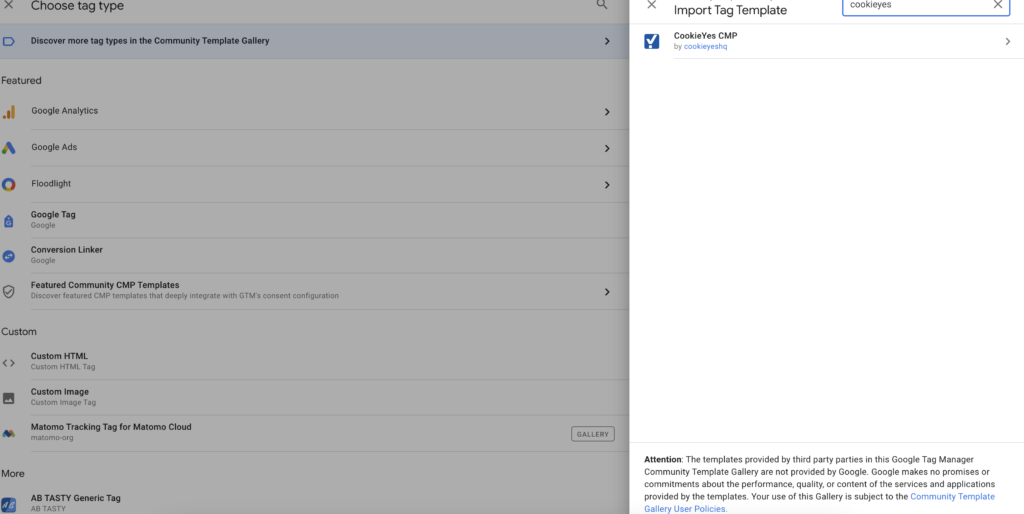
First, Add The CMP Tag Template to Google Tag Manager. In this example, we will use Cookie Yes. We need to add the CMP code to our website.
Google Tag Manager > New > Template Gallery > "CookieYes"
Next, configure The CMP by adding consent settings
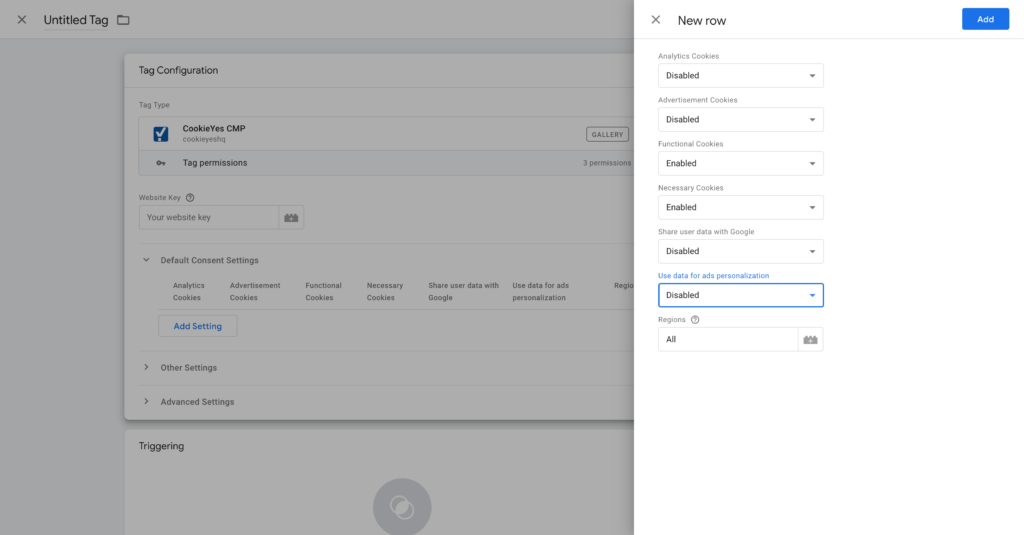
By default, we will disable consent settings and keep only the necessary cookies.
Your website requires necessary Cookies (thus the name) to function. They keep track of your preferences so that you don’t need to make the same changes when you visit a website the second time (language, login, etc.).
I will select the “Consent Initialization” trigger.
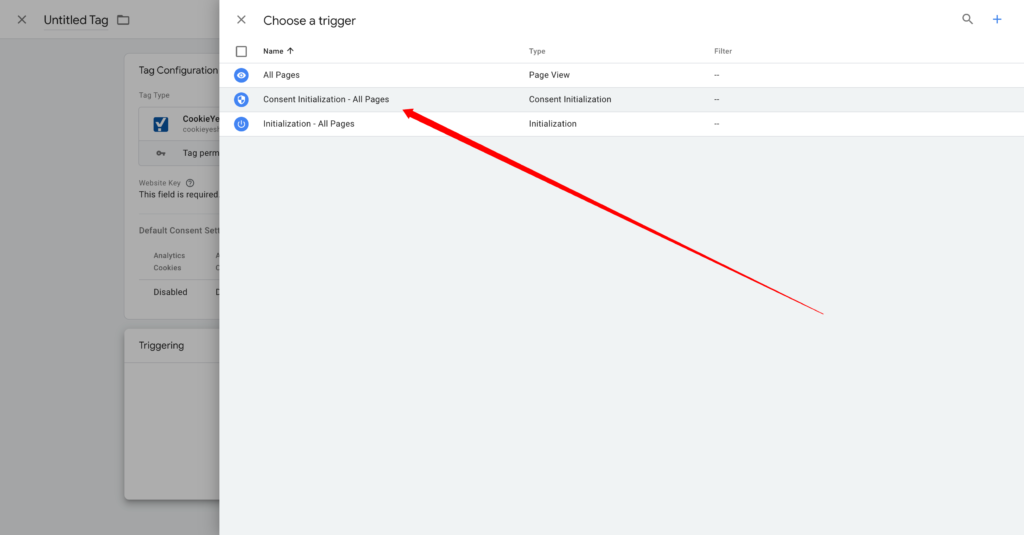
Do not use this trigger for any other tag besides CMPs. The initialization trigger is great for this particular use, because it allows the CMP to collect user’s choices before any other event.
Finally, let’s preview the tag and see what signals are we getting from the CMP.
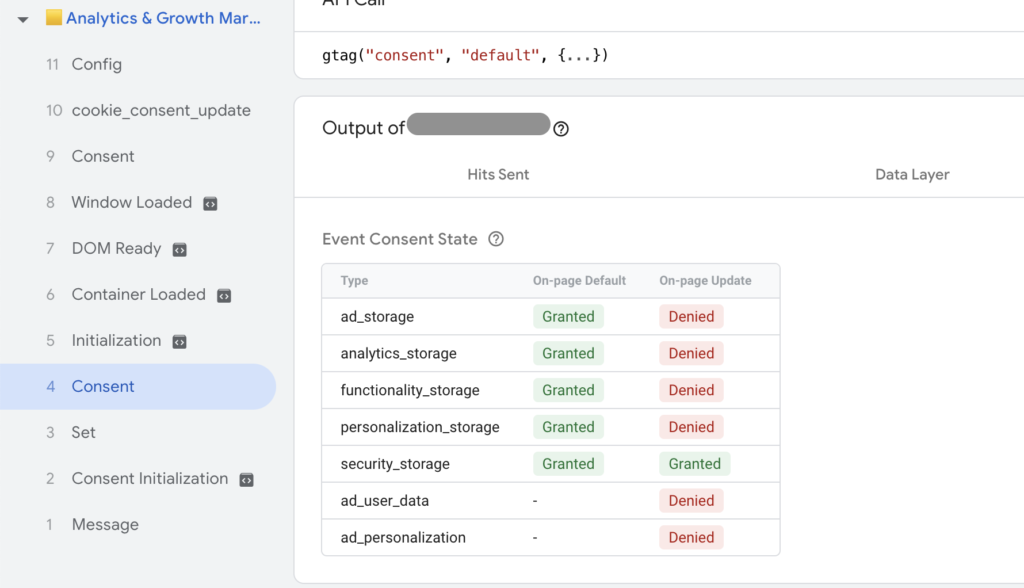
As you can see, GTM is receiving the consent signals. We can now configure the Google Ads tags.
Step 2: Google Ads configuration with Consent Mode
The first thing we need to do is to enable the Consent Overview from the admin section.
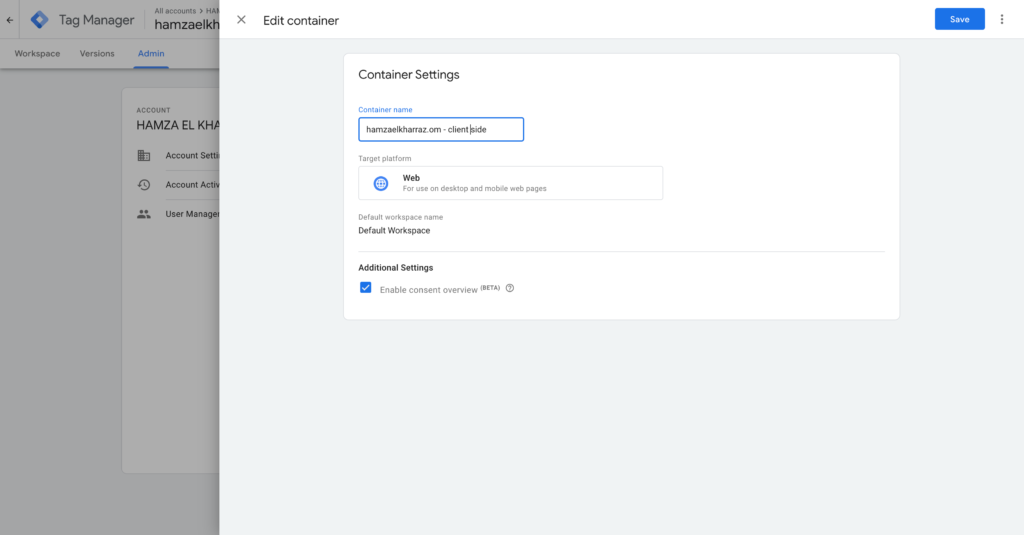
We can control how tags will behave when we receive consent signal using consent overview.
We need to determine what type of consent mode we want to set up.
Option 1: Advanced Consent Mode
We need to leave in this case the default consent settings.
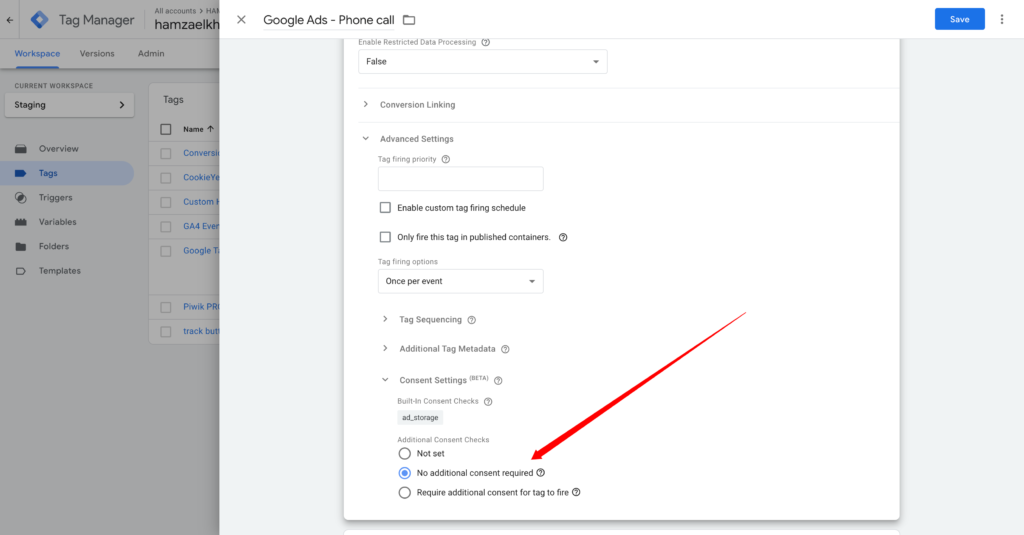
We are almost done. Let’s save and check the payload.

The tag is working as expected, and it’s sending the consent signals to Google Ads.
Option 2: Basic Consent Mode
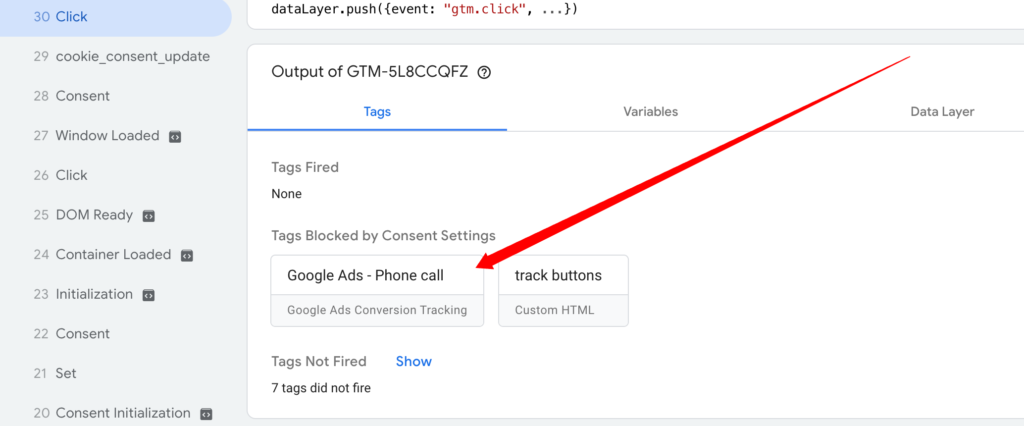
With basic consent mode, the tag won’t fire unless consent is granted.
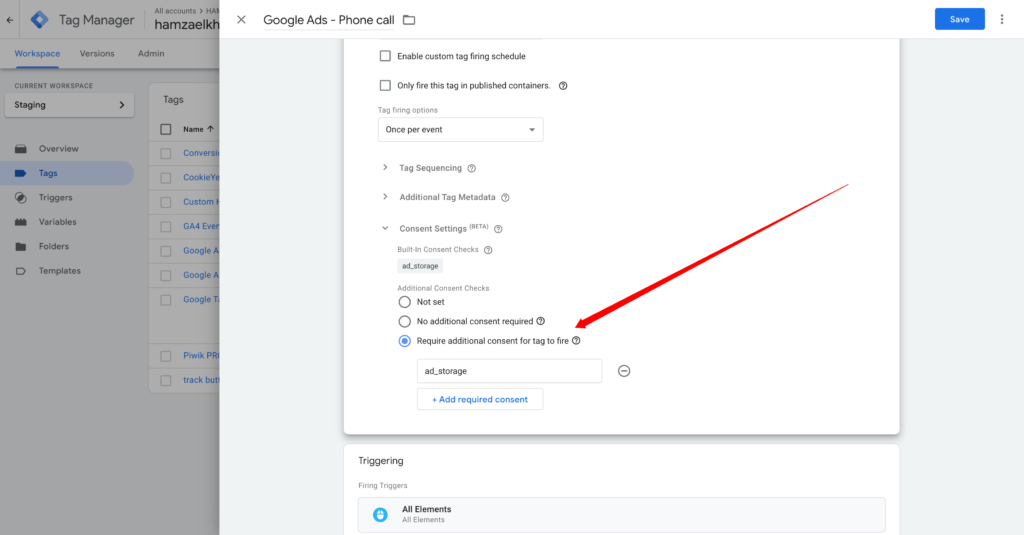
Furthermore, when we preview the set-up, you will notice that because of the consent settings, the tag was blocked:
Final Words
Consent mode is simple to set up if you choose the right tools to work with. My piece of advice is to select a consent management platform that integrates well with GTM.
Finally, If you are new to the topic, we highly recommend checking our guide for consent mode v2, where we talk about the basics.

