GA4 limitations are a big reason why BigQuery is becoming an essential tool for everyday analysts and marketers. Once you have the data in BigQuery, you can combine with it with other data sources, export it to a data visualization tool like Tableau and so on.
In this guide, we are going to focus on using the BigQuery data in a python notebook.
Why use a python notebook?
SQL is always a good starting point to investigate your data set and answer key questions. With a python notebook, you can take this further and create data visualizations to dig deeper into the data.
Not python vs. SQL but Python + SQL
To be clear, we are using both languages here. We will use SQL to interact with the BigQuery, while python will extend what we can do using its data visualization libraries.
Use case: Querying GA4 data export
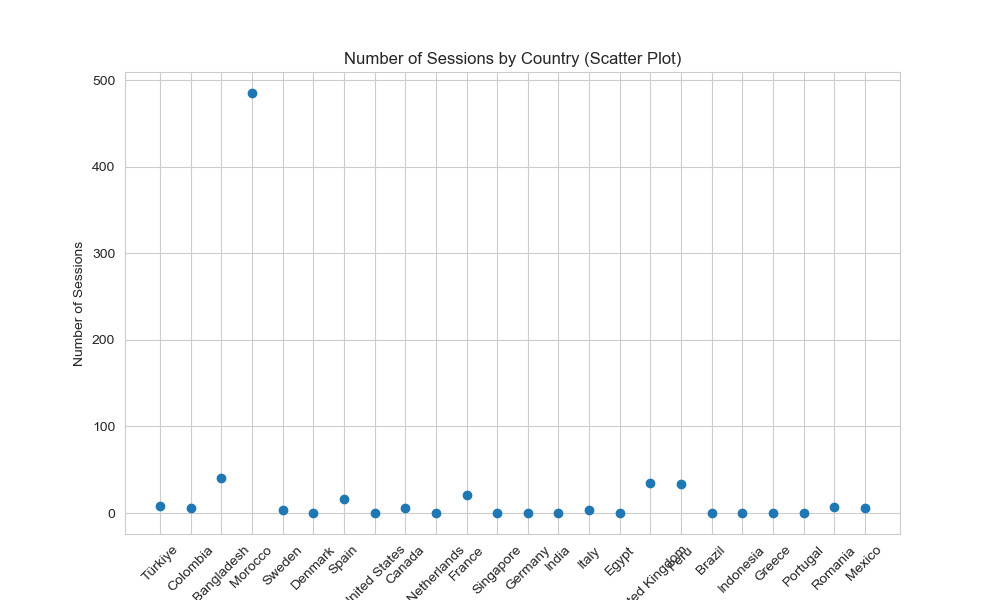
The chart above is a basic example of what you can do in python notebook. All we did was to get the ga4 data exported from BigQuery and visualize it.
How to Link BigQuery to a python notebook?
In this example, we are going to use Jupyter. You can use Google Collab, which is another option if you prefer to.
Requirements to follow along
In order to work with a python notebook and Bigquery, you need to have the following:
▪️You have a BigQuery project with a billing account.
Step 1: setting up credentials
Your datasets are sensitive data. You need to head to browse to your Google Cloud Console.
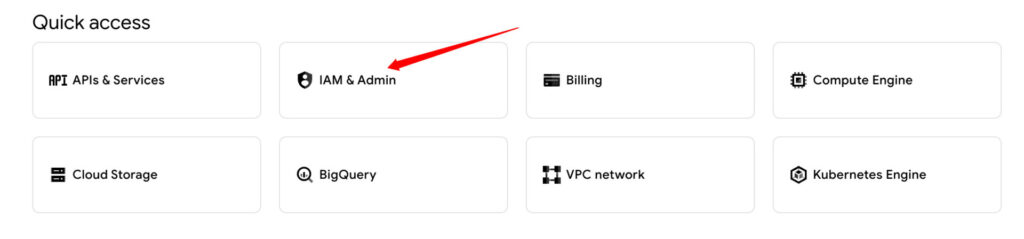
Click on IAM & admin and go to Service accounts.
You need to create your own service account

🤔 What are service accounts?
Service accounts are similar to your Gmail or any other access you have to a platform. They allow our python notebook to communicate with BigQuery and perform certain tasks like reading tables.
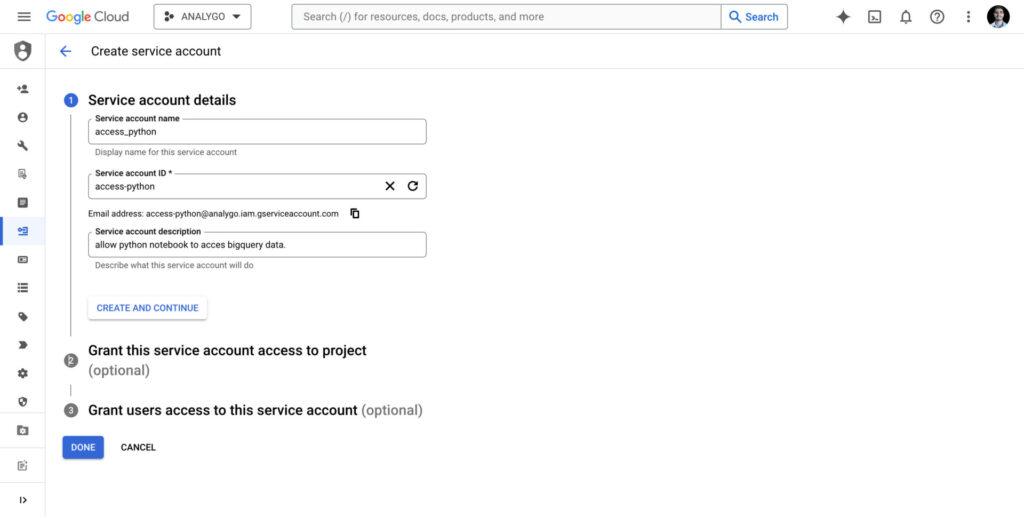
skip the optional steps and click on Done. from the table of service accounts, click on the service account you just created.
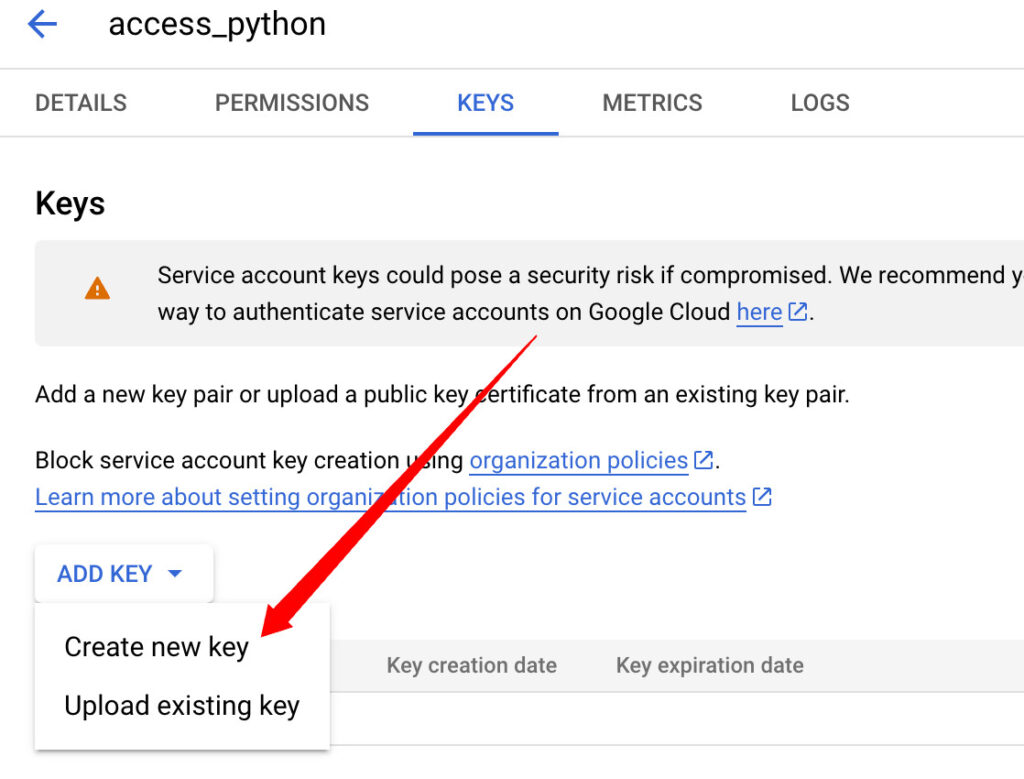
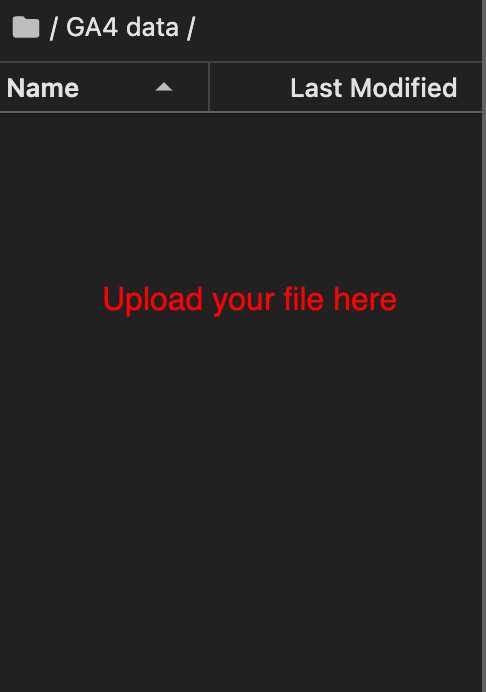
Create a new key and select the option JSON. The new file contains the key we need to authenticate. Open your Notebook and upload the file within the same file you will be working with. It’s a good idea to create a file for this project.
Step 2: Importing Packages
After opening anew notebook, we will import our first package google-cloud-bigquery. This python library will help us interact with Bigquery.
!pip install google-cloud-bigqueryNext, we need to import some modules
from google.oauth2 import service_account
Note
👉🏻 BigQuery which interacts with our BigQuery account.
👉🏻 service_account necessary to handle authentication process to Google Cloud.
from google.oauth2 import service_account
from google.cloud import bigqueryNow, we will add our account credentials
#replace 'file.json' with your JSON file
credentials = service_account.Credentials.from_service_account_file(
'file.json')
#the name of your bigquery project
project_id = 'my-project'Next, we will start interacting with BigQuery data by authenticating using our credential.
client=bigquery.Client(credentials=credentials,project=project_id)Lastly, we can start reading our BigQuery data. In the example below, we used a simple query to get the country and the sessions count. Finally, we transformed the query results to a DataFrame.
query=client.query("""select geo.country, count((select value.int_value from unnest(event_params) where key='ga_session_id')) as sessions
from `analygo.analytics_<your ID here>.events_202404*`  group by geo.country LIMIT 10
                   """)
#convert to data frame
query_df=query.to_dataframe()
print(query_df)And voilà! You just queried your BigQuery table. you can select any table using a different query.