What is Dataform? Why use it? Is Bigquery not enough?
You probably heard of the Transform, extract, and load process (a.k.a. ETL). If you never heard of it before, the short version is that this is how we turn raw and unusable data to production-ready tables.
An obvious example of where such tool can be useful is the GA4 raw export. Transforming the messy dataset with nested fields to production ready tables requires a lot of work, which can be handled effectively by Dataform.
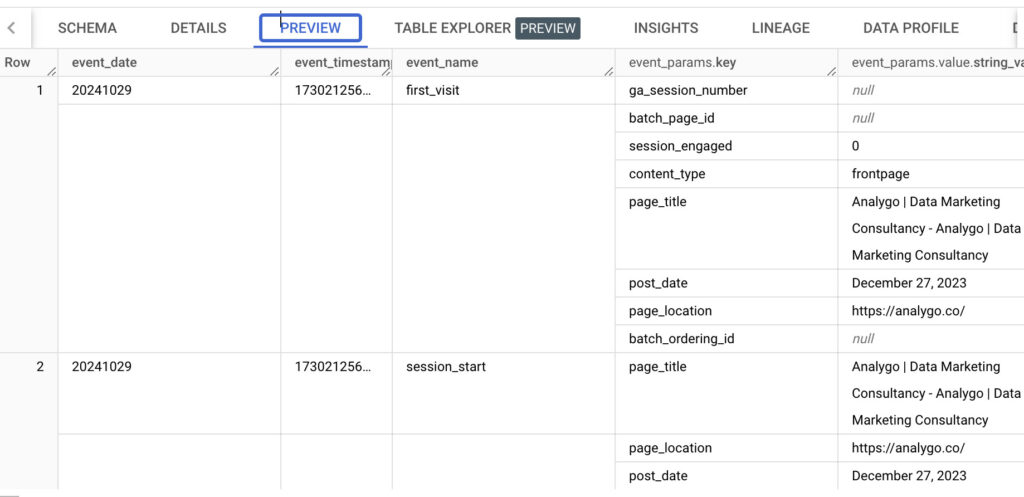
We will see in later articles how to start working with the GA4 export and Dataform.
Why use Dataform: the key advantages of a dedicated transformation tool
Dataform was born from the need for scalability that anyone managing large amounts of data understands.
Yes, you can use just Bigquery and plain SQL, if you are just starting out. Your set-up becomes increasingly harder to manage as you scale, without mentioning the cost.
Collaboration and version control
In large (and complex) projects, Even the smallest error can be costly. The simple approach of writing a few paragraphs of SQL in BigQuery, hoping everything goes well doesn’t cut it anymore.
Moreover, chances are you are not working alone, which adds an extra layer of complexity. Who did what and when?
That is why the concept of version control is key here. Keeping track of changes made by teammates or even just your own allows you to write and maintain high quality code.
ℹ️ Using GIT for Version control
Although I’m going to walk you through how to set up GitHub with Data form, this article does a great job explaining it.
Sequencing and managing dependencies
You have 2 tables:
- The first makes your raw data into a session level table: in other words, instead of using the default events table, you transform it to a session-based table.
- Your second table manages purchases and classify users into tiers based on the purchase amount (gold, silver, etc.)
If 2 depends on data from 2, you need to make sure that data is available first. Only a professional tool like Dataform can give you this degree of control.
Make your code reusable
Your tables, like Lego pieces, can be combined to make different shapes.
Instead of duplicating and updating code over and over again, you write reusable blocks that you can reuse.
Setting the environment for Data Form
If you do not have a Google cloud account, please follow the steps in this guide.
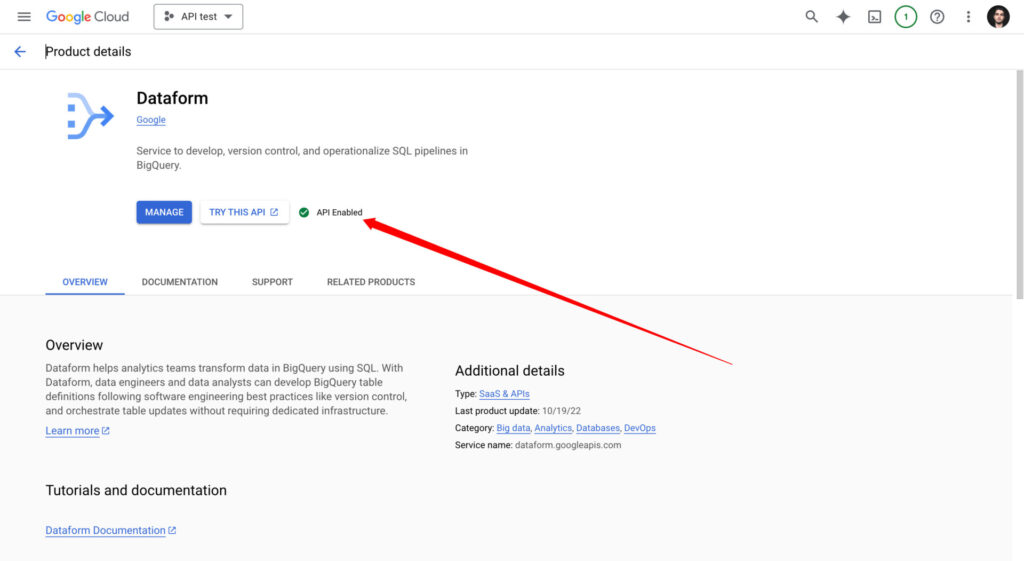
Enable The Dataform API
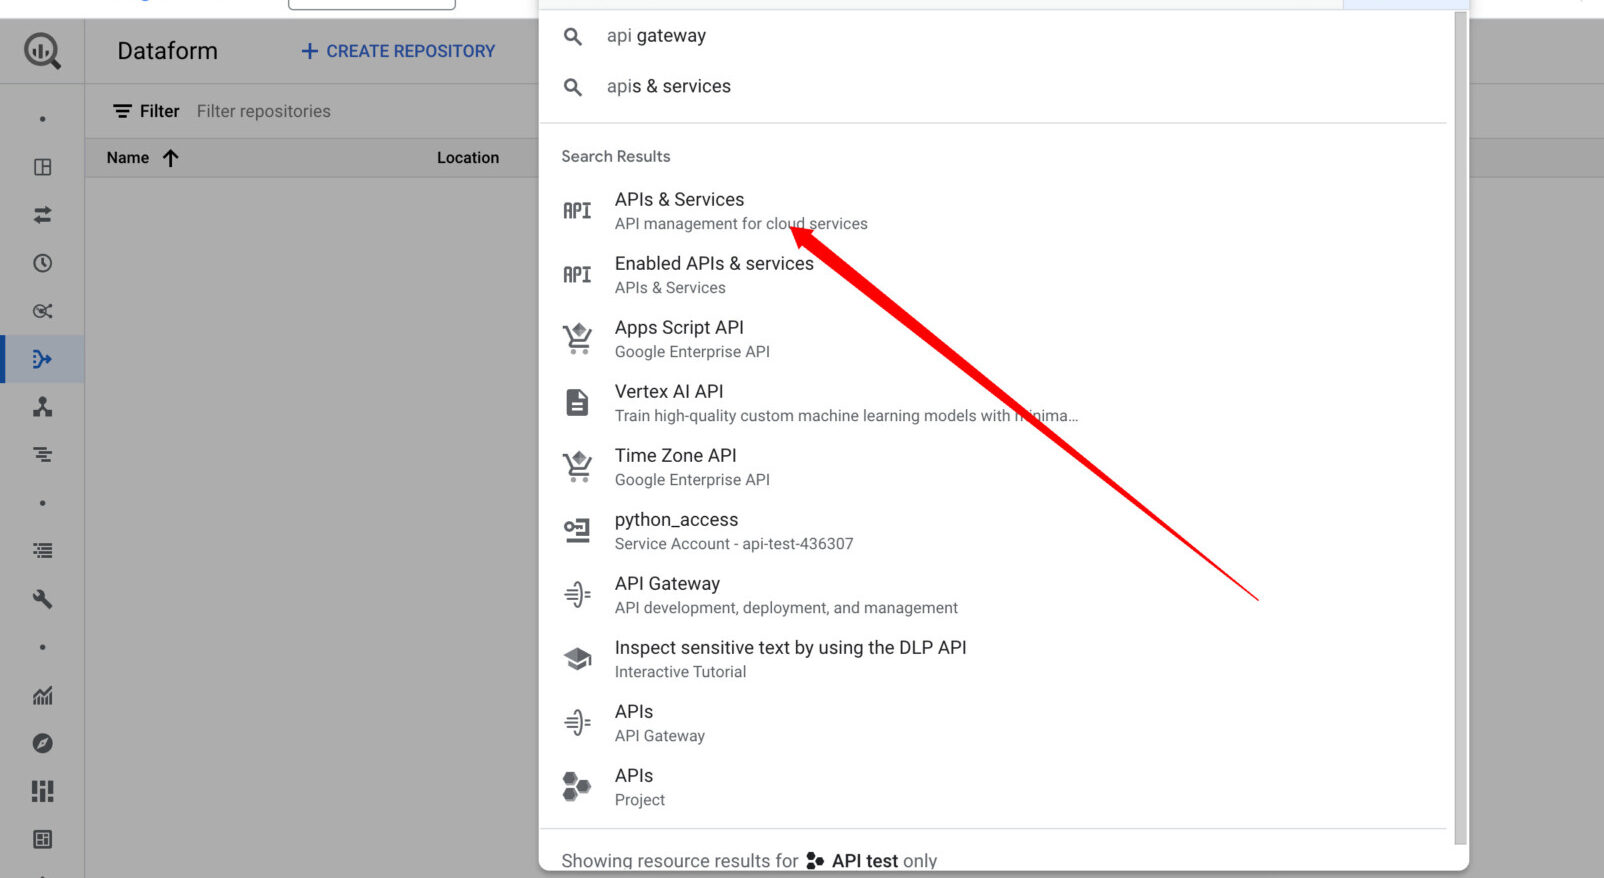
Go to APIs and Services and enable the data form API.
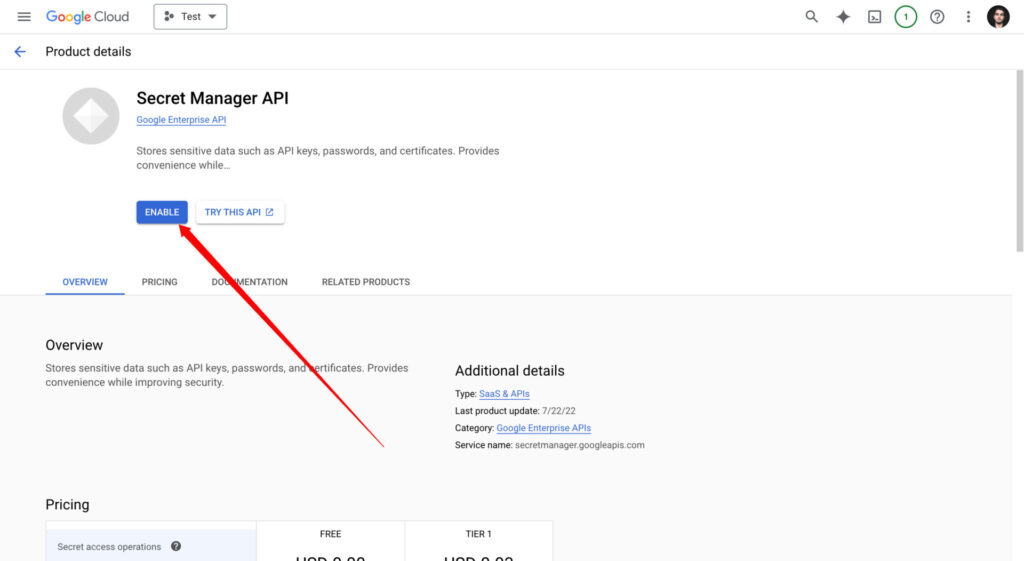
Next, make sure that the Secret Manager API is enabled as well. It will help us store any sensitive data in safety.
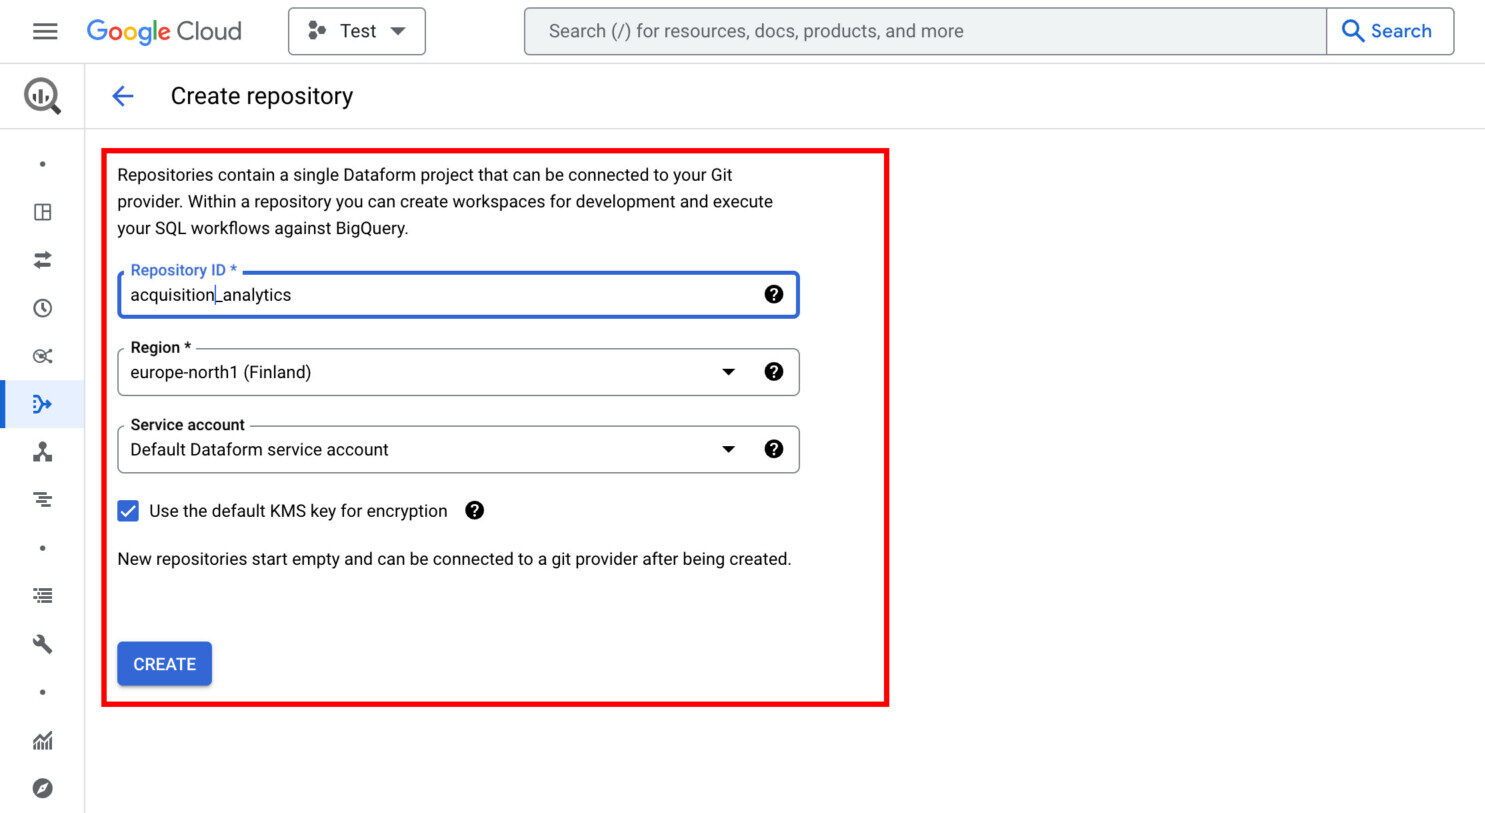
Create a repository
Repositories are like folders for your projects. Before creating our files for queries, we need to have a repository to host them. Create a new repository by browsing to Dataform.
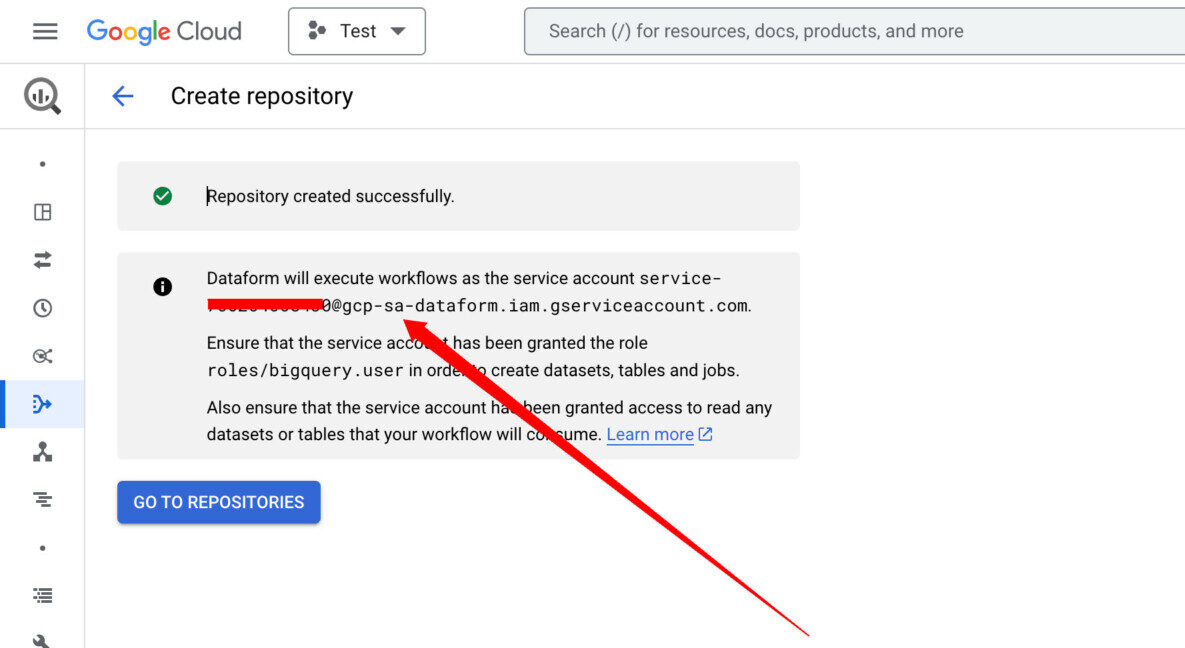
Next, use save the default access. we need it to give permissions to Dataform
Give proper roles
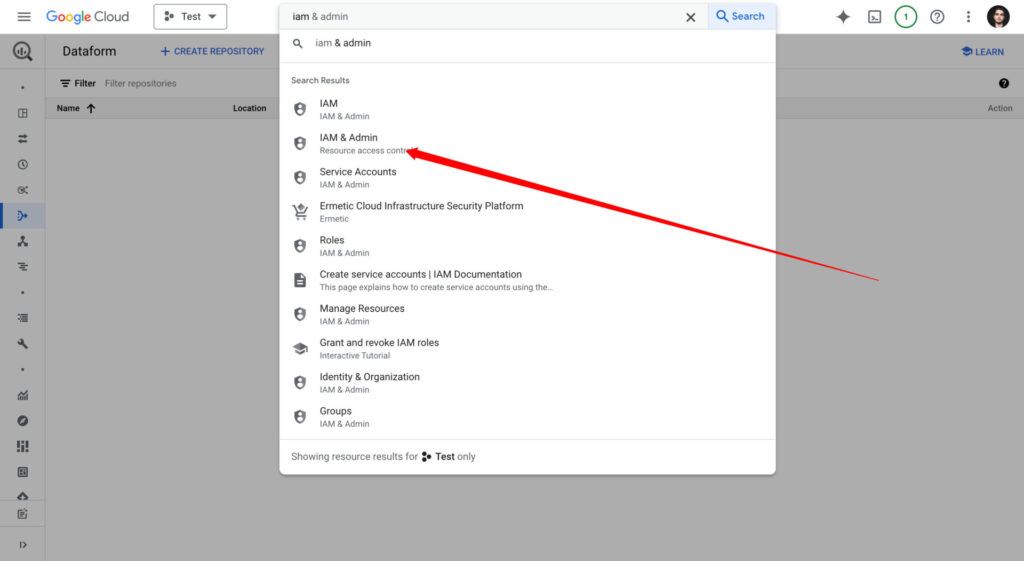
Next, let’s give our newly created repository some basic access. Use the search bar to browse to IAM & Admin.
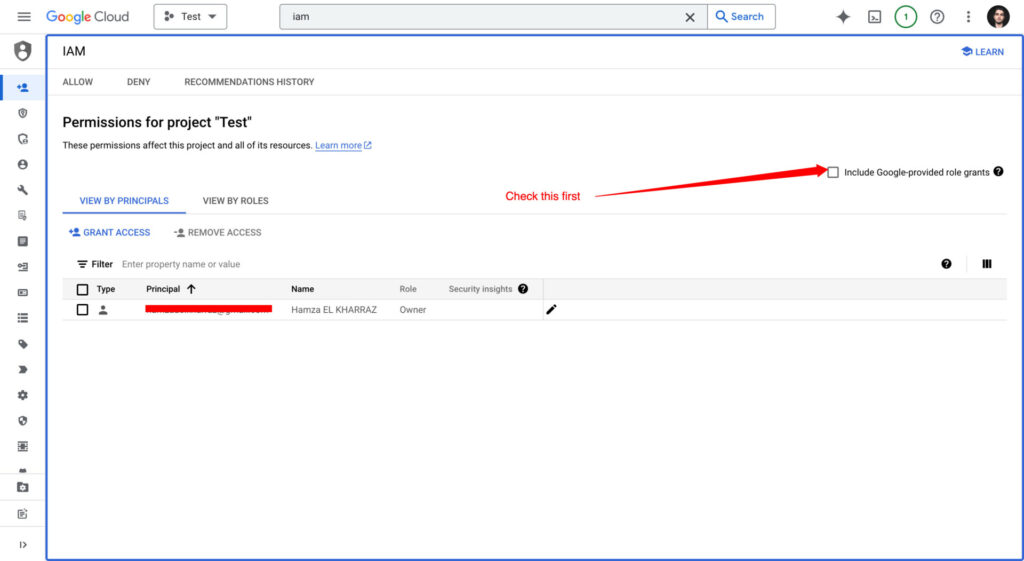
Look for the address we used earlier to create the repository. The name you should look for is Dataform Service Account.
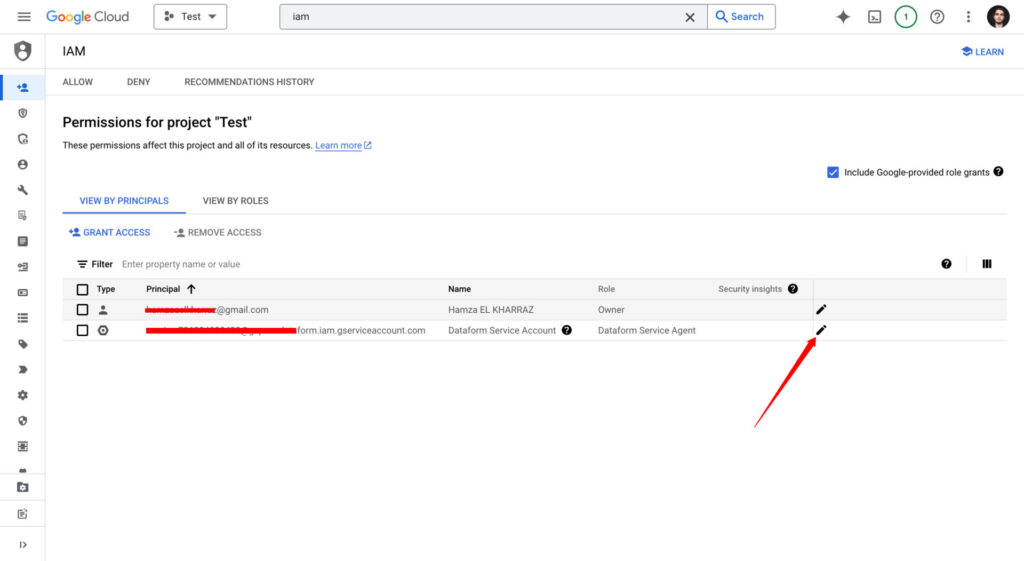
Click on the pen to edit the access for Dataform.
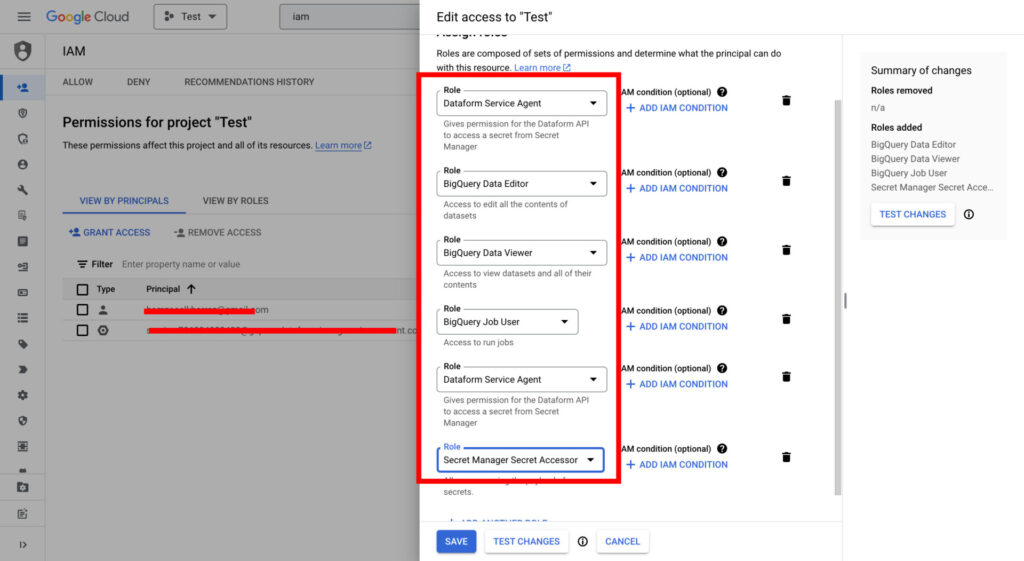
Next, give the following access to the service account.
Connect Dataform to GitHub
The secret sauce that makes Dataform powerful is version control and collaboration. This is all possible because we can link it to GitHub. Let’s go ahead and Link our Dataform with a GitHub repository.


Go back to Dataform and create a secret using the secret manager API we enabled earlier.
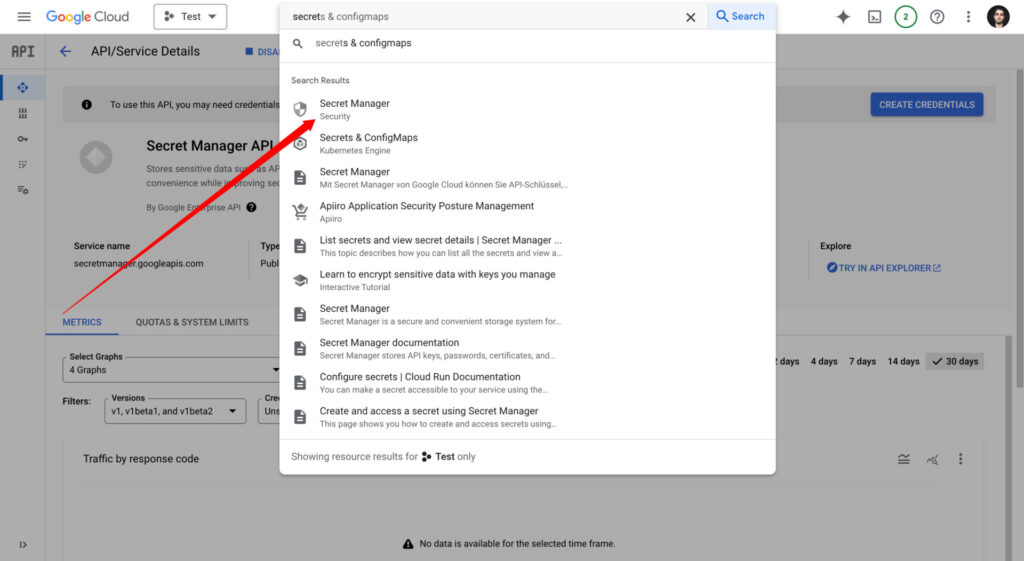
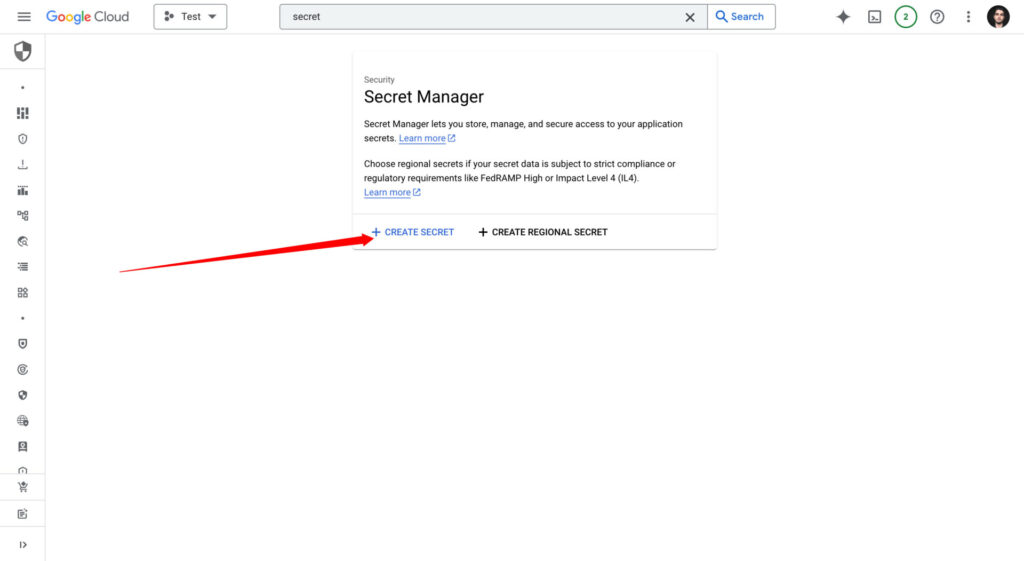
Next, click on CREATE SECRET.
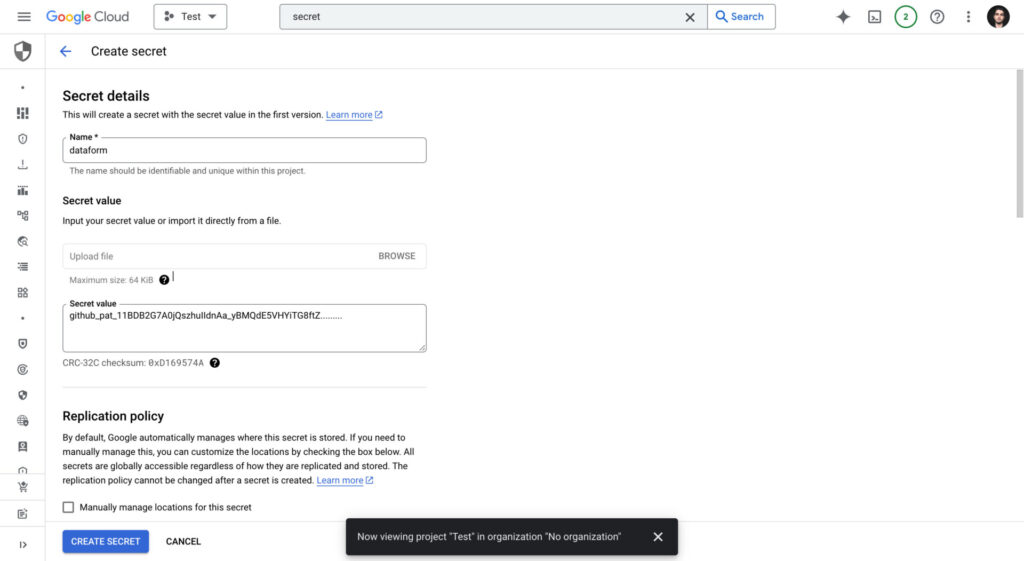
Add the developer token from your GitHub and name the secret whatever you want. Save the changes by clicking on create secret button.
Finally, let’s connect the data form with GitHub. In the settings section of your repository, click on CONNECT WITH GIT.
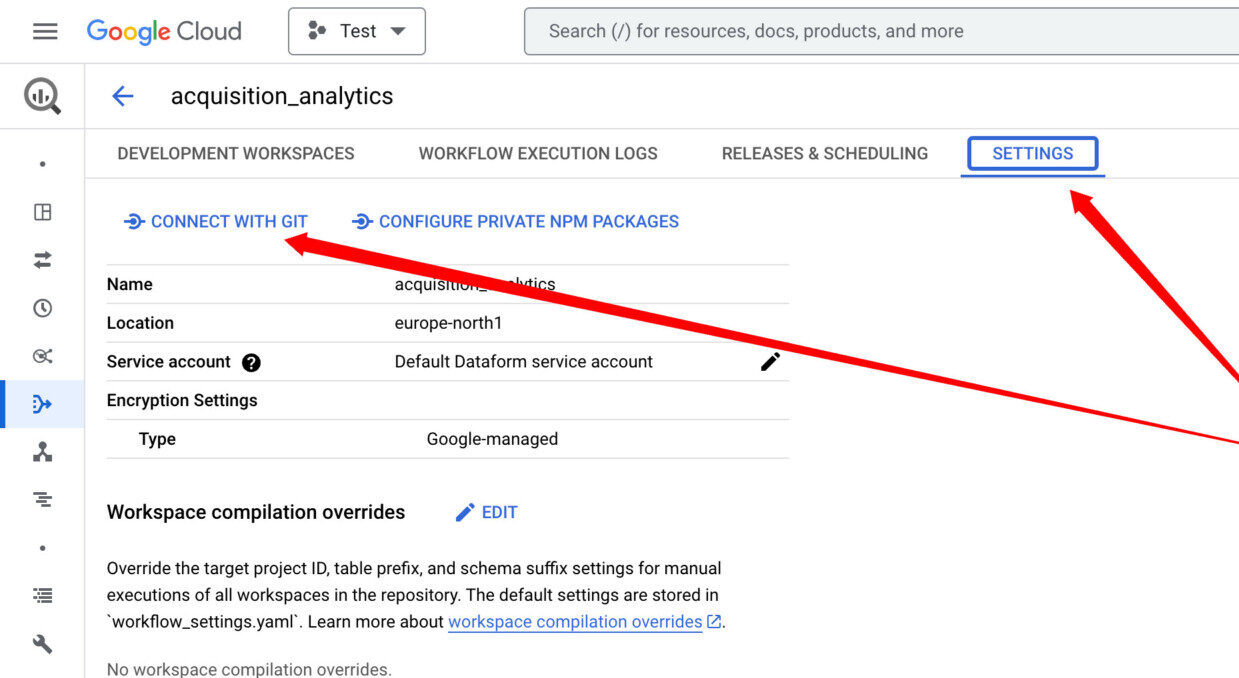
Fill in the information in the fields.
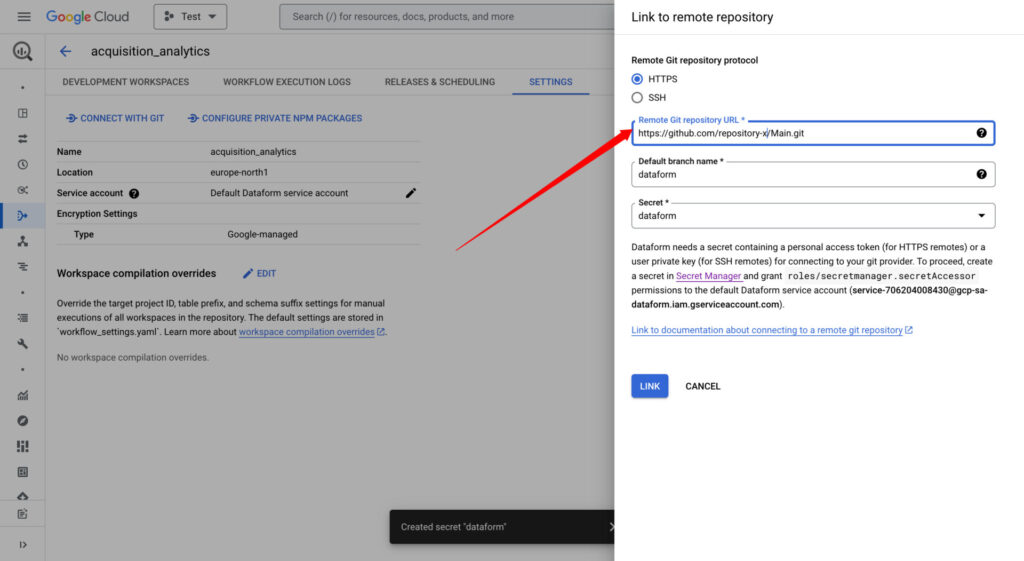
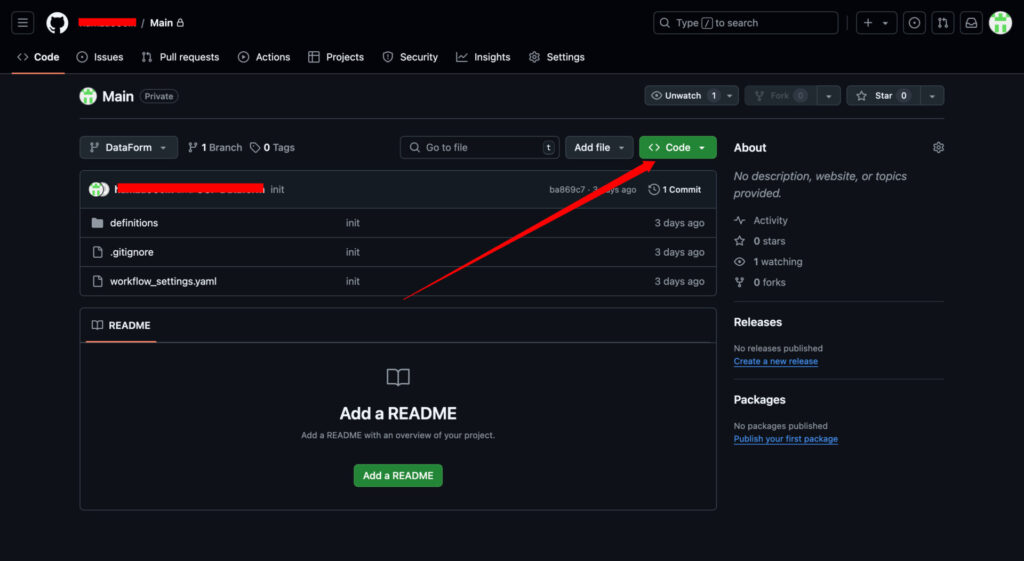
Make sure to use your own HTTPS link, which you can find in your GitHub repository.
If everything works as expected, you will see the message below.

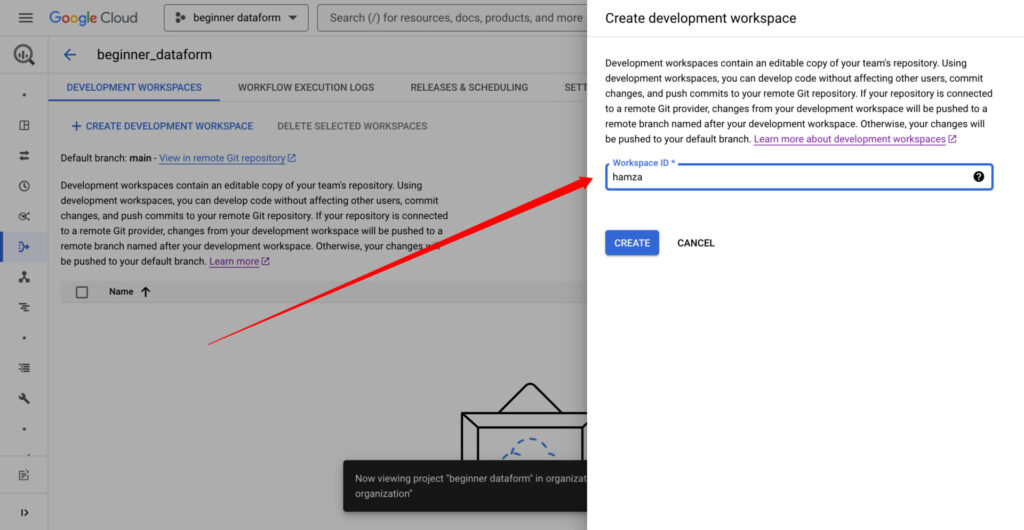
Phew! We’ve done a lot of clicking, but we are almost done. The last thing we need to do is create and initialize a workspace to finally start working on some queries.
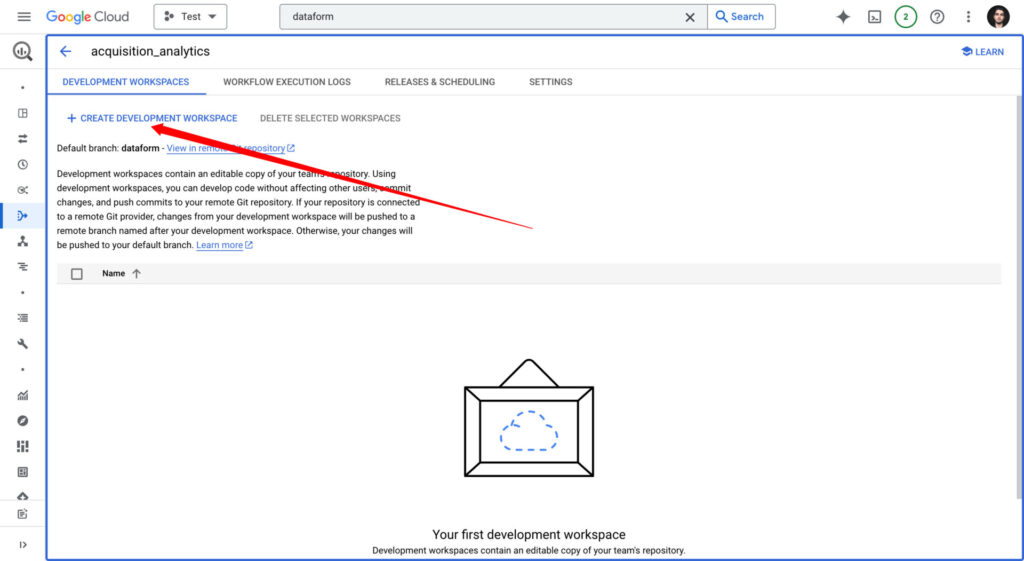
I recommend using your own name to distinguish your workspace from that of your teammates.
Finally, after clicking on your workspace, you can write some actual code in Dataform. Lets tart by initializing our workspace.
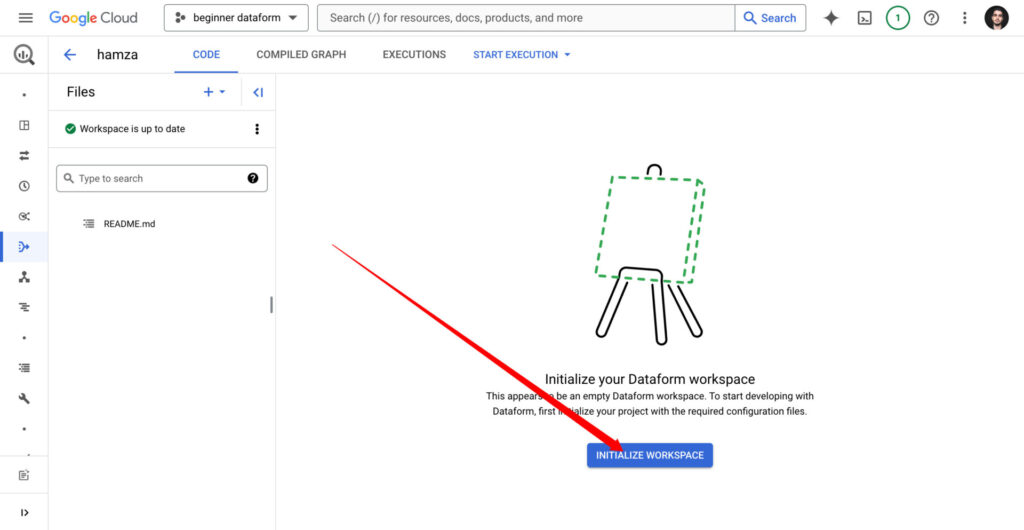
New directories and files will be accessible in the side panel, providing useful resources as we prepare our workflow.
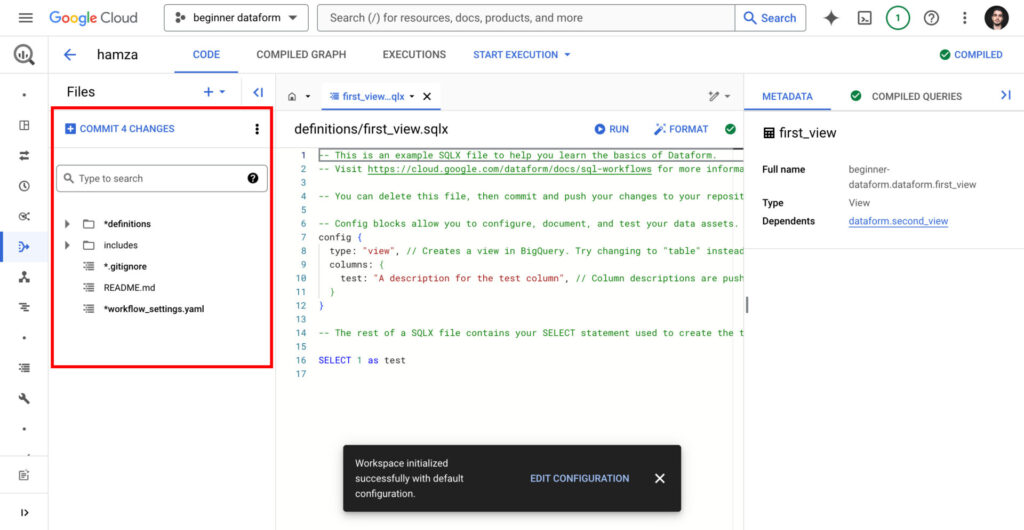
We will dive deeper into how to work with the different directories. For now, just remember that:
definitionsis where we will have our SQL queries + some JavaScript code to save us time and remove redundancies. Below is an example of how to structure this directory.
definitions/
  ├── ga4_sessions.sqlx
└── gads_conversions.sqlxincludesthis file contains JavaScript functions and variables we can leverage in definitions. I added an example of a JavaScript function I use to store BigQuery parameters that store page information.
let page_fields='page_title, page_location, page_referrer';Final words
Don’t worry if you do not understand everything from the get-go. The next article in this series will expand on how to start using JavaScript and SQL to make your workflow much smoother.
In the next article, we will discuss how to run our first SQL queries and save changes to GitHub. We will also start using some useful JavaScript code to enhance our workflow.

