Server-side tracking with Google Tag Manager and Cloud run
Client-side tracking is not enough
Section titled “Client-side tracking is not enough”Collecting data and privacy concerns
Section titled “Collecting data and privacy concerns”Ad and tracking blocking technologies
Section titled “Ad and tracking blocking technologies”Can server-side tracking save the day?
Section titled “Can server-side tracking save the day?”What server-side tracking can’t do
Section titled “What server-side tracking can’t do”Get you 100% of data
Section titled “Get you 100% of data”You won’t need the user’s consent anymore
Section titled “You won’t need the user’s consent anymore”- A proxy server for GA4,
- Matomo’s (or another tool) cookieliess tracking configuration.
Configure SSGTM with Cloud run
Section titled “Configure SSGTM with Cloud run”Create a server-side container
Section titled “Create a server-side container”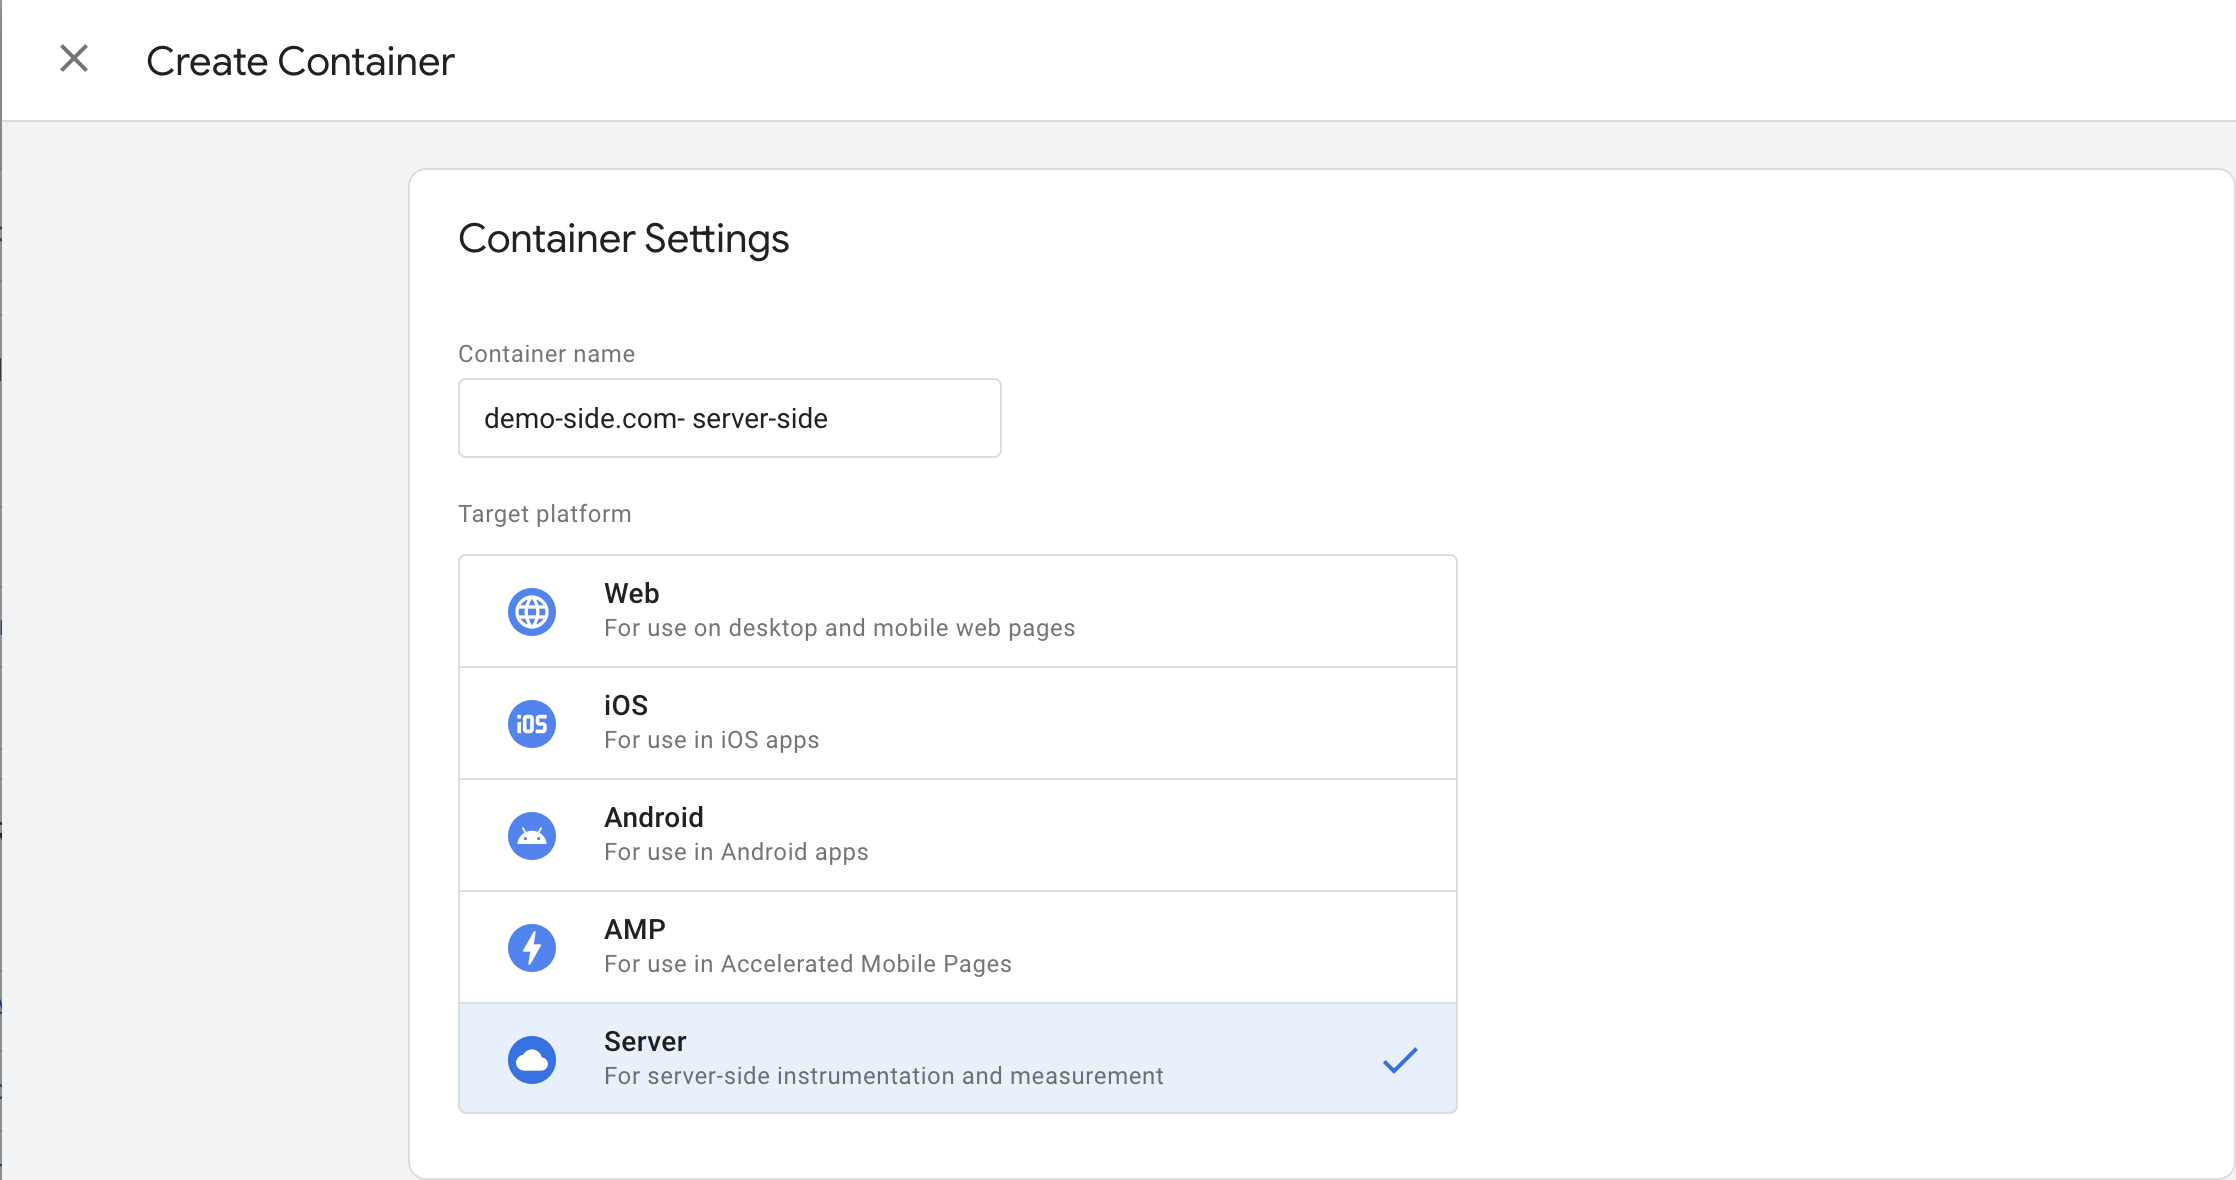
- Familiar sections like tags, triggers, and variables.
- Server-side specific sections like clients and transformations.
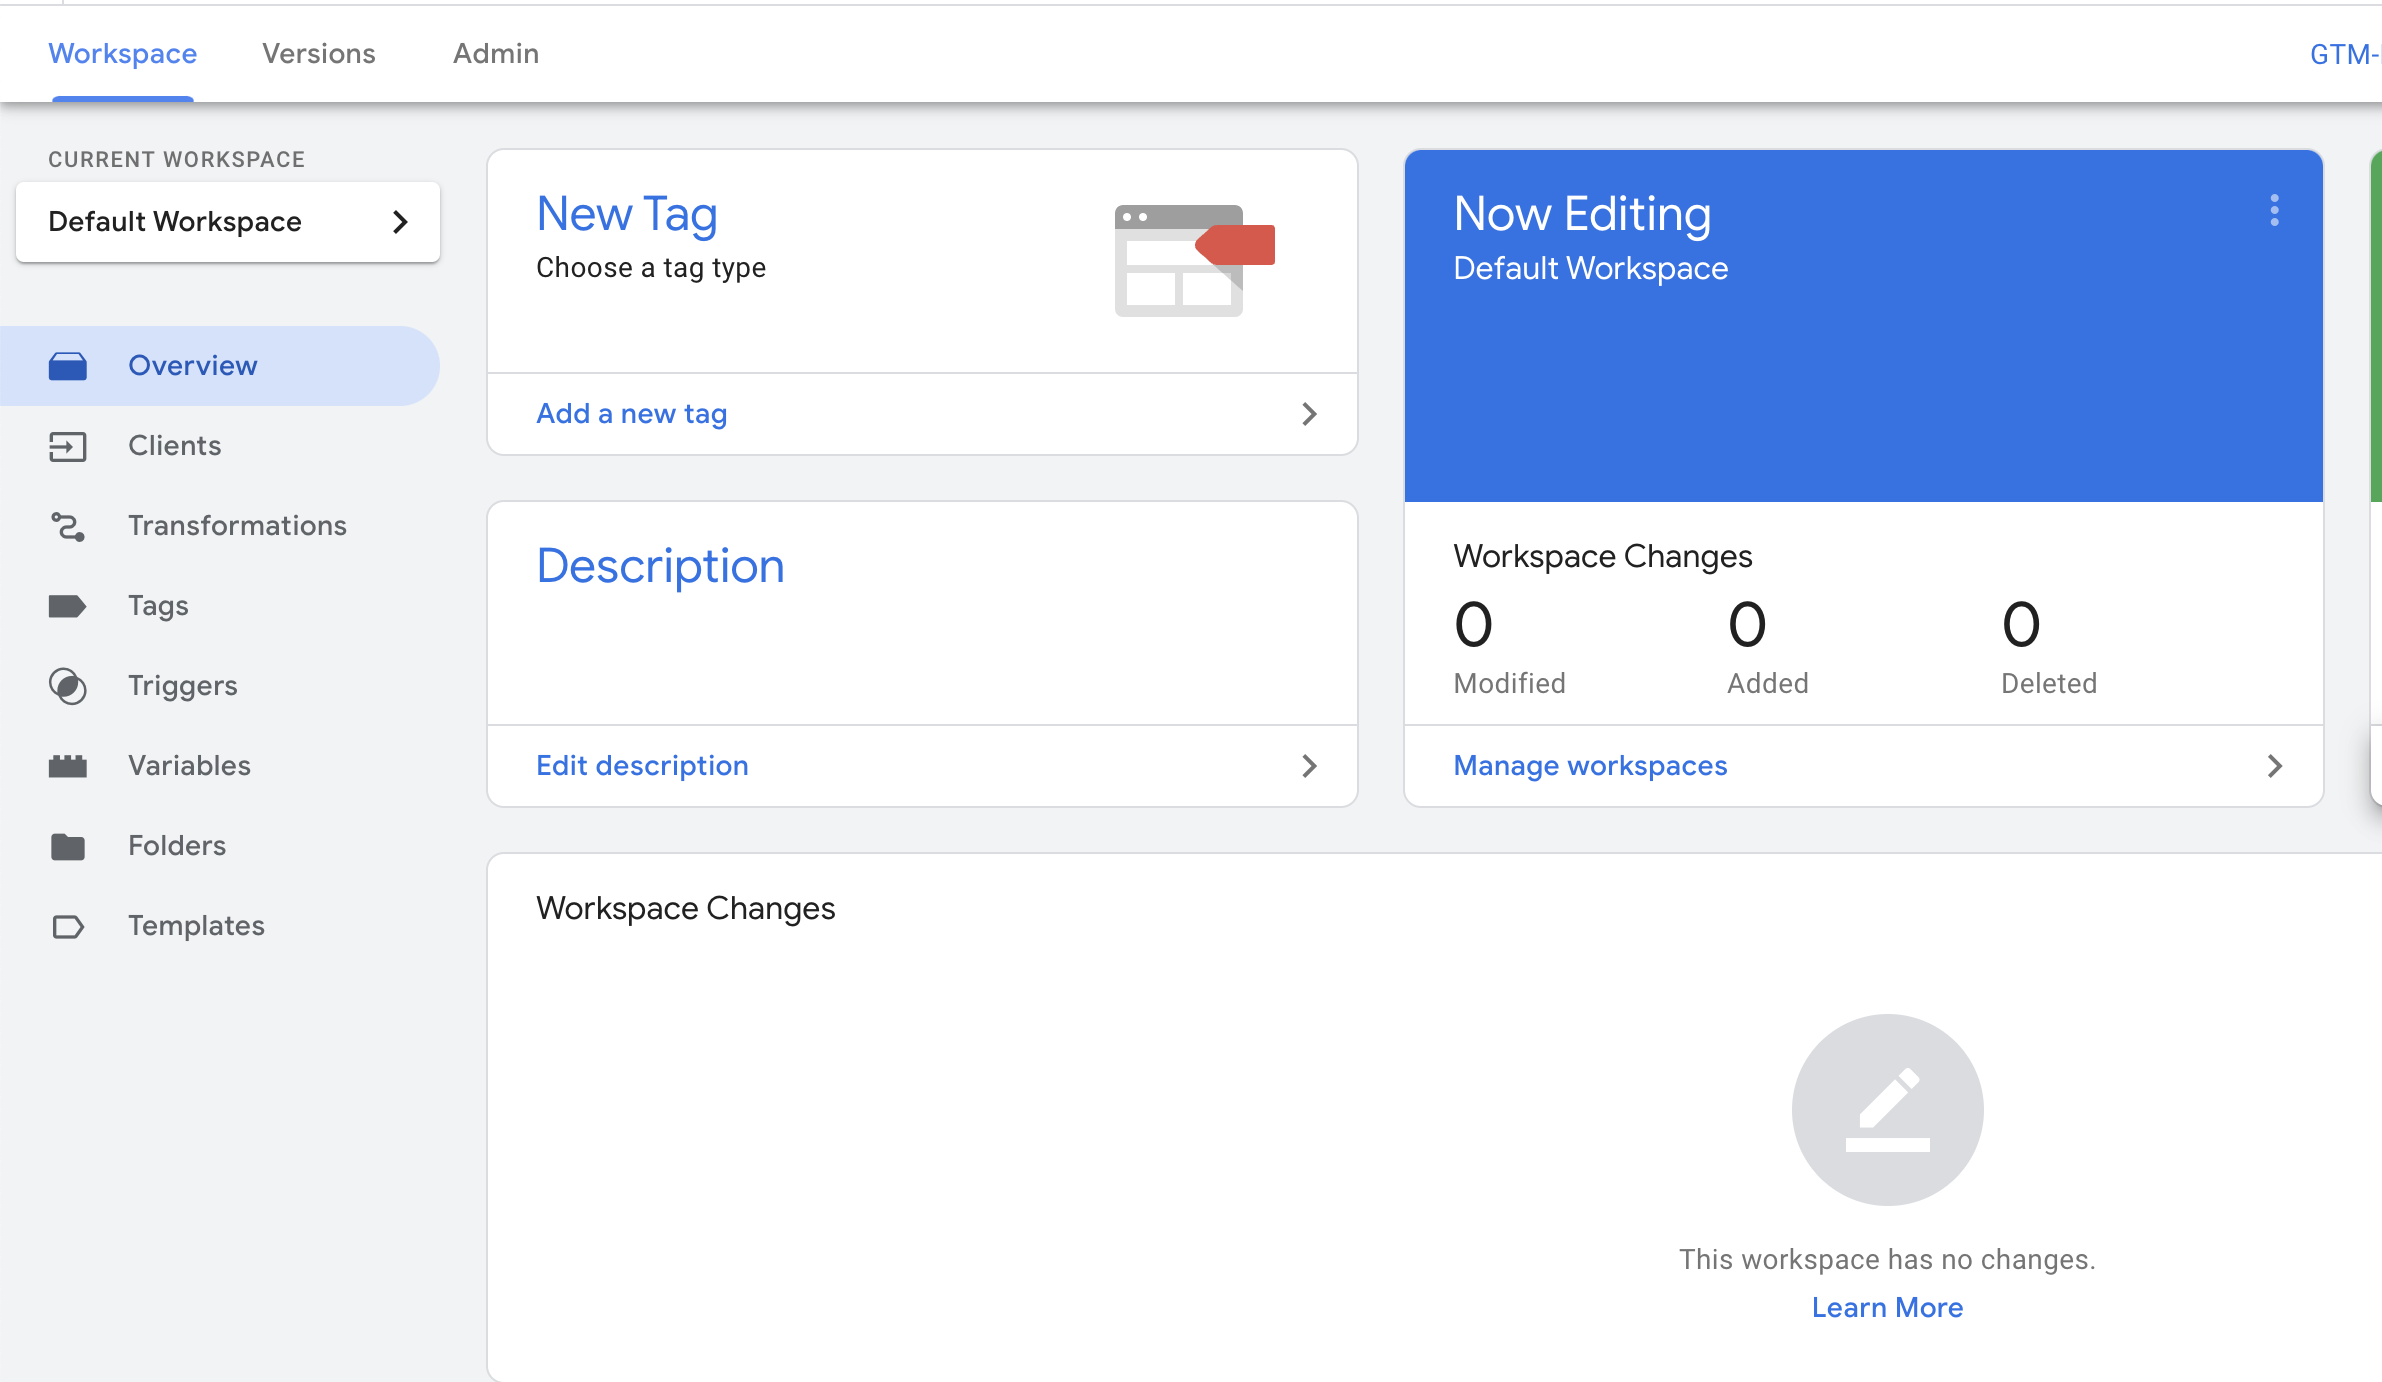
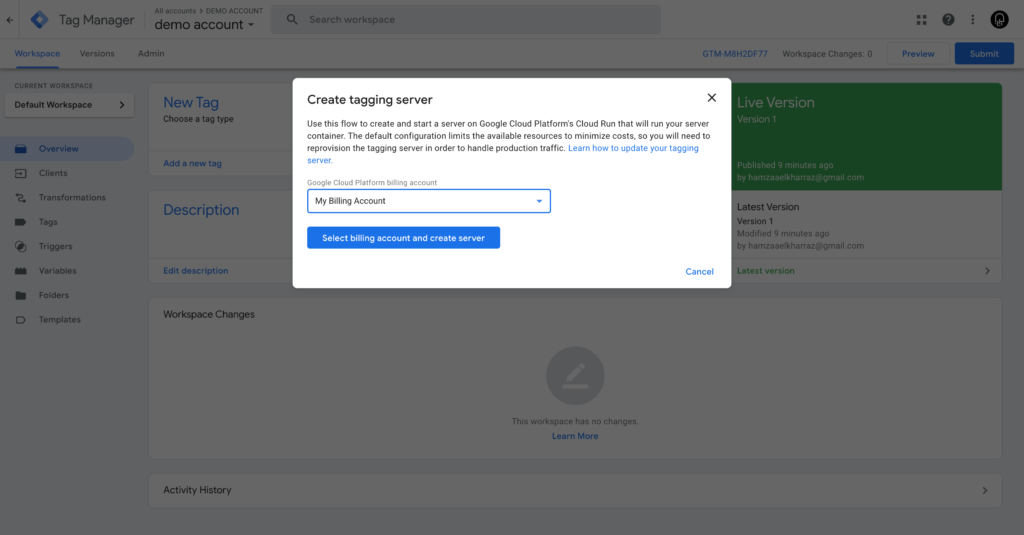
Once you hit save, a pop-up will appear in your new container. Click on “automatically provision tag server”.
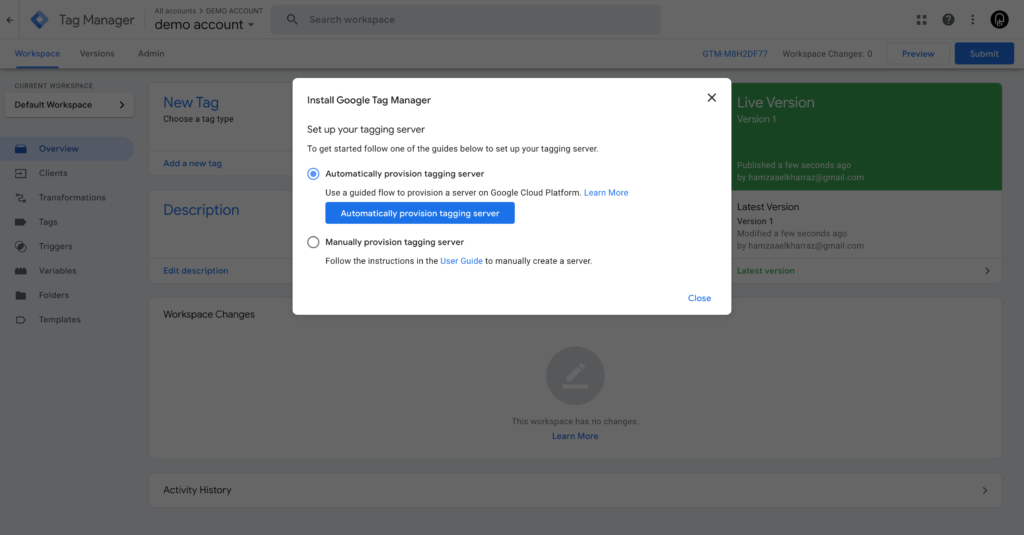
GTM will create a new server in the US-Central 1 region. Don’t worry, if your customers are in the EU, you can change the region later on.
Create a billing account
Section titled “Create a billing account”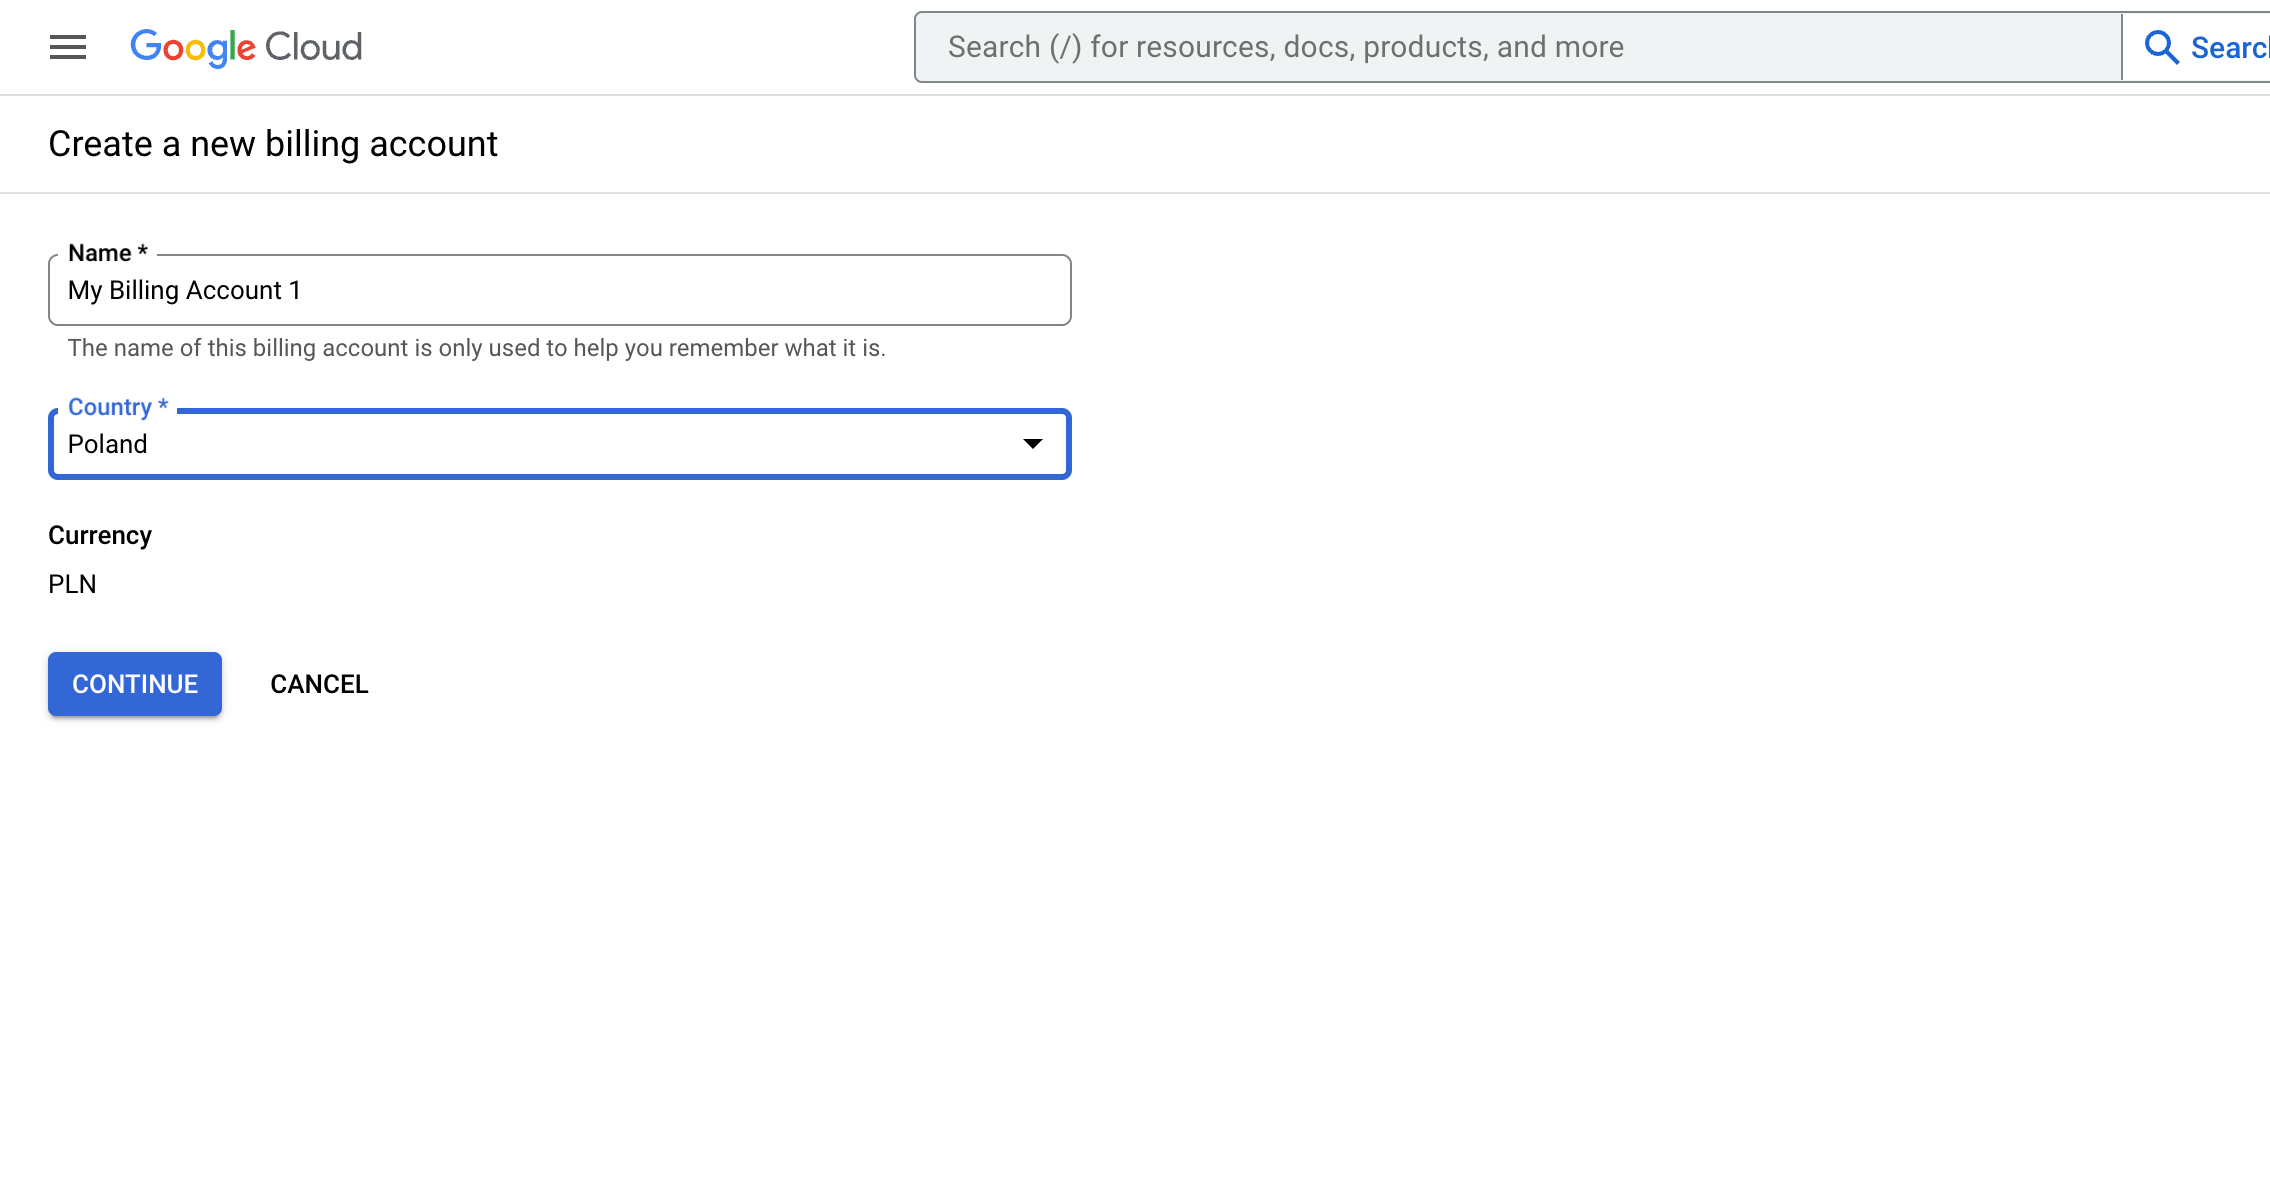
Follow the steps and once you are done, you can select the billing account you added from the dropdown and click to provision the server.
In a few moments, you will see a new screen with your server’s details.

Upgrade the number of instances
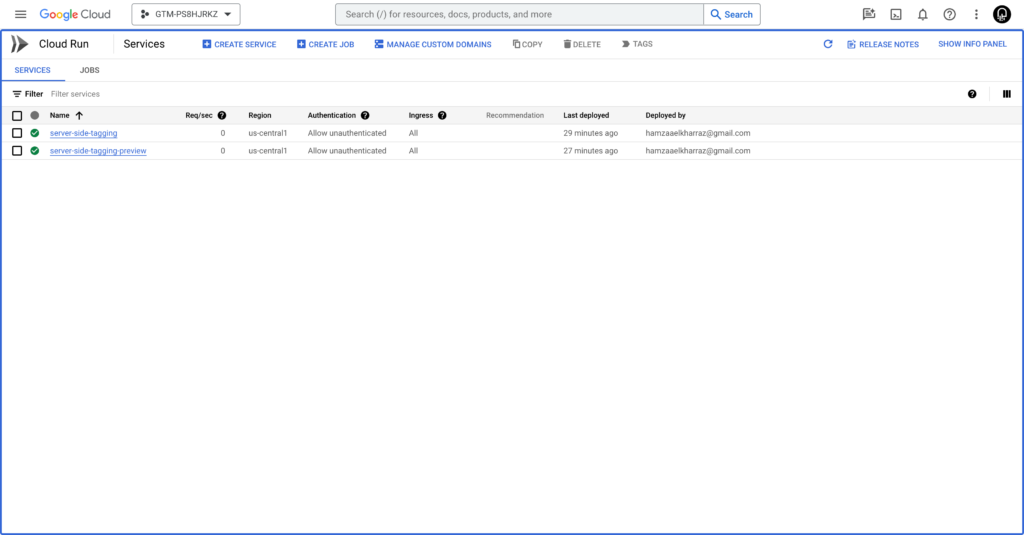
Section titled “Upgrade the number of instances”When you browse to Cloud Run in your GCP account, you will find two types of servers:
- Server-side-tagging: The main server that receives data.
- Server-side-tagging-preview: As the name indicates, this server will preview requests by the server.
Open server-side-tagging
Section titled “Open server-side-tagging”Click on “EDIT & DEPLOY NEW REVISION” then scroll to the bottom.
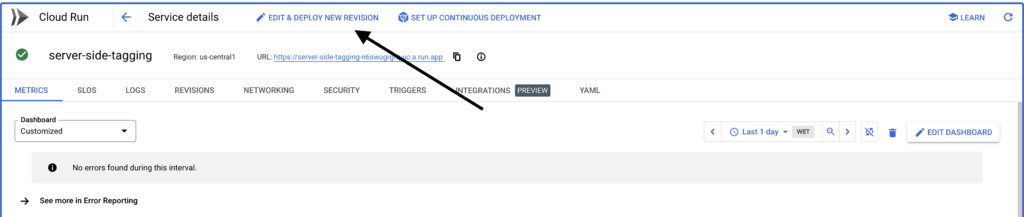
You will notice that our deployment is running on 0 to 1 server. This is fine for testing purposes, but the number of servers will likely not be enough for a production environment. Having only one server can cause abrupt pauses when there are traffic spikes.
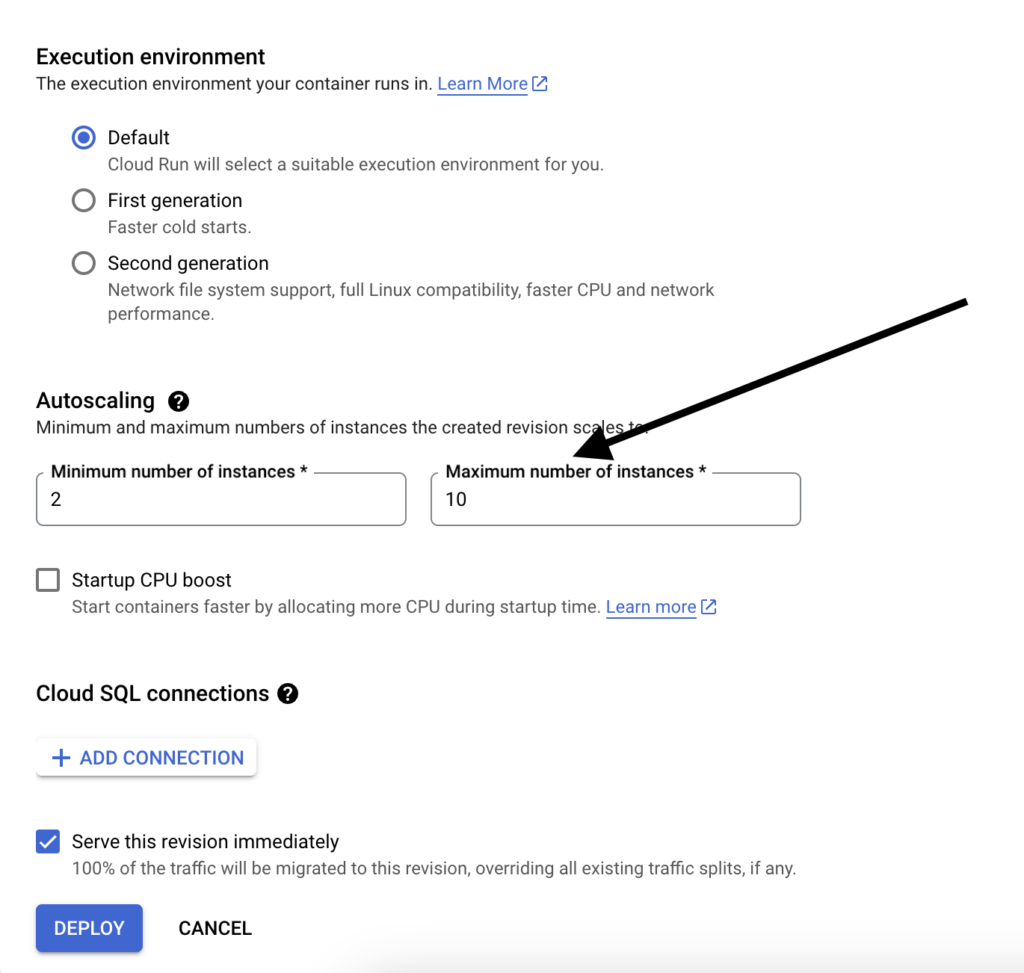
We need some margin of safety by upgrading to at least 2 and up to 10 instances. This will guarantee smooth functioning of your deployment. Even if traffic spikes, the new setup can handle it.
Change server location (optional)
Section titled “Change server location (optional)”Changing your server’s location is a good idea, especially for businesses based in the EU. It brings your server closer to your customers and helps to stay in line with GDPR, for example.
Copy the Server-side-tagging-preview
Section titled “Copy the Server-side-tagging-preview”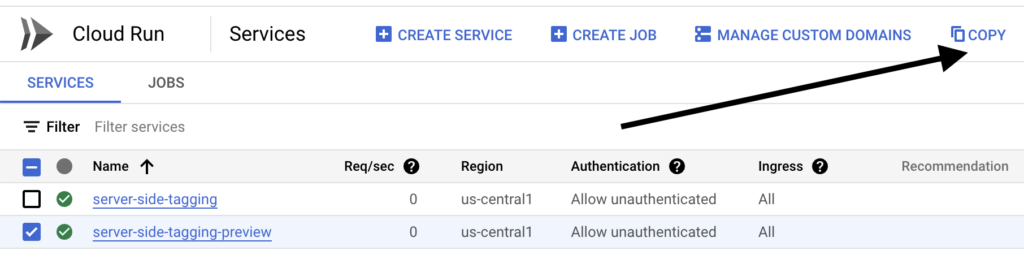
The simplest way to do this is by selecting and copying the server-side-tagging-preview.
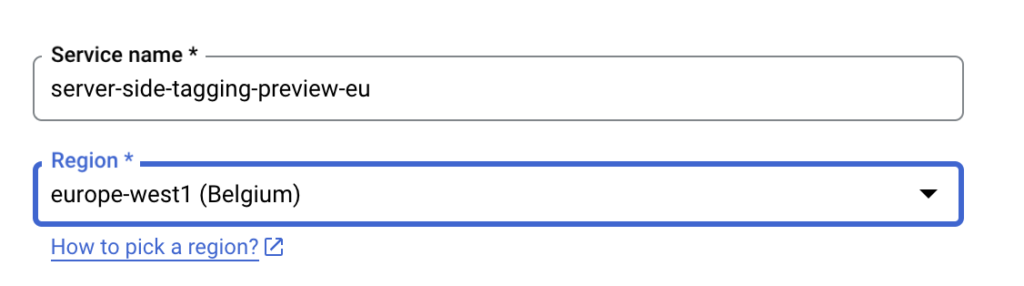
Once copied, you can change the region to europe-west2 (England), for example.
The only things you need to change are:
- The name of the new server:
server-side-tagging-eu, for example.
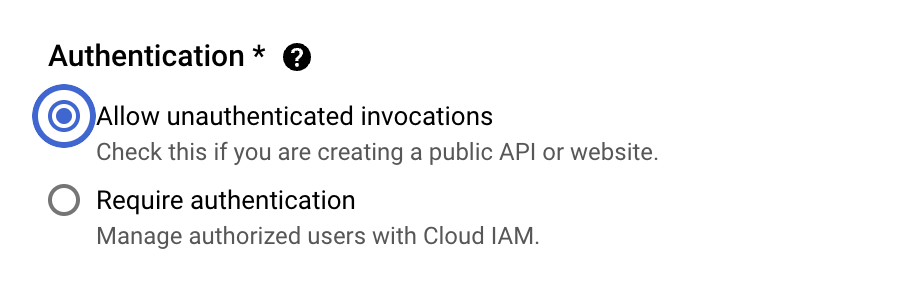
- Check the option “Allow unauthenticated invocations”.
Copy server-side-tagging
Section titled “Copy server-side-tagging”
We will do the same thing for the server-side-tagging. Ensure that you change the “PREVIEW_SERVER_URL” to point to the new preview server.
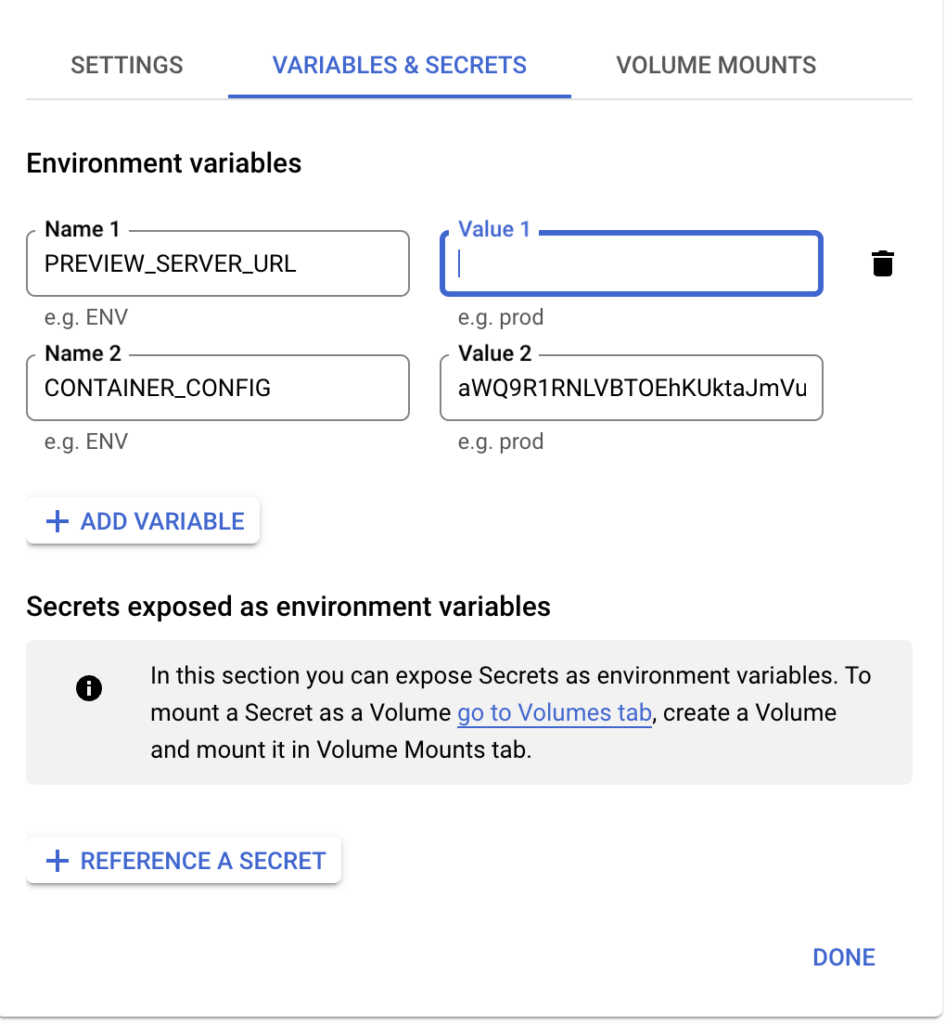
Make sure to change the name and check “Allow unauthenticated invocations.” You can delete the old setup and keep only EU services.
Create a custom domain
Section titled “Create a custom domain”One of the main benefits of server-side GTM is to load cookies from a first-party context. The default domain is still considered as third party. We need to fix this by creating your own subdomain.
Create a new integration
Section titled “Create a new integration”Go to your tagging server and browse to the integration
Section titled “Go to your tagging server and browse to the integration”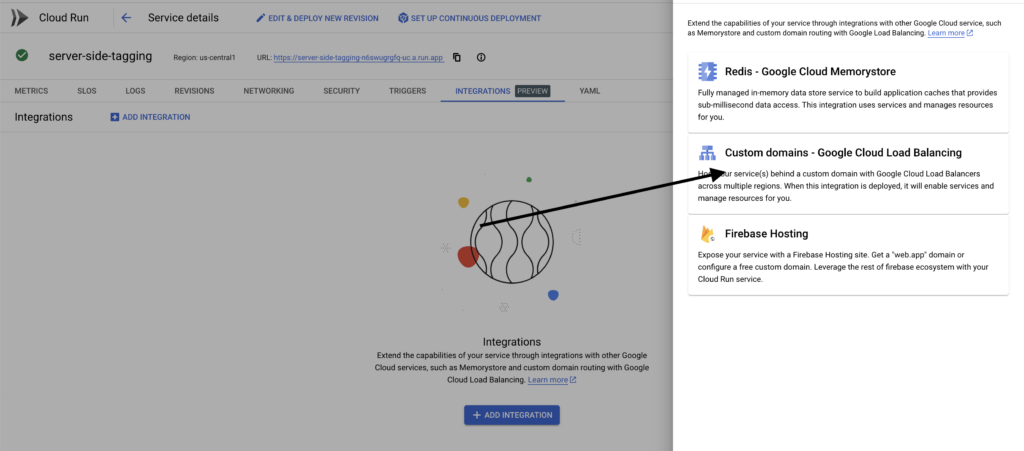
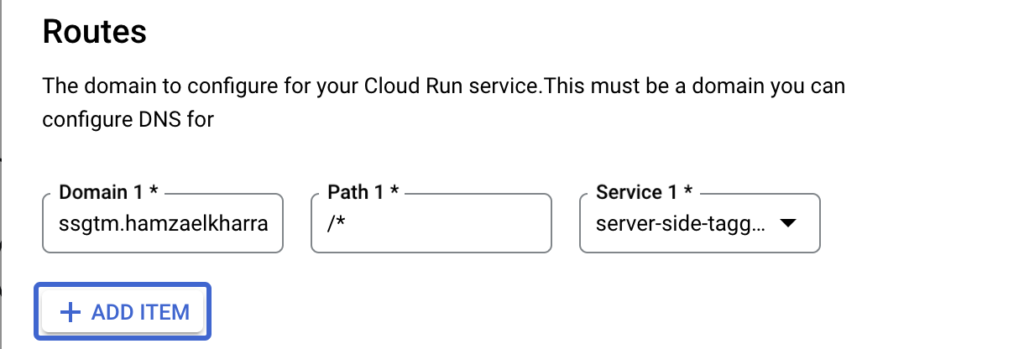
Select “Custom domains, Google Cloud Load Balancing”. Here, you need to add your custom domain, for example: ssgtm.hamzaelkharraz.com.
Next, enable all APIs and click on submit.
This process may take up to 24 hours or more.
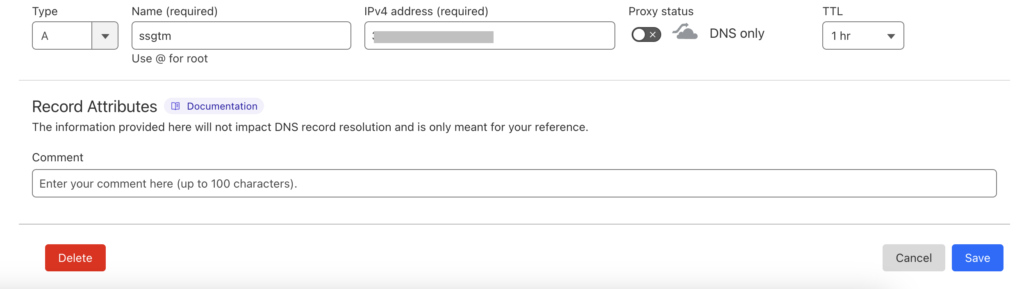
Add DNS records to your hosting provider.
Once the DNS records are available, browse to your hosting provider and add the A record. If you don’t have access, you can ask your developer to do this for you.
Configure GTM web tags
Section titled “Configure GTM web tags”By this time, we are ready to link our web container with the new server-side domain. We do this by adding the server URL to the configuration tag.

Final words
Section titled “Final words”Server-side tracking will play a major role in a world that doesn’t rely on third-party cookies. It is a bit weird at first, but one could argue that learning is a must. More and more vendors like Facebook are pushing towards this approach.
Of course, there are many ways to set up server-side tagging. This approach is quite complicated for those new to GCP. Feel free to reach out if you are having issues with setting up your SSGTM.