Introduction
Piwik Pro is one of the first names that come to mind when discussing alternative tools to Google Analytics 4 (GA4). This is very understandable as the tool is easy to use and quite reminiscent of universal analytics (UA). In addition to this, Piwik Pro has some cool features that you can find in similar software like Matomo, as well as other features like the ability to configure a consent form within the interface.
But let’s not get ahead of ourselves, the first part will talk about the interface before diving to the actual implementation. If you know your way around the tool, you can skip to the part about configuration with Google Tag Manager.
Piwik pro interface: what, where, and why
The first thing you will probably notice is how easy it is to use the interface.
Dashboards
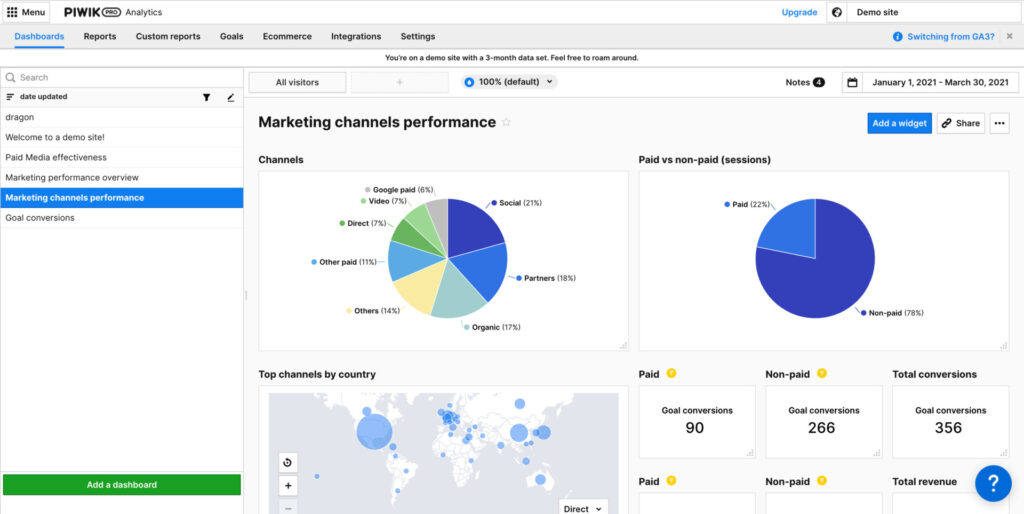
You can keep in this section all dashboards you use on a day-to-day basis. Adding your own dashboard is very easy as well. You can add your own marketing dashboard and populate it with graphs of your choice.
Reports

Reports give you a more detailed look on how your website is doing. This section has many subparts:
Audience: know your traffic
You can group your traffic by common characteristics, like the device they use or an action they did. For example, we can see in the custom dimension section how each content category on our website is performing.
Acquisition: know your marketing channels
Where your traffic is coming from?
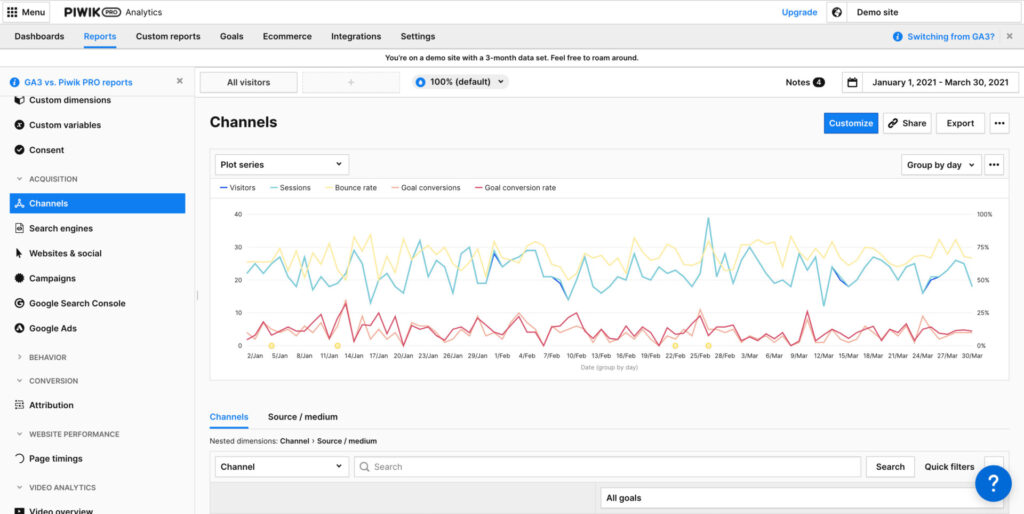
The Goal of this section is to answer this question. You can add data from Google Ads and your search console to make this report even more useful.
Behavior: how people use your website
Your best performing pages, the keywords people search for within your website, even heatmaps are available in this report.
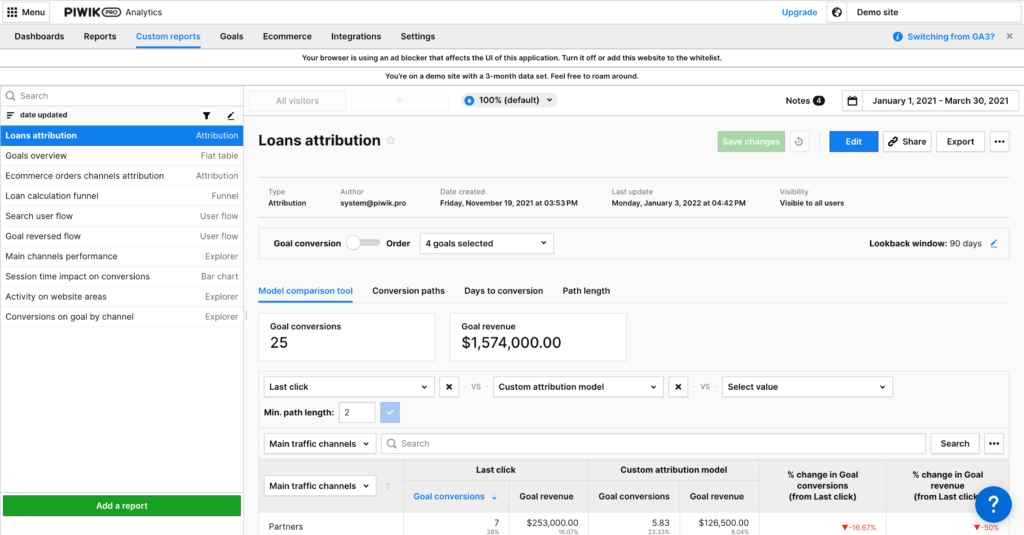
Attribution: the ROI of your marketing channels
People rarely buy from you the first time they interact with your website. The attribution report helps you find out how each channel contributed to converting users.
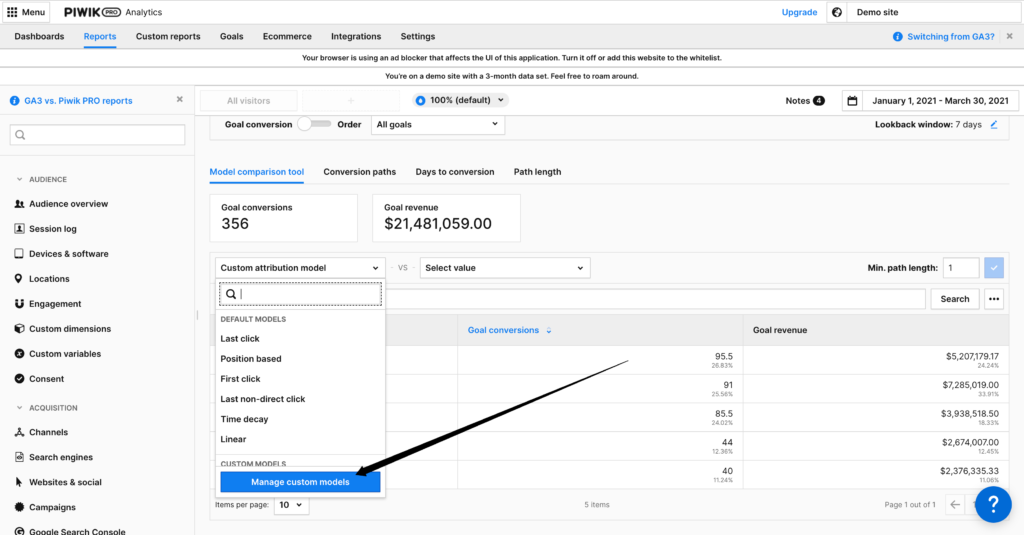
Conversion: track your goals
You can keep track of the performance relative to your goals in this section.
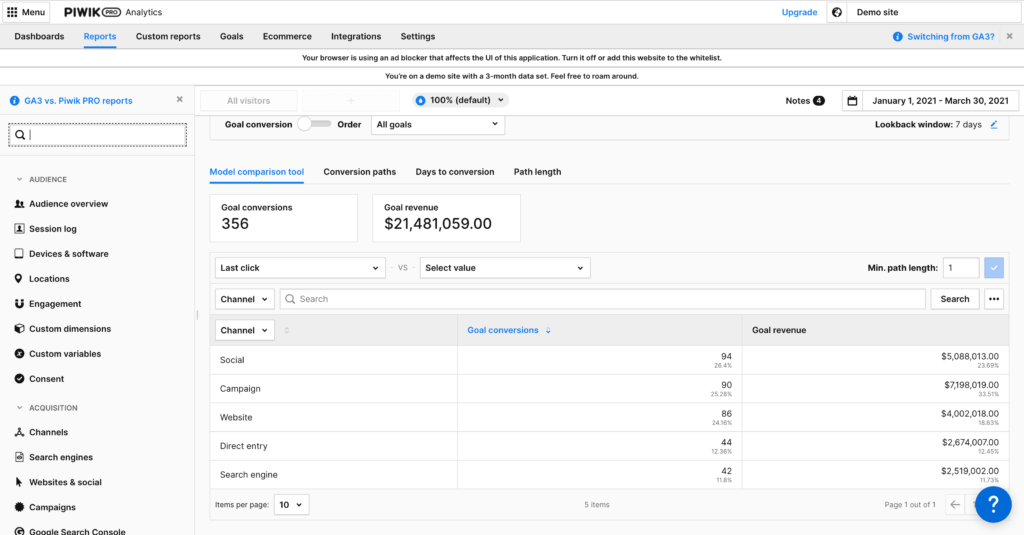
You can change your attribution model at will and even use your own custom model:
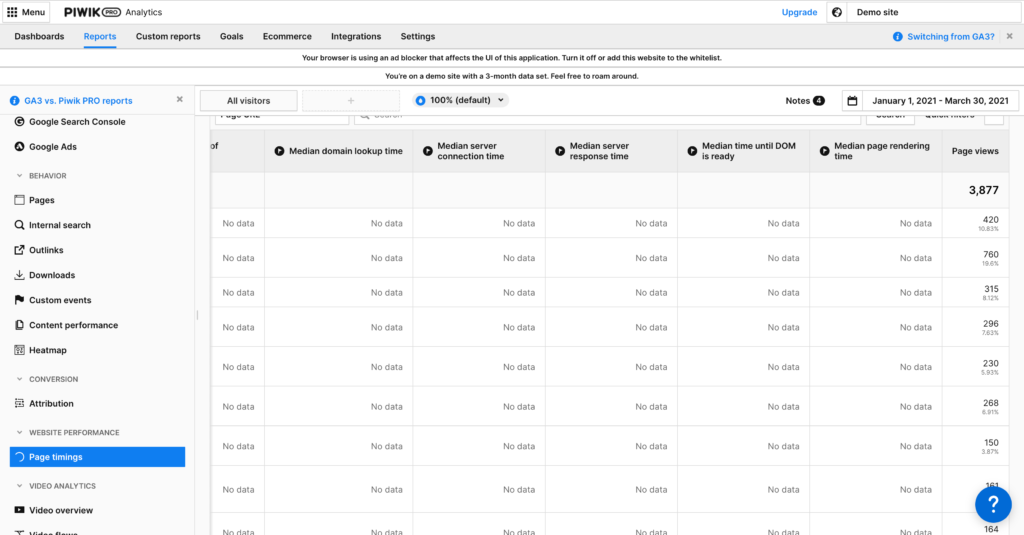
website performance
One of that are missing reports in GA4 default is your website’s loading speed. Piwik pro has a dedicated section to keep track of how fast your pages are loading, among other indicators.
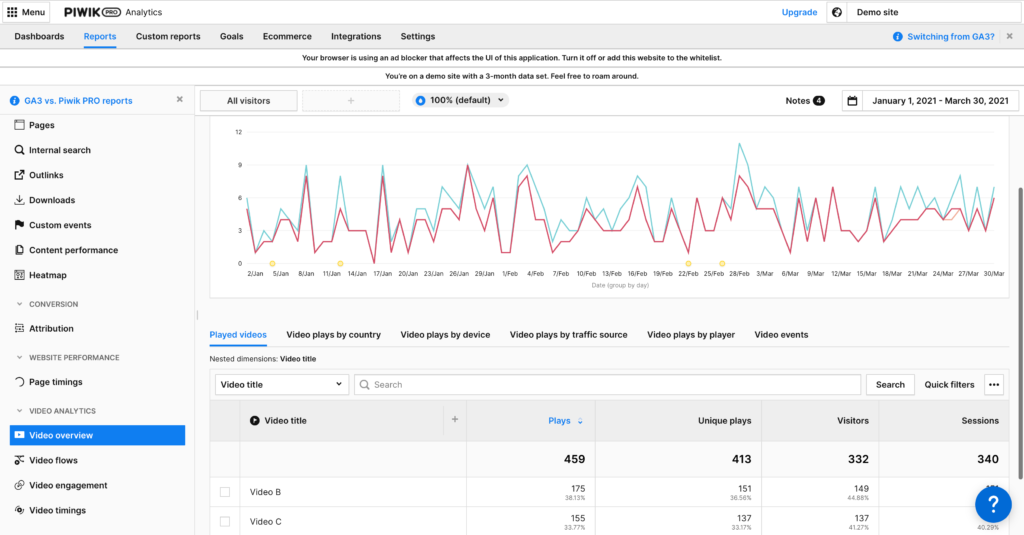
Video Analytics
If you have a lot of video content, this section is definitely useful to see how your videos are performing over time.
Custom reports
We talked about custom reports before, this section is where you can see all the custom reports you created and add new reports if you like.
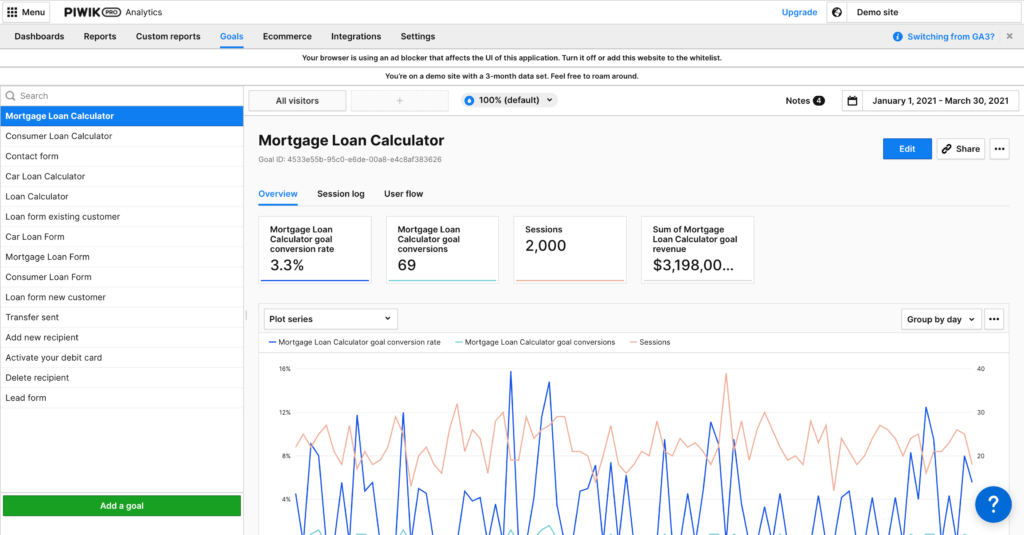
Goals
Similarly to custom reports, this section is dedicated to the goals you configured.
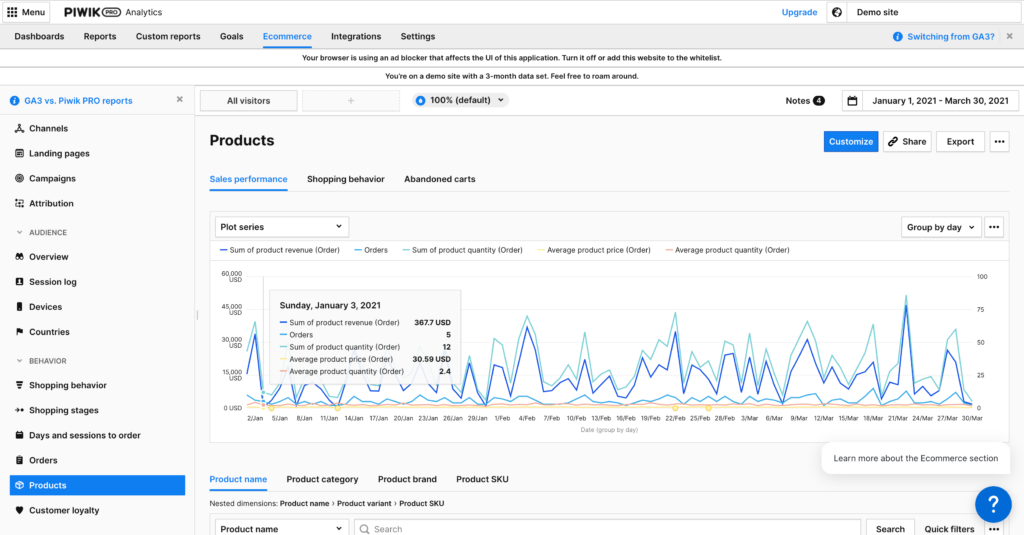
E-commerce
Piwik pro has a whole section dedicated to keep track of e-commerce data. You will in this section everything anything ranging from the campaigns that brought sales.
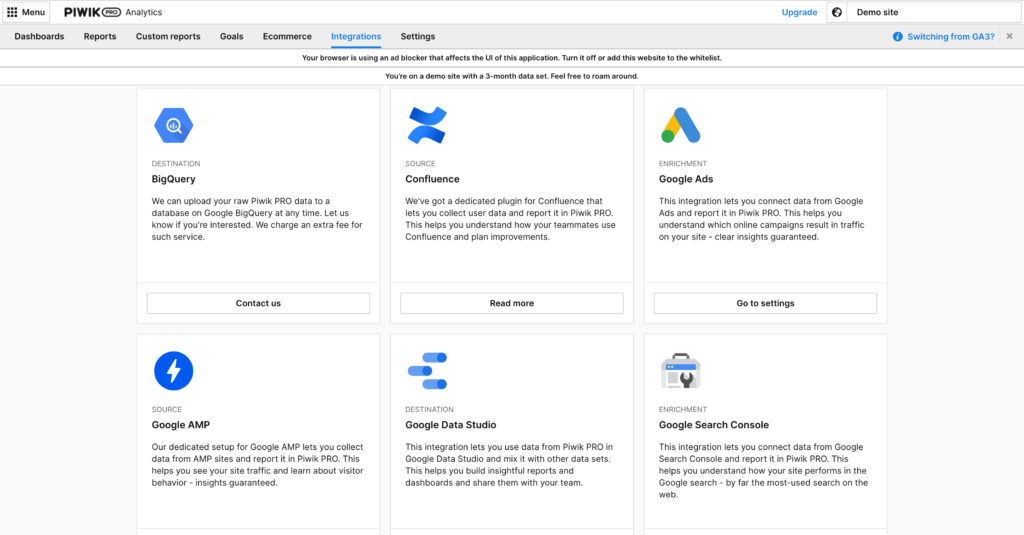
Integrations
You can connect your Piwik pro account to other platforms like Google Ads. This allows you to keep your eye on important metrics within the UI. there are other integration like BigQuery to export your Piwik pro data to a data warehouse if you want to.
How to configure Piwik Pro with Google Tag Manager
Piwik Pro configuration tag set up
First, we need to connect Piwik pro to our Website.
Get your website ID
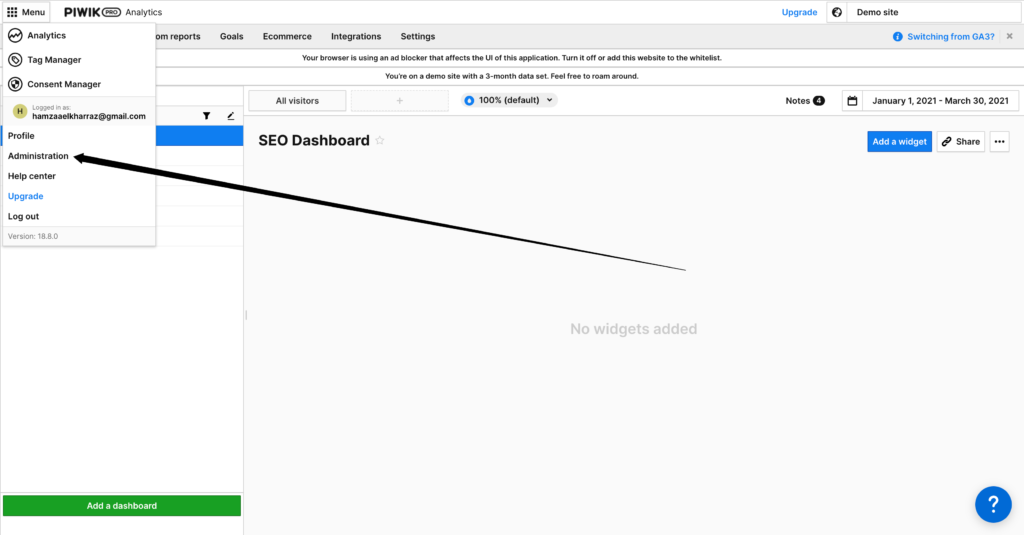
Click on menu and navigate to the administration section.
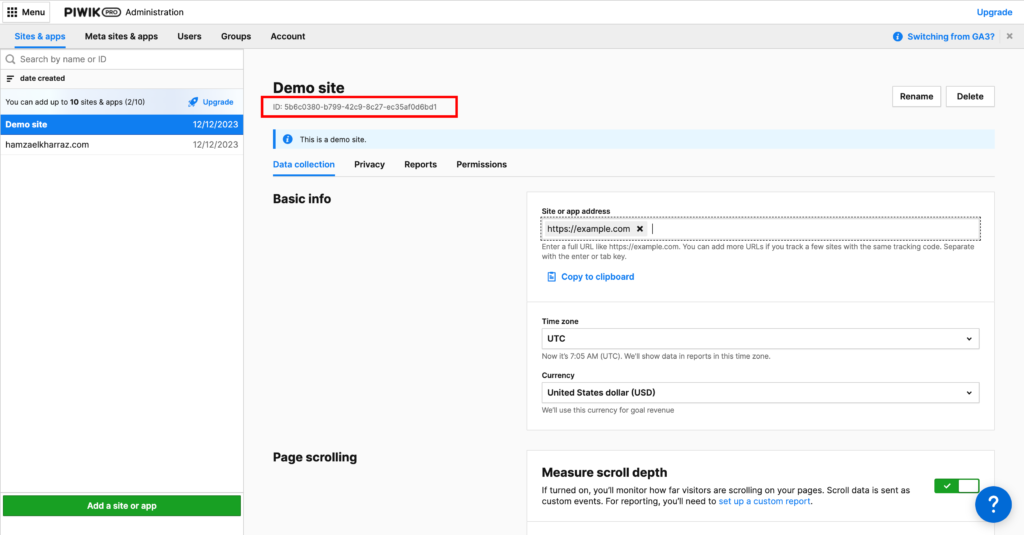
Copy the ID of your website.
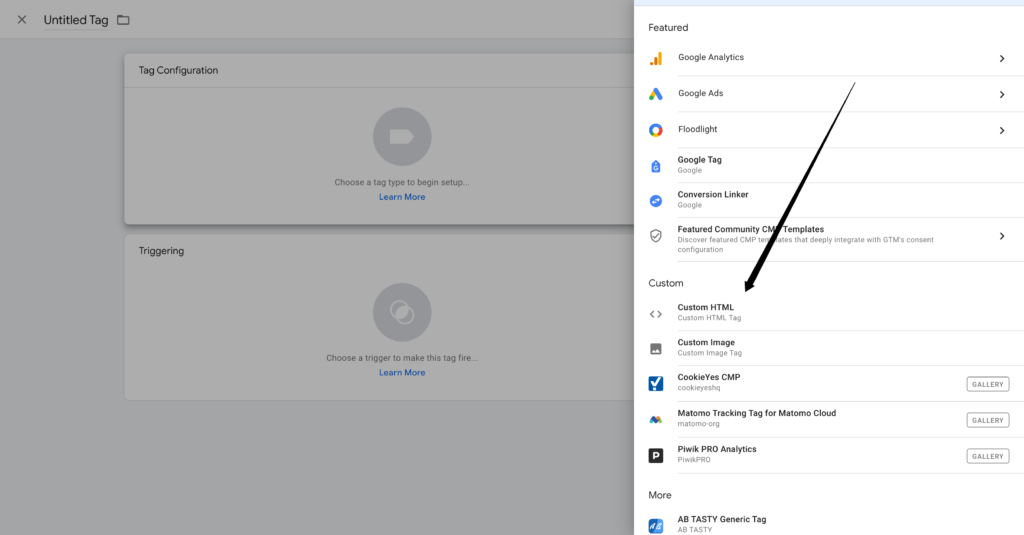
Add a new Google Tag Manager Tag
We need to add a new tag.
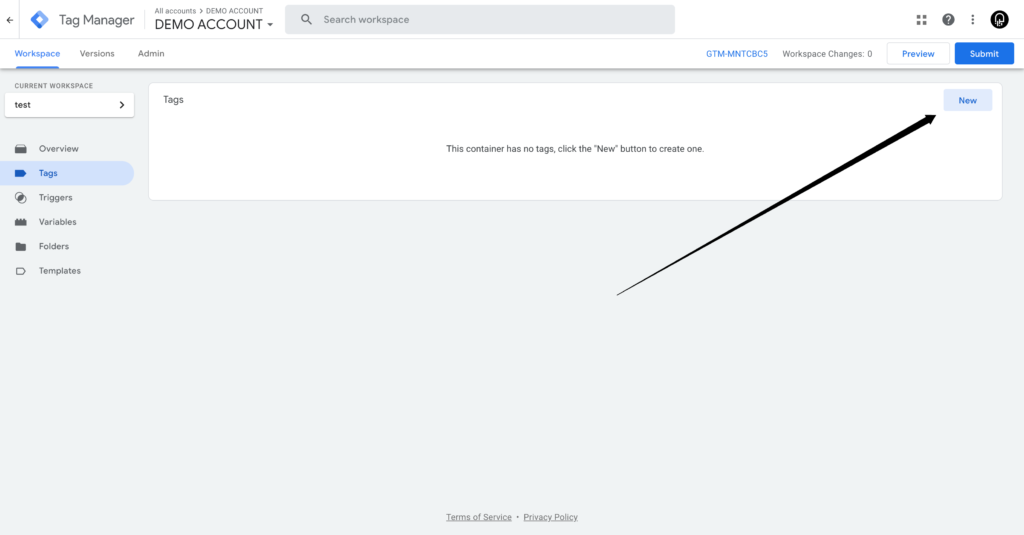
Browse to the library and look for Piwik pro

Now we need to add the website ID we copied earlier along with the website URL (example https://yourwebsite.piwik.pro/). In the “Site or app address” you can add your website’s actual URL.
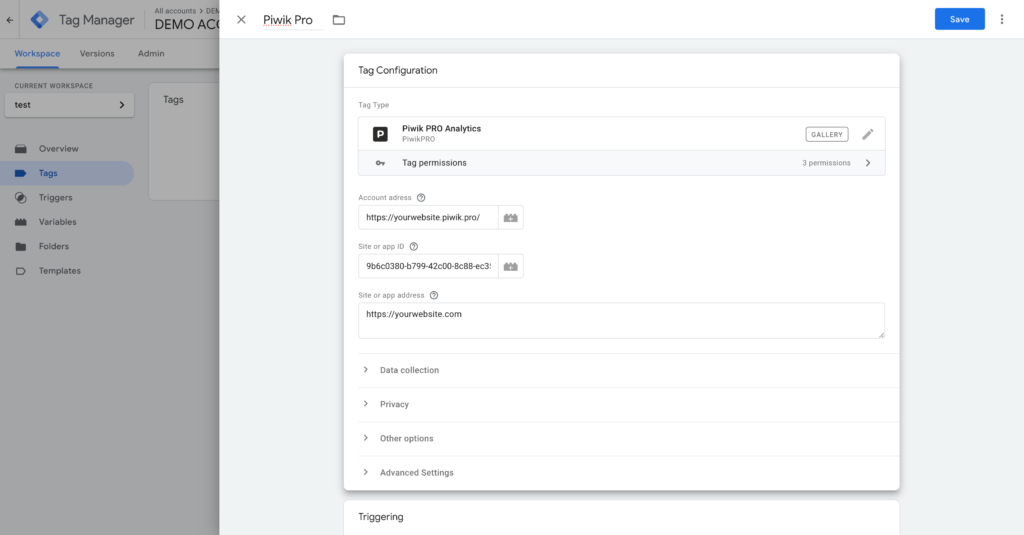
You can check the following features as well:
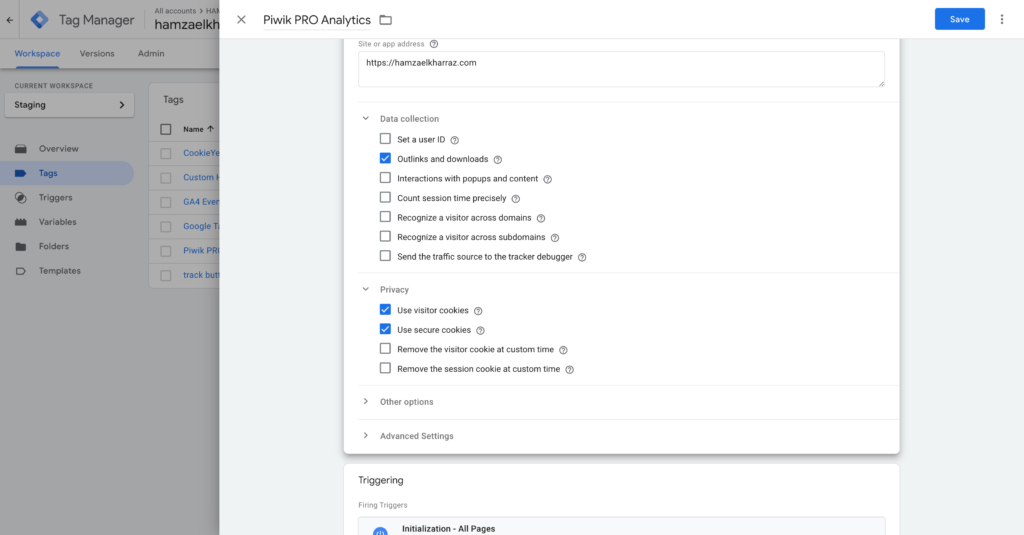
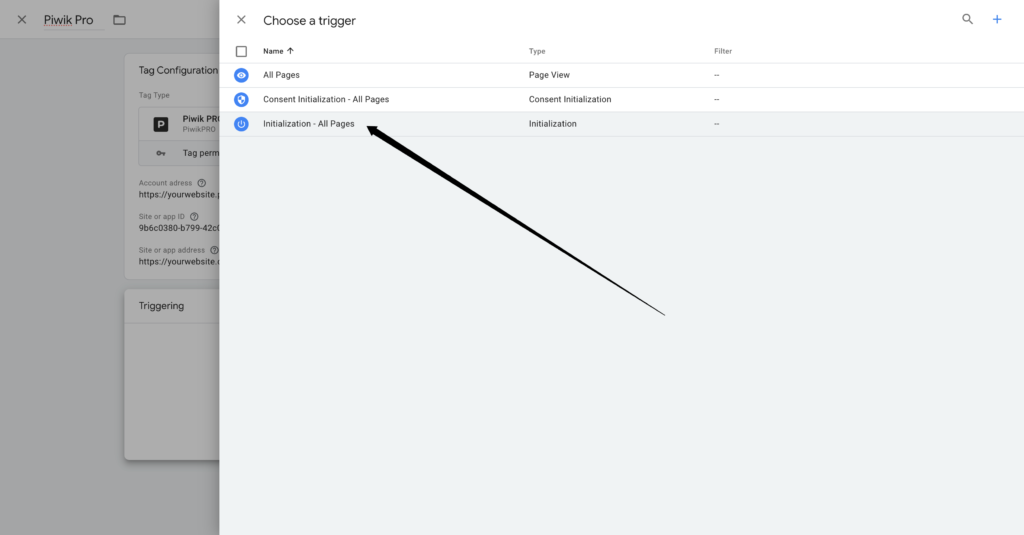
Now all that is left is to add the trigger. We want the tag to work as early as possible so we can select the initialization trigger.
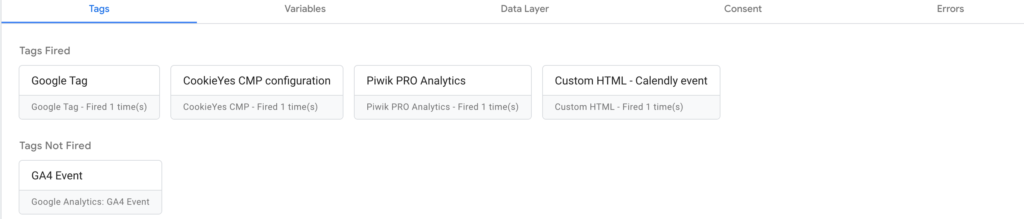
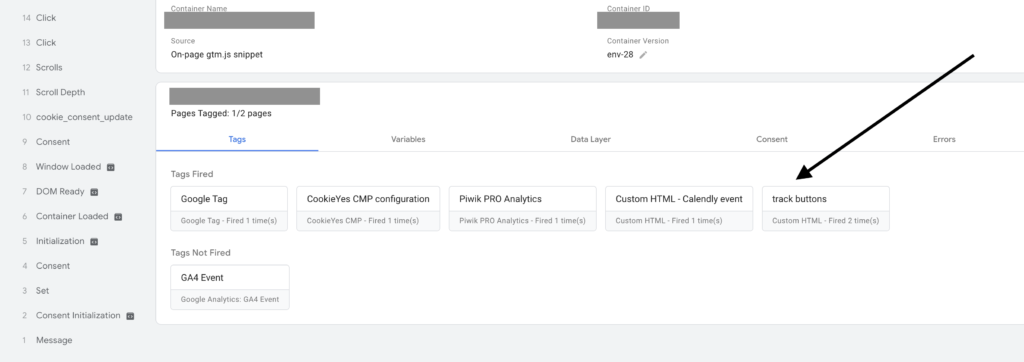
We can see that the tag is working properly.
To make sure our configuration is correct, we can check the debugger in Piwik Pro (settings > Tracker debugger).
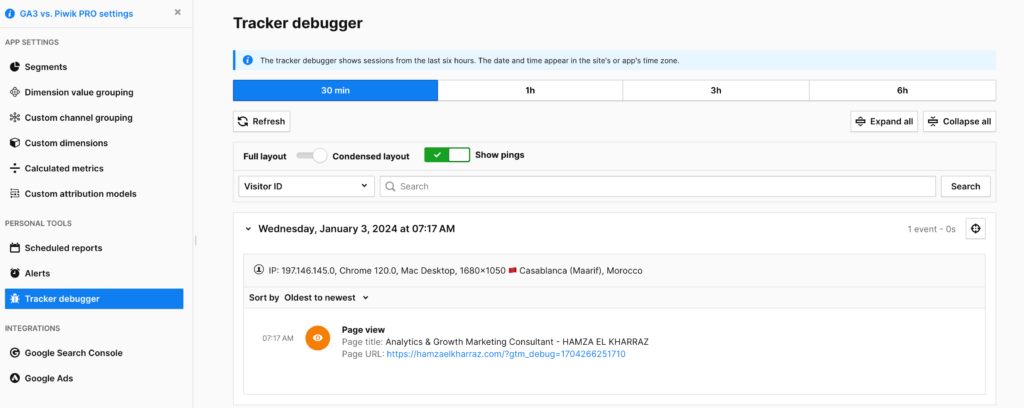
Piwik Pro received a page view, so everything is working as expected. We can now publish the configuration tag. Soon enough, you will start seeing data in your Piwik Pro Dashboard.
Track a Piwik pro event using Google Tag Manager
Configuring events is not as seamless as the first part. There is no tag template we can use. We will rely on HTML template to add new events. Don’t worry, it’s not nearly as complicated as it seems.
Let’s say we want to track button clicks. The first thing we need is a new HTML Tag:
Piwik Pro events have the same structure: an event name, event category, event action. If you worked with Universal Analytics, these concepts should be familiar to you.
<script type="text/javascript">
_paq.push(["trackEvent", "Buttom Tracking", "Click on button", "Submit"]);
</script>
The event will track button submissions:
- First, we have the event category which is “Button Tracking”
- The event action is the act of clicking on the button, “Click Button”
- Finally, there is the event name, “Submit”.
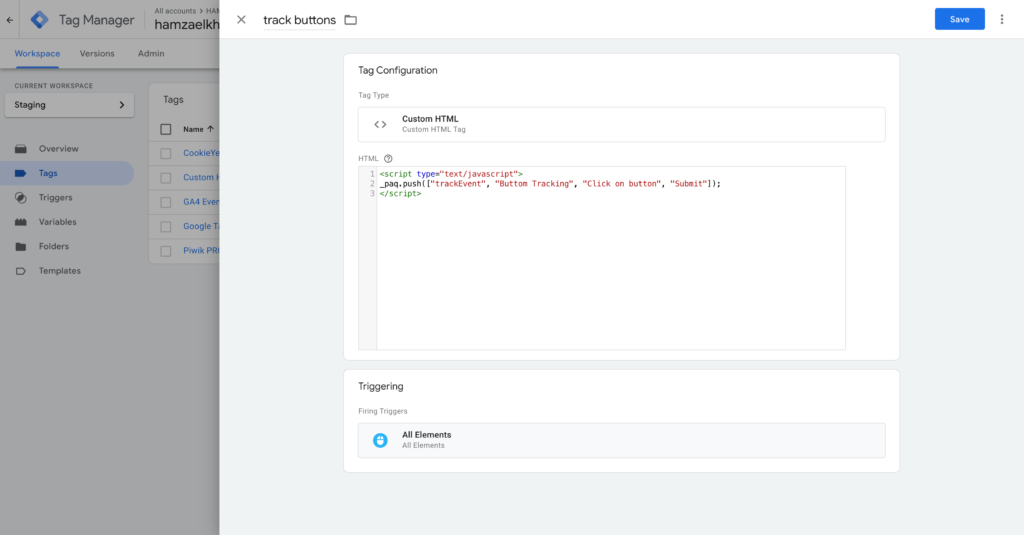
We will save and preview the event. We will send a button click event every time we click on any element on the website.
Let’s go to the debugger in Piwik Pro to see what did we send:
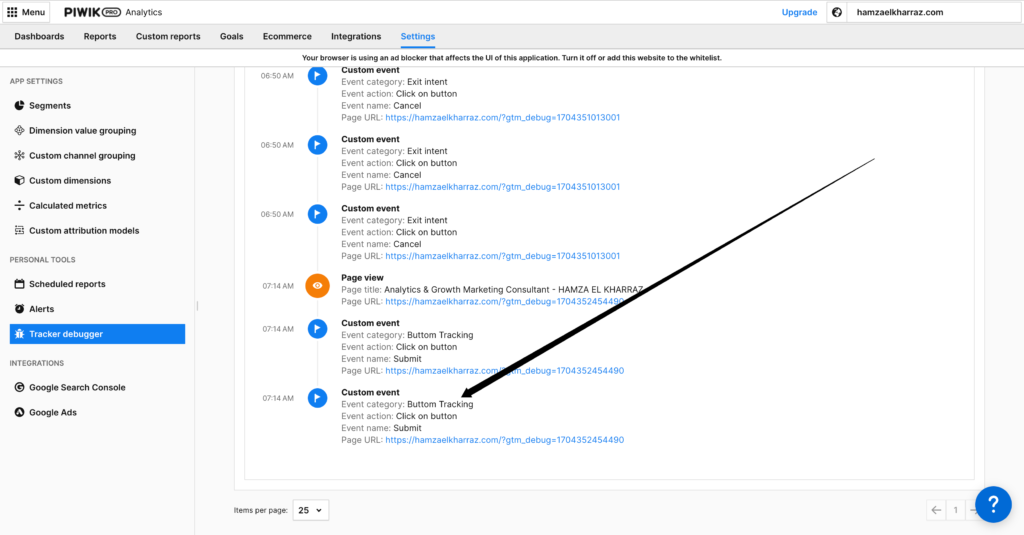
As you can see, the event is working as expected.
Final words
The beauty of using Piwik Pro is its accessible interface, which is a very important factor for most of us to keep an eye on the website’s performance. This guide provided an introduction to the tool and how can you set up some basic tracking. But you can do much more with Piwik Pro.
Advanced tracking like configuring e-commerce and custom dimensions can be done and will be the topic of future articles.