Whether you are using Google Tag Manager (GTM) or Piwik’s own solution (GTM), the installation process is quite straightforward. If you are new to Piwik pro, I recommend starting with how to use the interface.
Why More Businesses Are Switching to Piwik pro?
Google Analytics is not the Gold Standard Anymore
As anyone who used the newest version of Google Analytics, GA4 can attest, the tool has a steep learning curve, and frankly it is not meant to be used as a standalone solution. Google seems to be pushing users to integrate GA4 with BigQuery, Google’s cloud based solution to store data.
“Why?” you might ask, well, storing data costs money, and Google wants you to spend your own money to do it. Makes sense right? But this doesn’t really justify why the new interface well sucks for people who what to just get a few stats and get on with their day.
That’s why we advise people who are actively looking for an alternative to either choose Matomo or Piwik pro. They are reminiscent of Universal Analytics and provide most of the features available in GA4.
Privacy concerns For Businesses Based in the EU
GDPR concerns are another factor you should consider as well. This especially true if you are based in the EU region.
To spare you the details, you need to remove a lot of identifiers from your payload if you are using GA4 (what you send to google’s servers) in order to be compliant with GDPR. The only problem is that Google Analytics becomes rather useless after all this work, and you are now stuck with it after paying $$$.
Setting up your Piwik pro account
Note
Piwik pro has two versions: a free version (Piwik Pro) that you can get by creating a free account, and an enterprise plan if you have a larger business website with more than 500K events.
To know more about the plans, check this page.
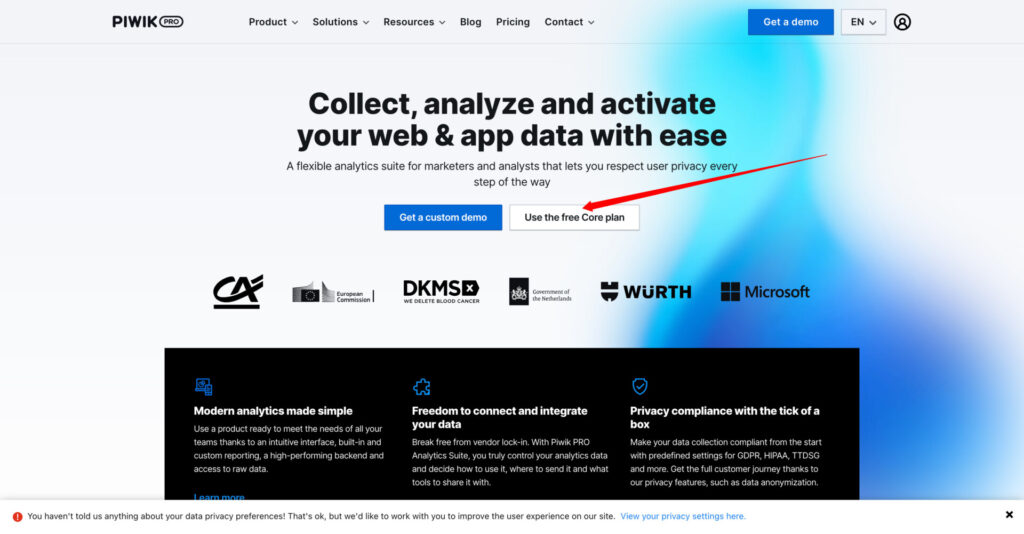
Go to Piwik pro’s website and use the free core version:
Next, you will need to add your personal information.
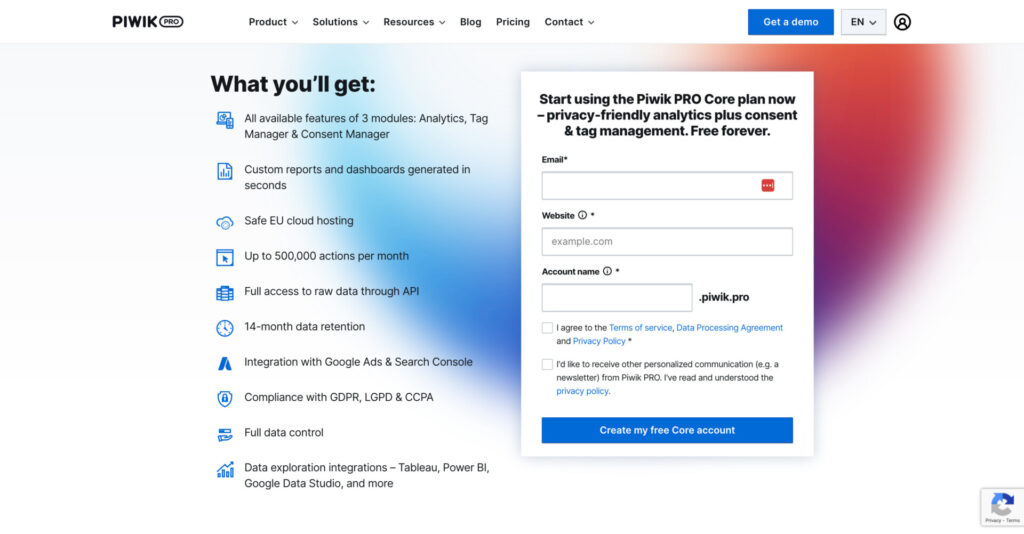
You need to confirm your email. After adding your password, you can access Piwik pro’s interface. We need to add the tracking script to our website to see the data.
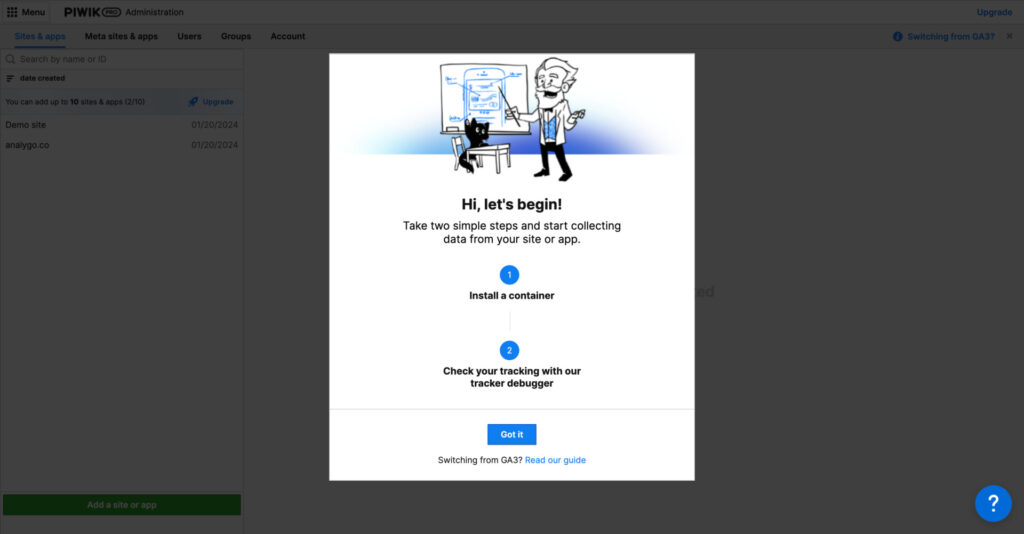
Here we have two options that I recommend: either use Google Tag Manager container or Piwik Pro Tag own tag management system. Adding JavaScript code works, but it will not give you the most flexibility and control.
Configure Piwik pro with Google Tag Manager
The first thing we need to do is to add the tracking script to our website via Google Tag Manager (GTM).
How to find Piwik Pro Tracking script?
Go to Menu > Administration > Sites & apps > Data Collection
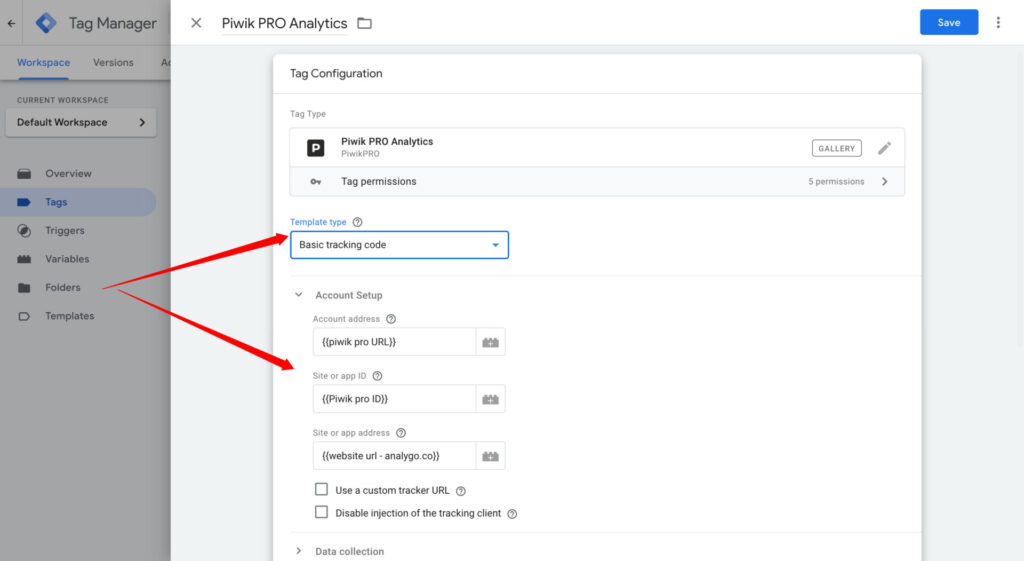
In Google Tag Manager, browse to the tag templates library and look for “Piwik Pro Analytics”
In the tag template, use the dropdown menu to select the type of installation and start by setting up the configuration tag. All we need, is to fill the information about our account.
Finish the set-up by checking the checkboxes like in the screenshot below and select a trigger like “All pages”.

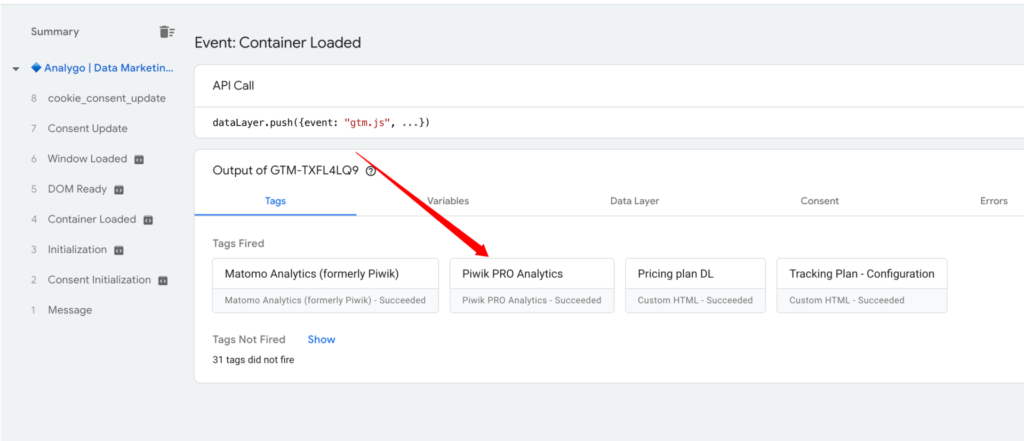
Save your tag and open the preview mode in Google Tag Manager. Our tag is worked as we expected.
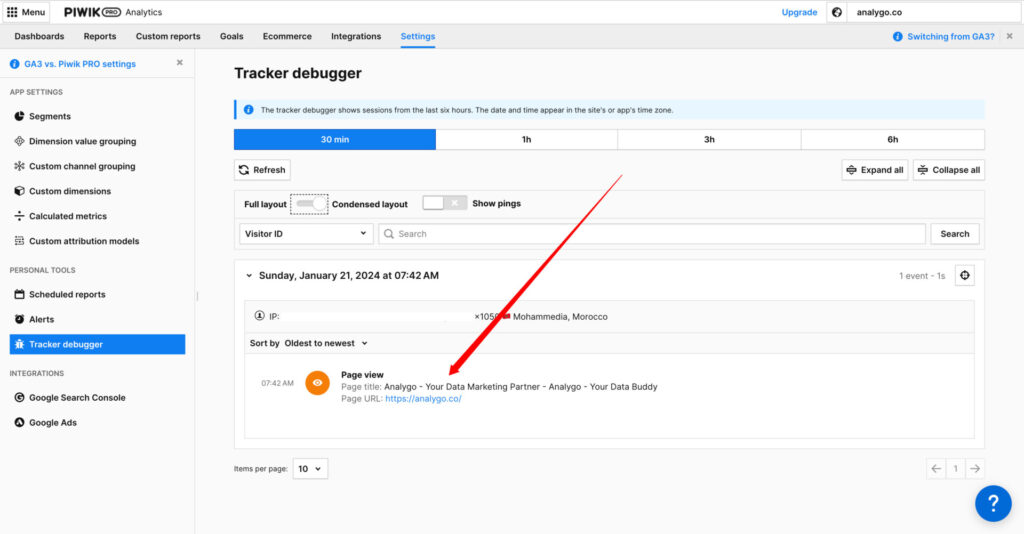
When you go to the debug mode (Menu > Analytics> Settings > Tracker debugger), you will find the page view from your visit. This means that everything is working as expected.
Piwik Pro Event Tracking using Google Tag Manager
Configuring an event in Piwik using GTM is easy using the same tag template. You can choose other event categories like ecommerce or track content interactions from this template.
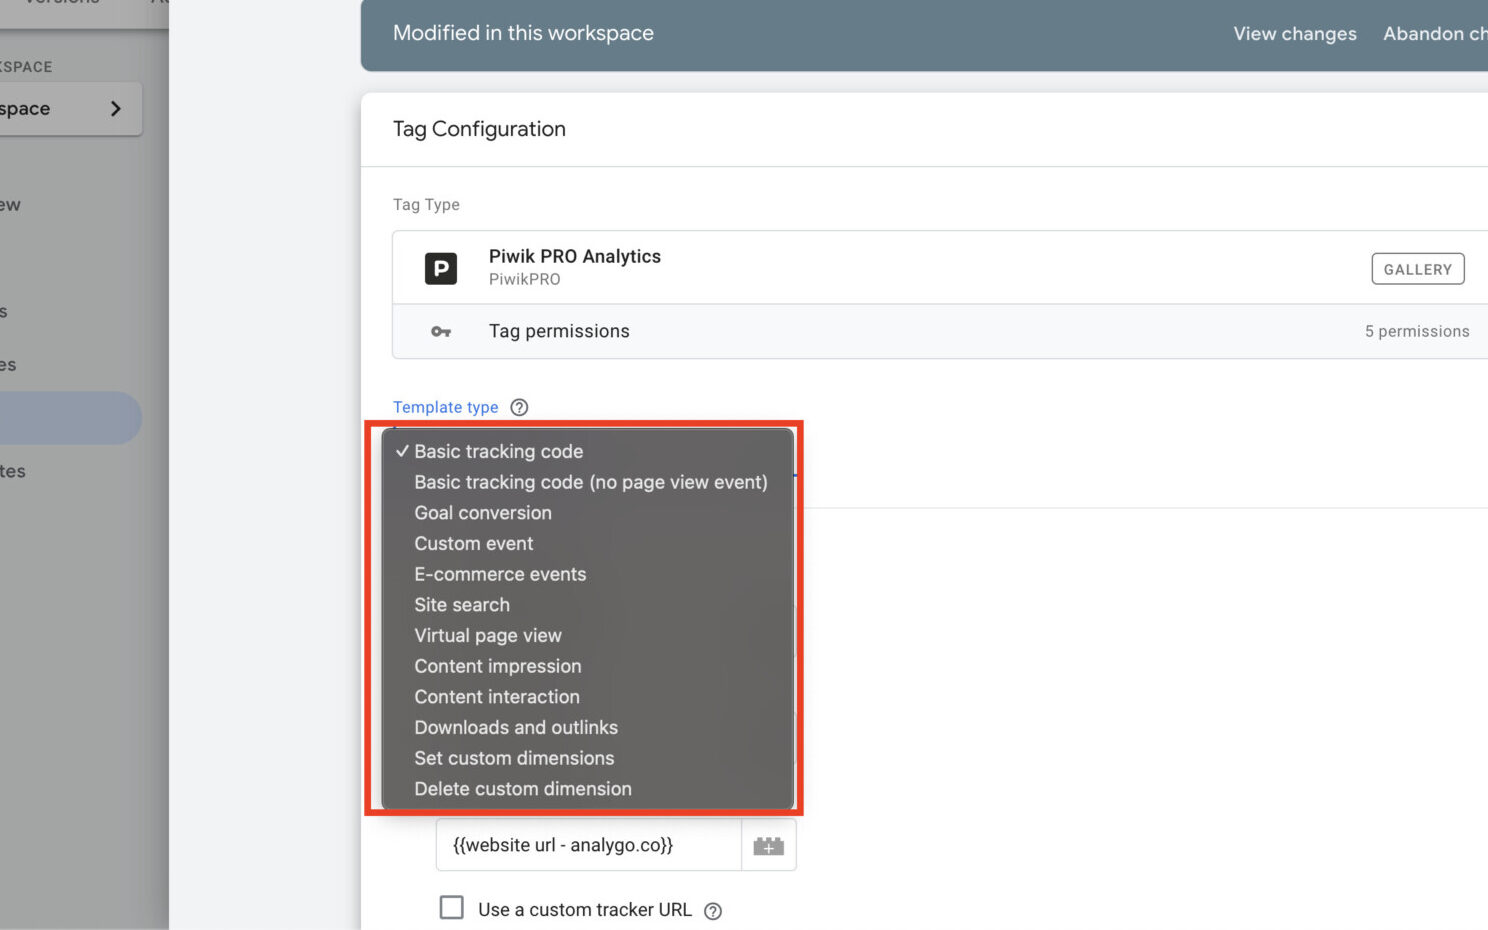
I’m going to show you how to set up custom events. Select Custom Event and you will notice that you have some fields you need to fill:
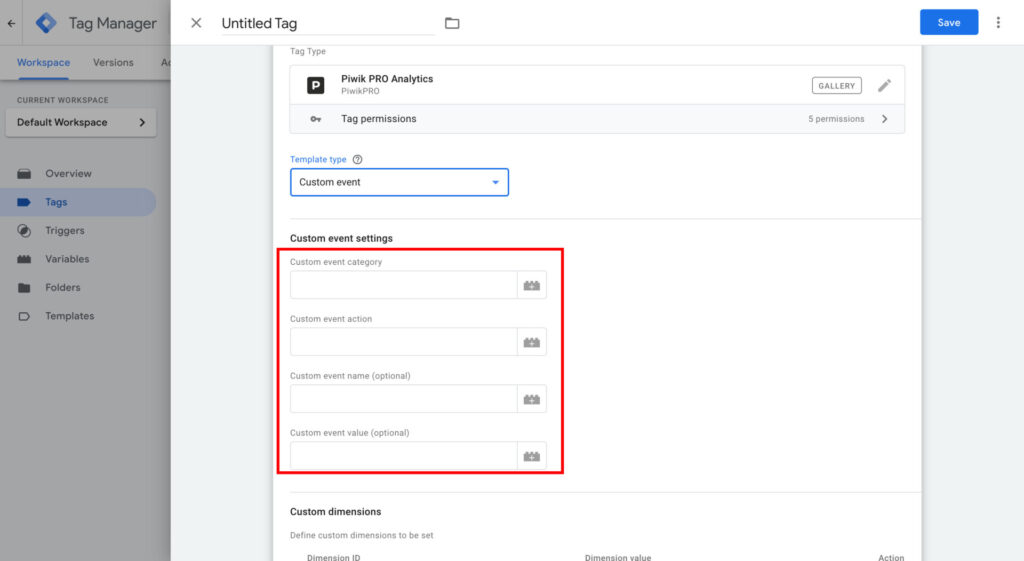
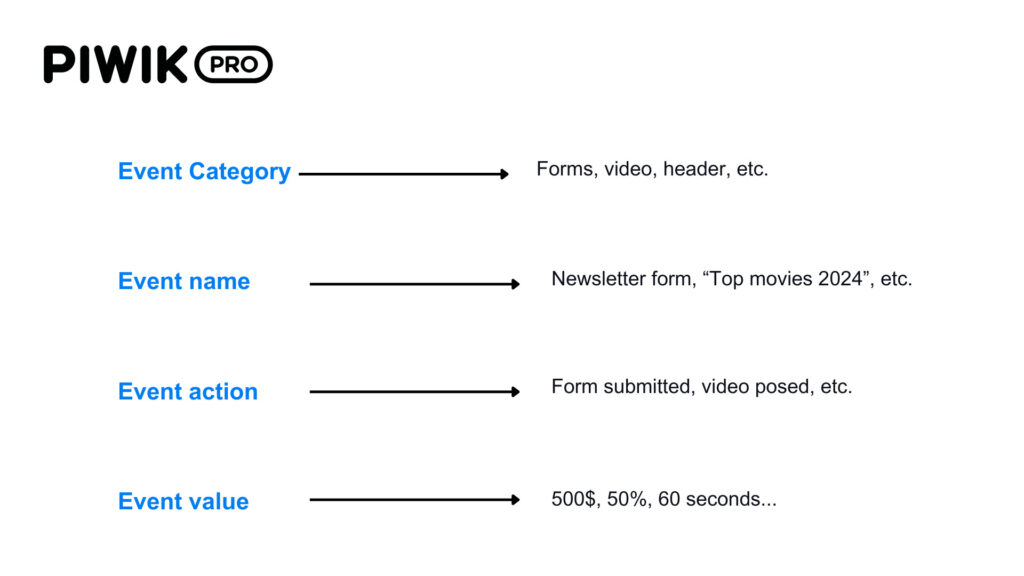
The custom event tag template follows this structure:
- Event category: the type of element to track (Forms, Buttons, Podcast)
- Event action: how the user interacts with the element with it (impression, clicks, scroll…)
- Event name: the name of the element (newsletter form, summer promotions….)
- Event value: if you know each newsletter subscriber can bring in $50 in revenue, you can add the amount in your dashboard.
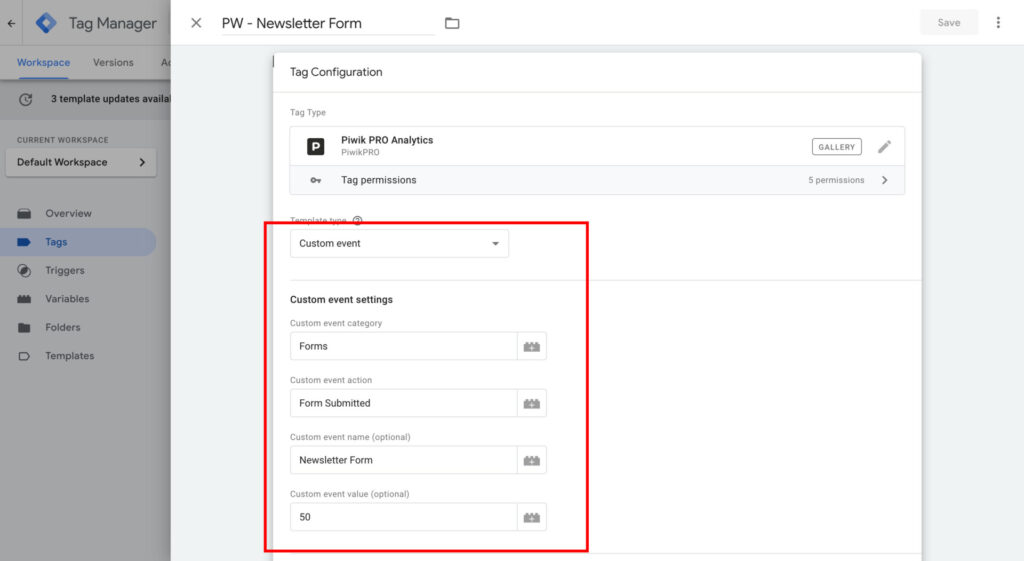
Example: newsletter submission event
Let’s see an example of how to set up newsletter tracking using the event tag template.

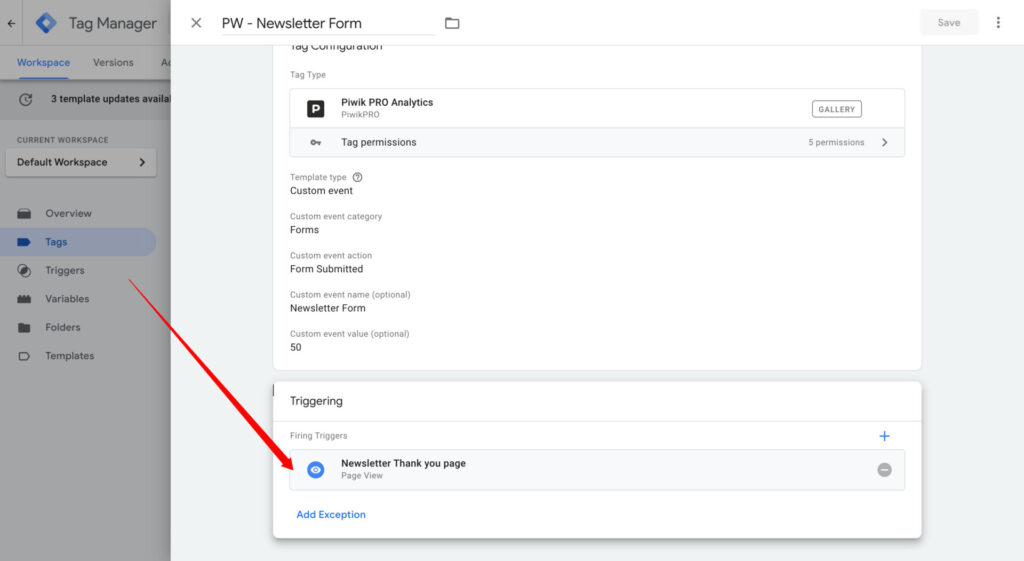
Next, let’s add a new Piwik pro event tag.
All we need to do next, is add the event details.
The trigger is going to be the moment the user lands on a “Thank You” page.
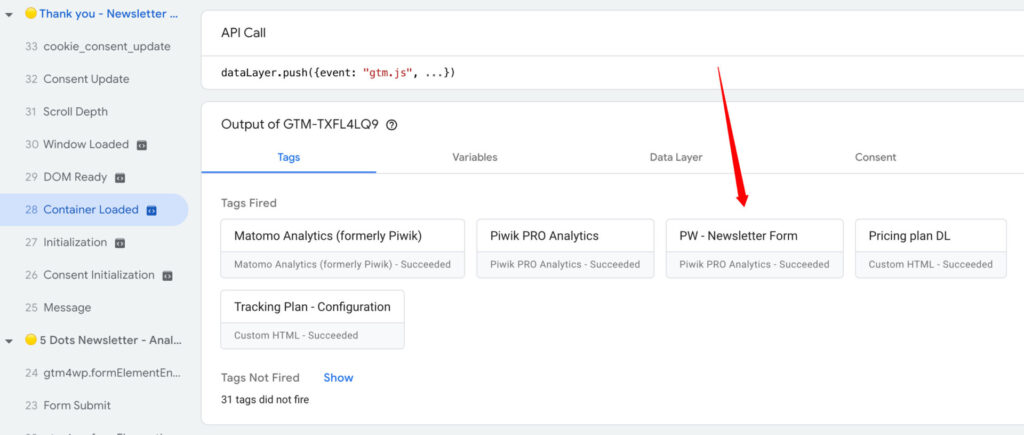
Finally, we need to preview our changes and see if the tag is working.
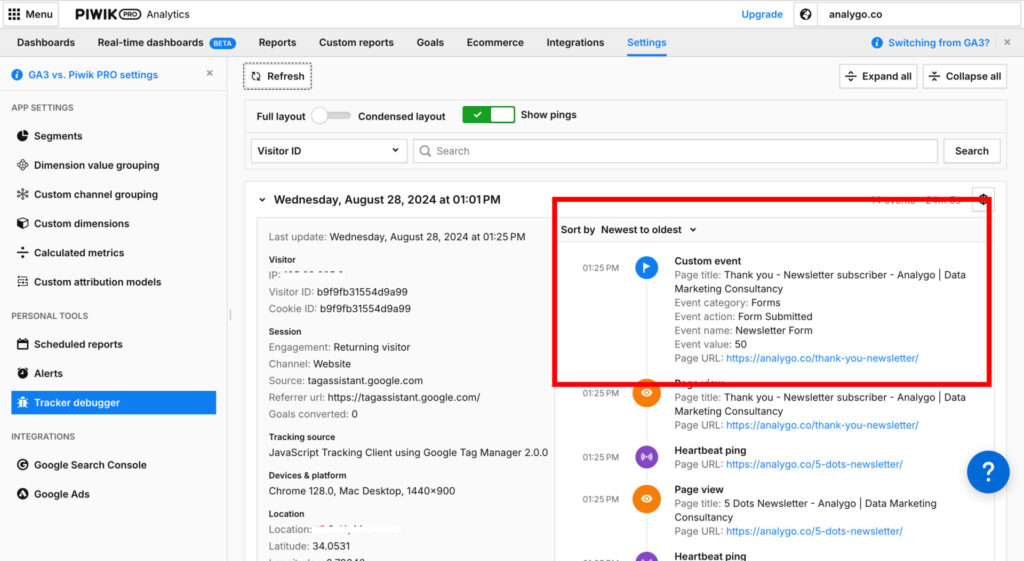
I will open the tracker debugger in Piwik pro as well to check if the event is displayed there as well.
Alternative to the tag template: using HTML
You can track events using an HTML tag instead of the template in GTM. Replace the fields with actual values using the example below.
<script type="text/javascript">
_paq.push(["trackEvent", "Add Event Category Here", "Add Event Action Here", "Add Event Name Here", "Add Event Value Here"]);
</script>
Let’s say we wanted to track button clicks. We can use the script in the following manner:
<script type="text/javascript">
_paq.push(["trackEvent", "Buttom Tracking", "Click on button", "Submit"]);
</script>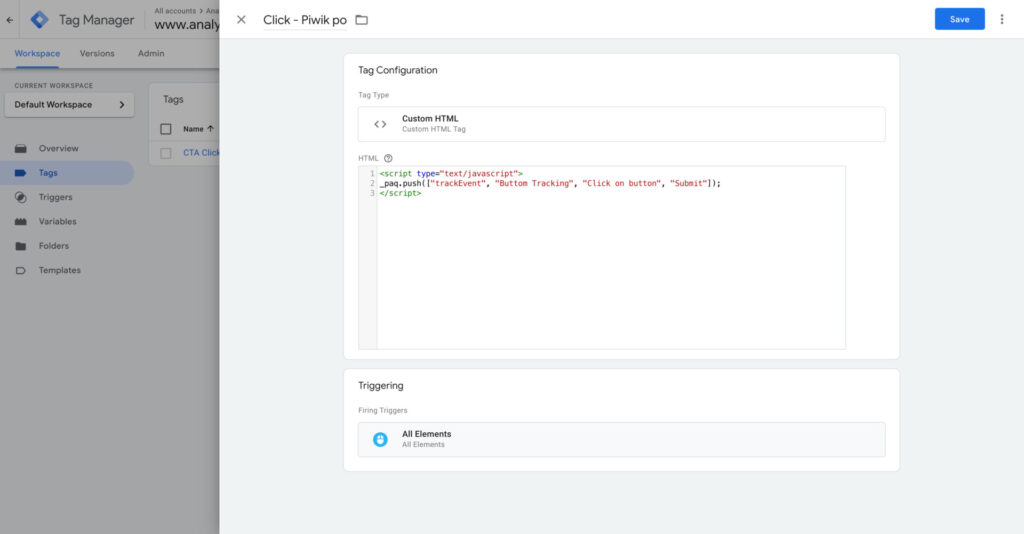
When we save and preview the tag, you can see that the event is working as expected.
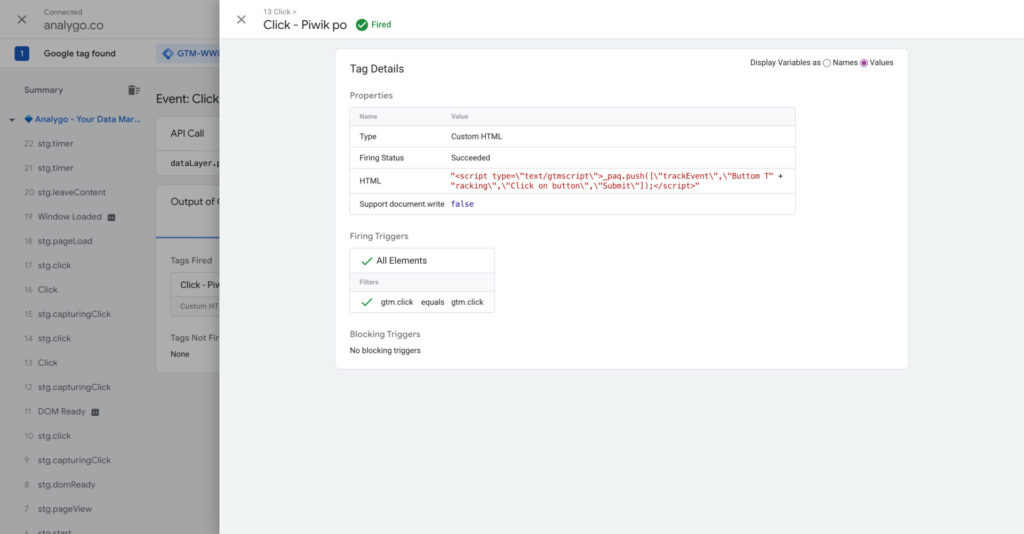
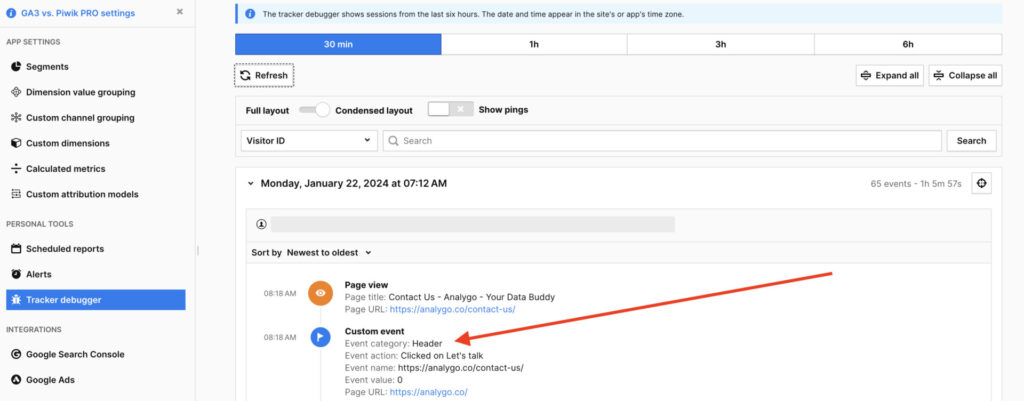
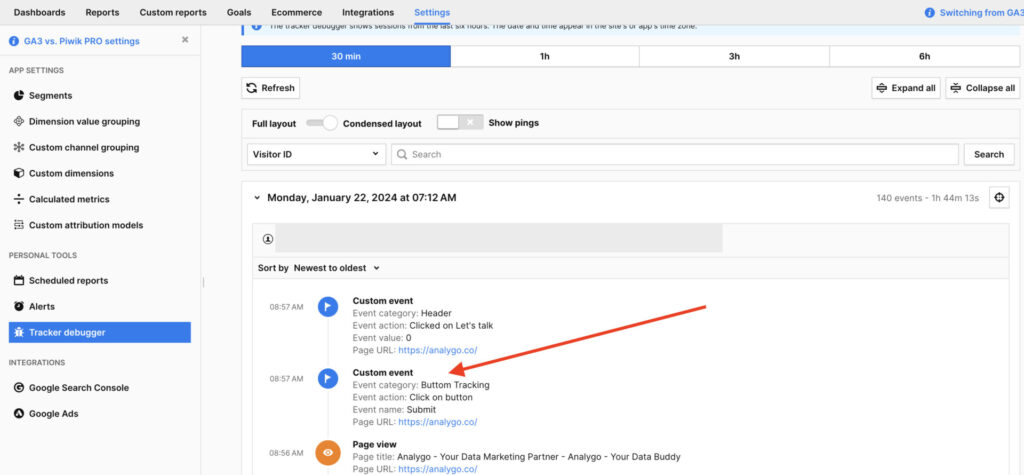
When you access Piwik Pro’s tracker debugger, you can also view your event.
Event Tracking via Piwik Tag Manager
Let’s say we want to track a click on some call to action, how can we pull this off using Piwik’s TMS? Let’s head to Piwik’s tag Manager and create a new tag.
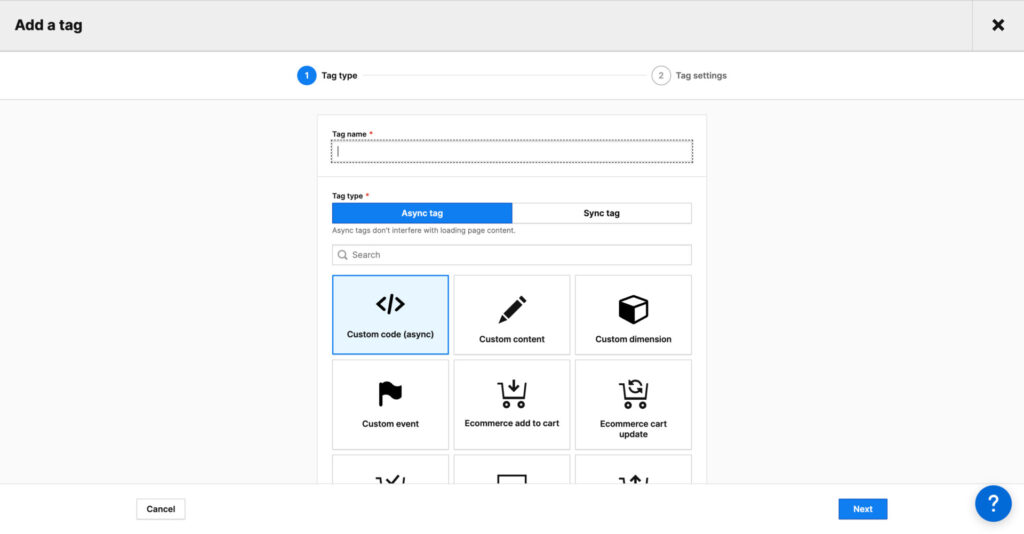
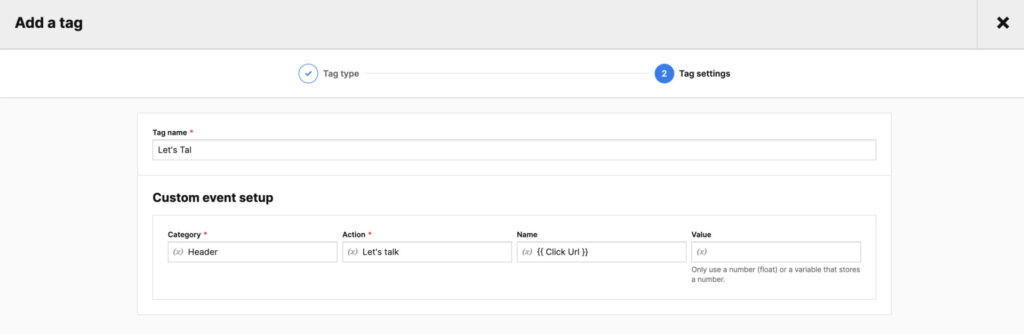
We will select “Custom event”.
Note
Piwik pro is very reminiscent of how Universal Analytics (UA). Events have a category, name, and action.
Now we need to add the trigger. Scroll all the way down and click on “Add a trigger click”.
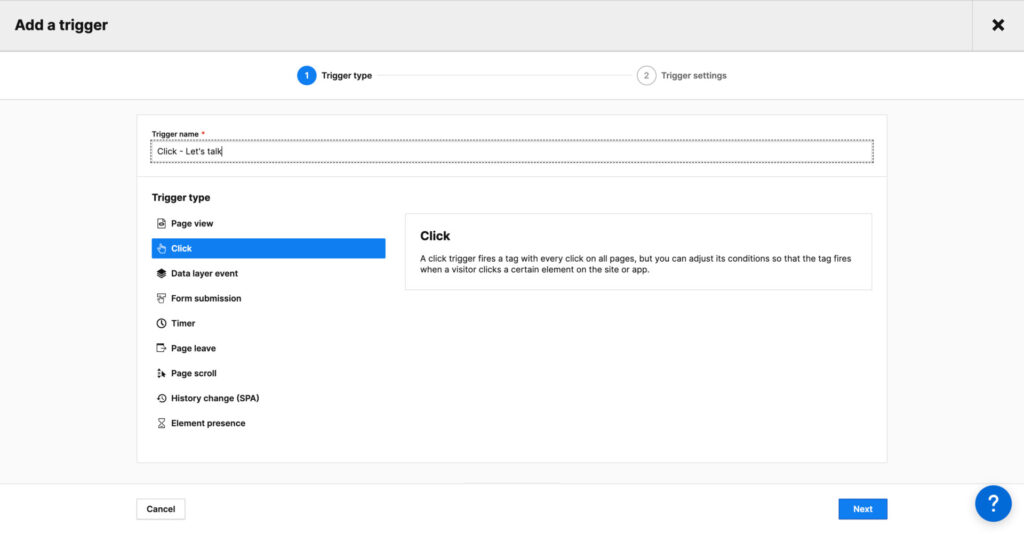
We can name our event the following way:
Next, we need to add the condition under which we want this tag to fire.
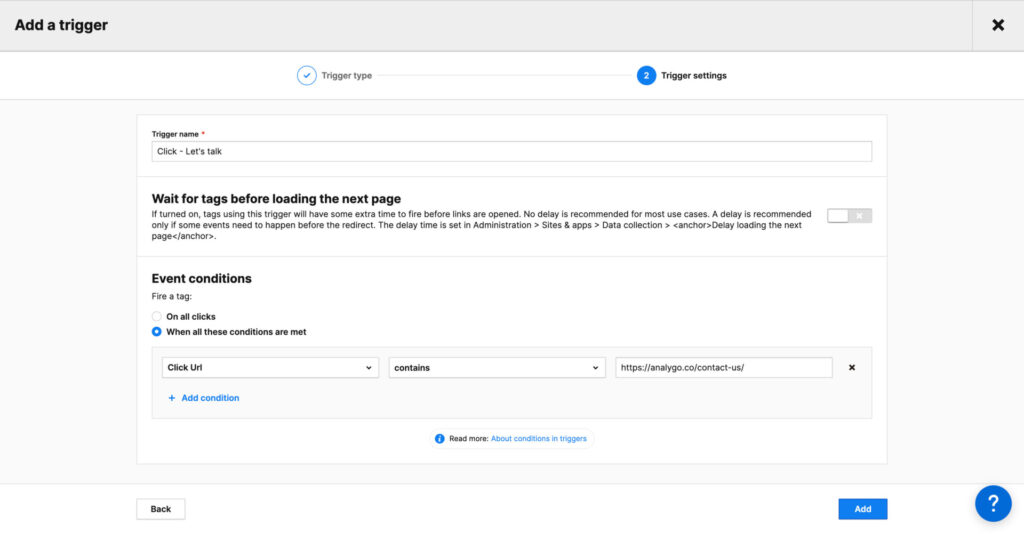
Once we are done, we can click “Add”. All that is left is to see if the tag is working by clicking on debug.
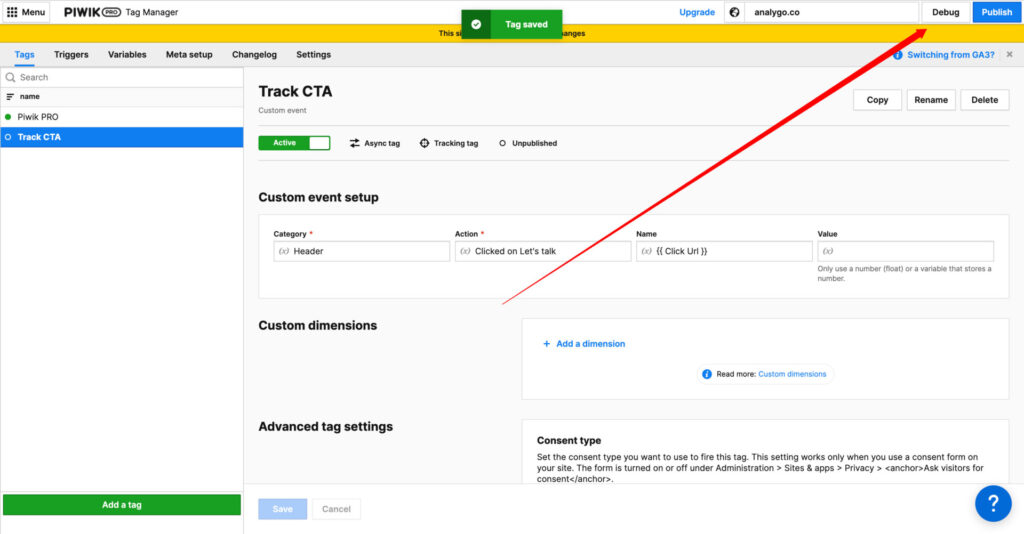
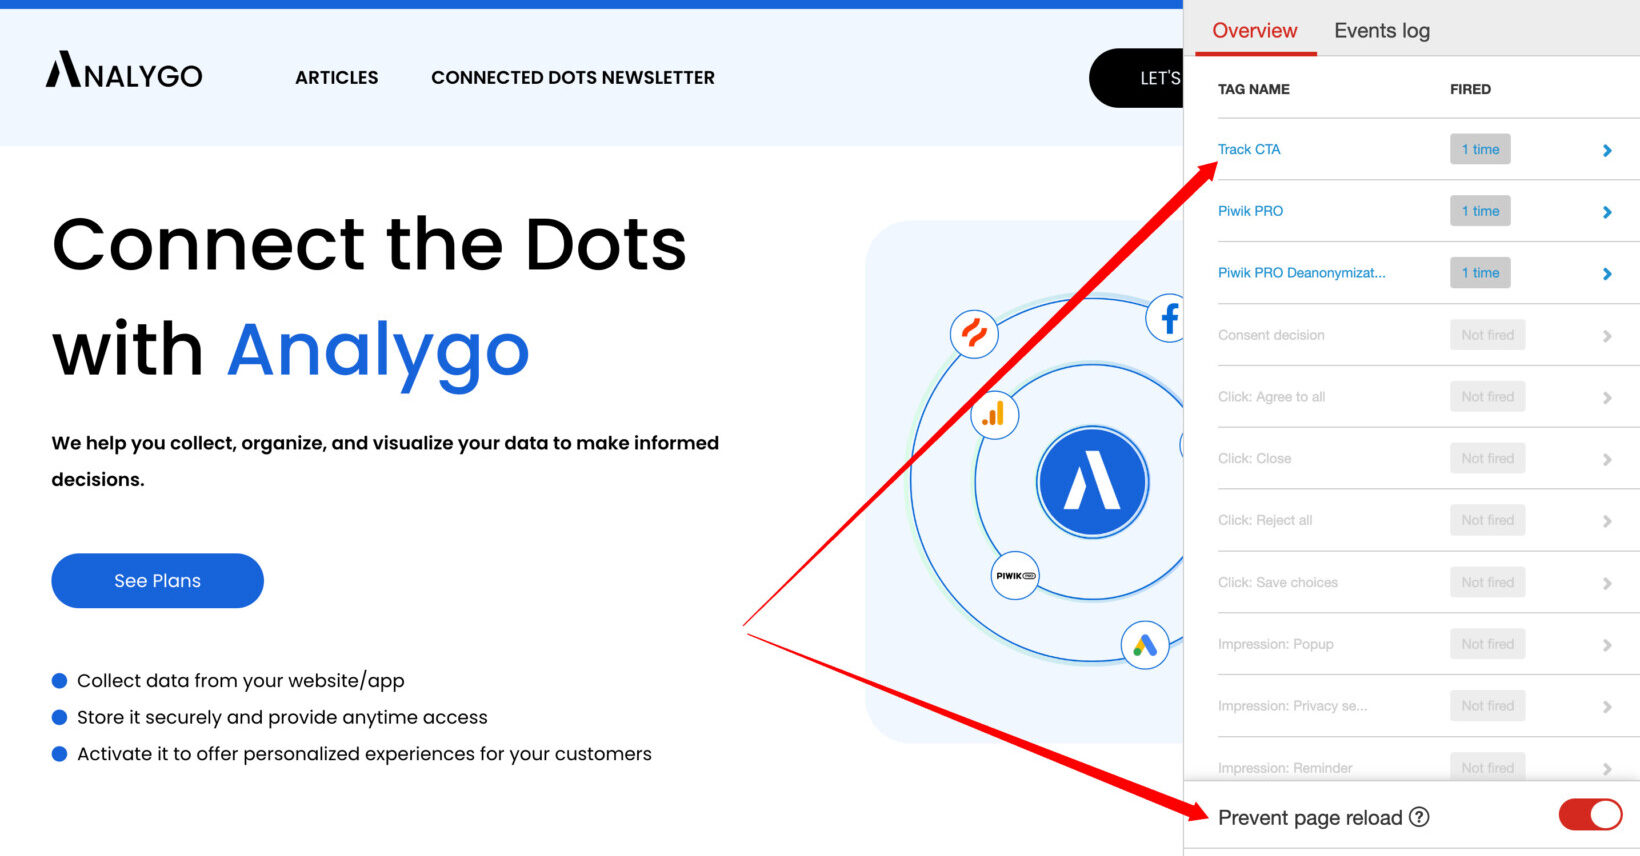
As you can see below, our tag is working properly when we click
Note
Make sure to toggle on “Prevent page reload” to test clicks and events that will cause your page to refresh. It makes it easier to debug events.
We can publish the container. When you browse to the debug mode, you can see the tag is working as expected.