We will walk you through how to set up consent mode v2 using CookieYes. The principles we will discuss apply however to whatever CMP you happen to use (and we plan to cover some popular ones in future articles 😉).
Add cookie banner to your Website
There are 2 ways to do this:
- Google Tag Manager: you use a template or plain HTML: tag to inject the cookie banner code.
- Inject code directly to the website: Paste the cookie banner code to your website’s
head(more on this later)
Google Tag Manager vs. Direct Script Injection To The Website
If you don’t have access to your website back-office for some reason, it’s fine to load the cookie banner via Google Tag Manager. But, if you can, add the code directly to your website as GTM is not always guaranteed to load, but your banner should be displayed no matter what.
We will cover both methods in this article.
Add CookieYes with Google Tag Manager
Step #1: Add CookieYes tag template to your workspace
Go to Google Tag Manager’s tags library and search for CookieYes.
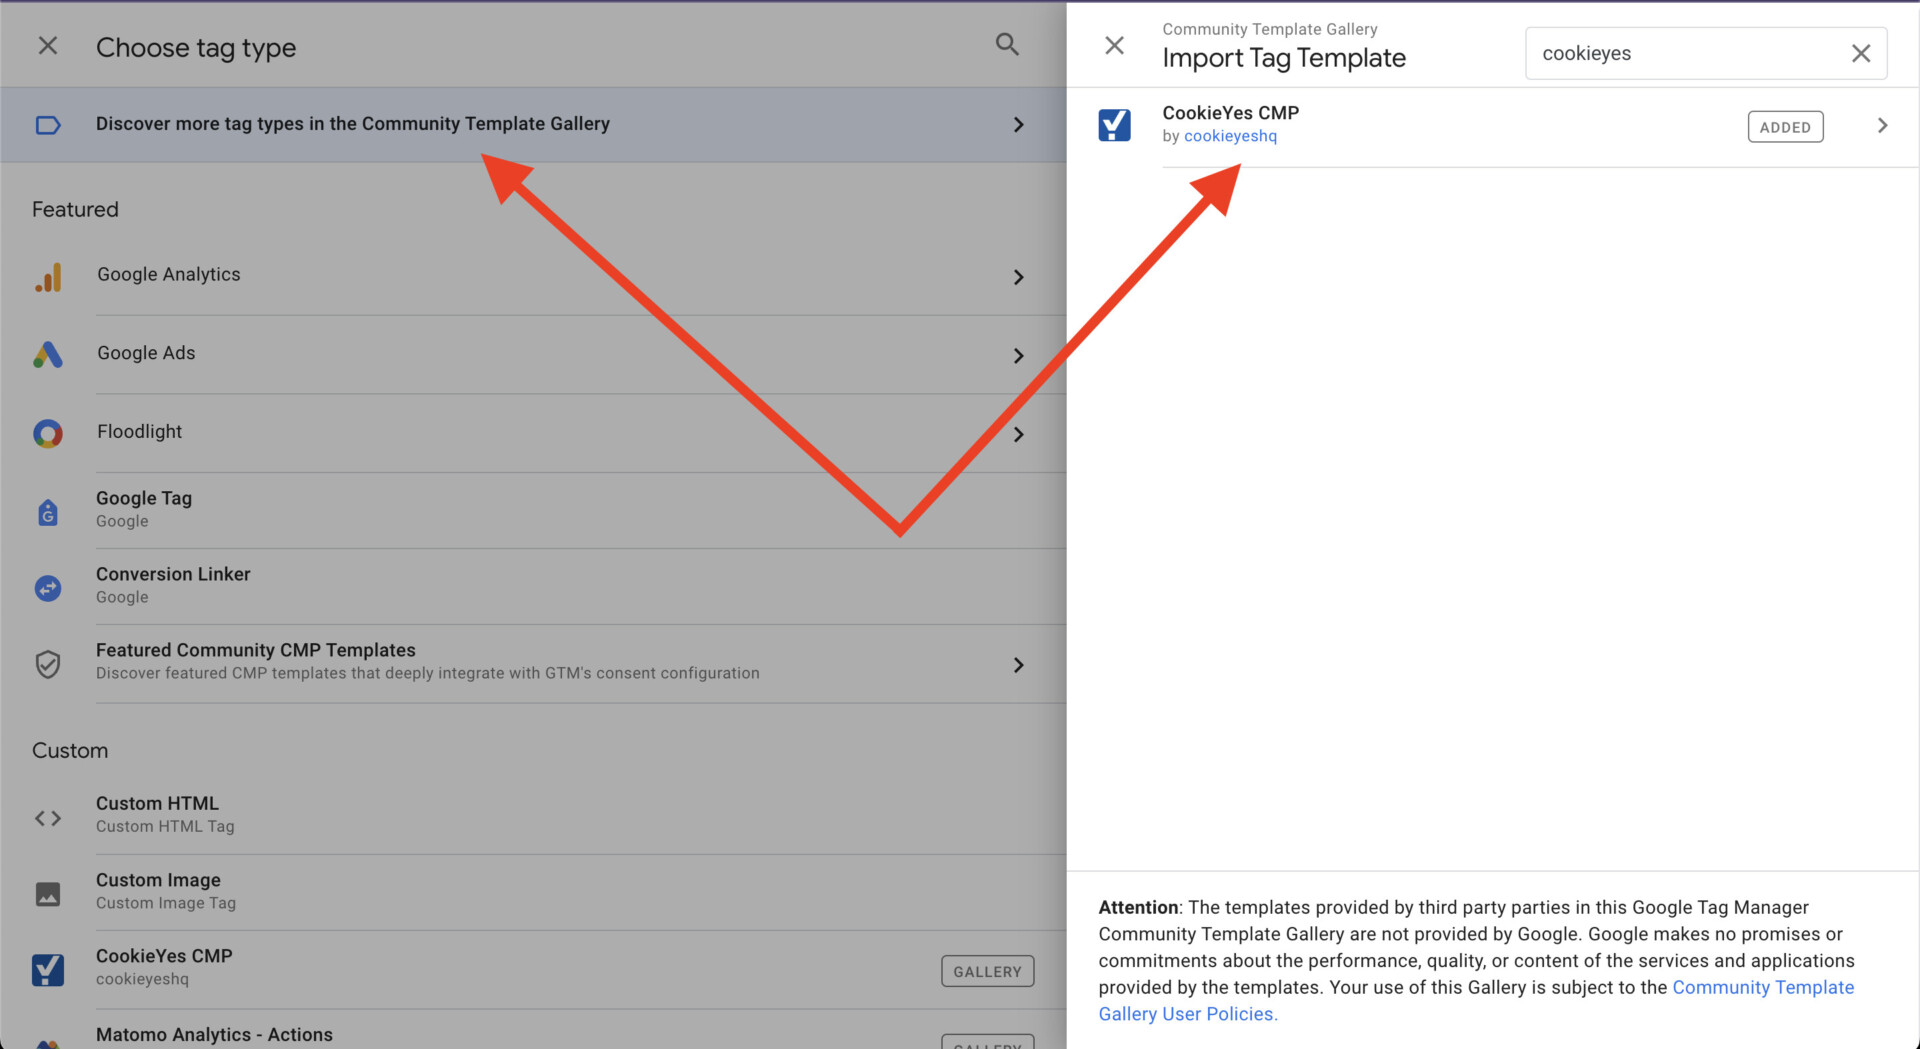

Next, we need to get our CookieYes Key before configuring the tag template.
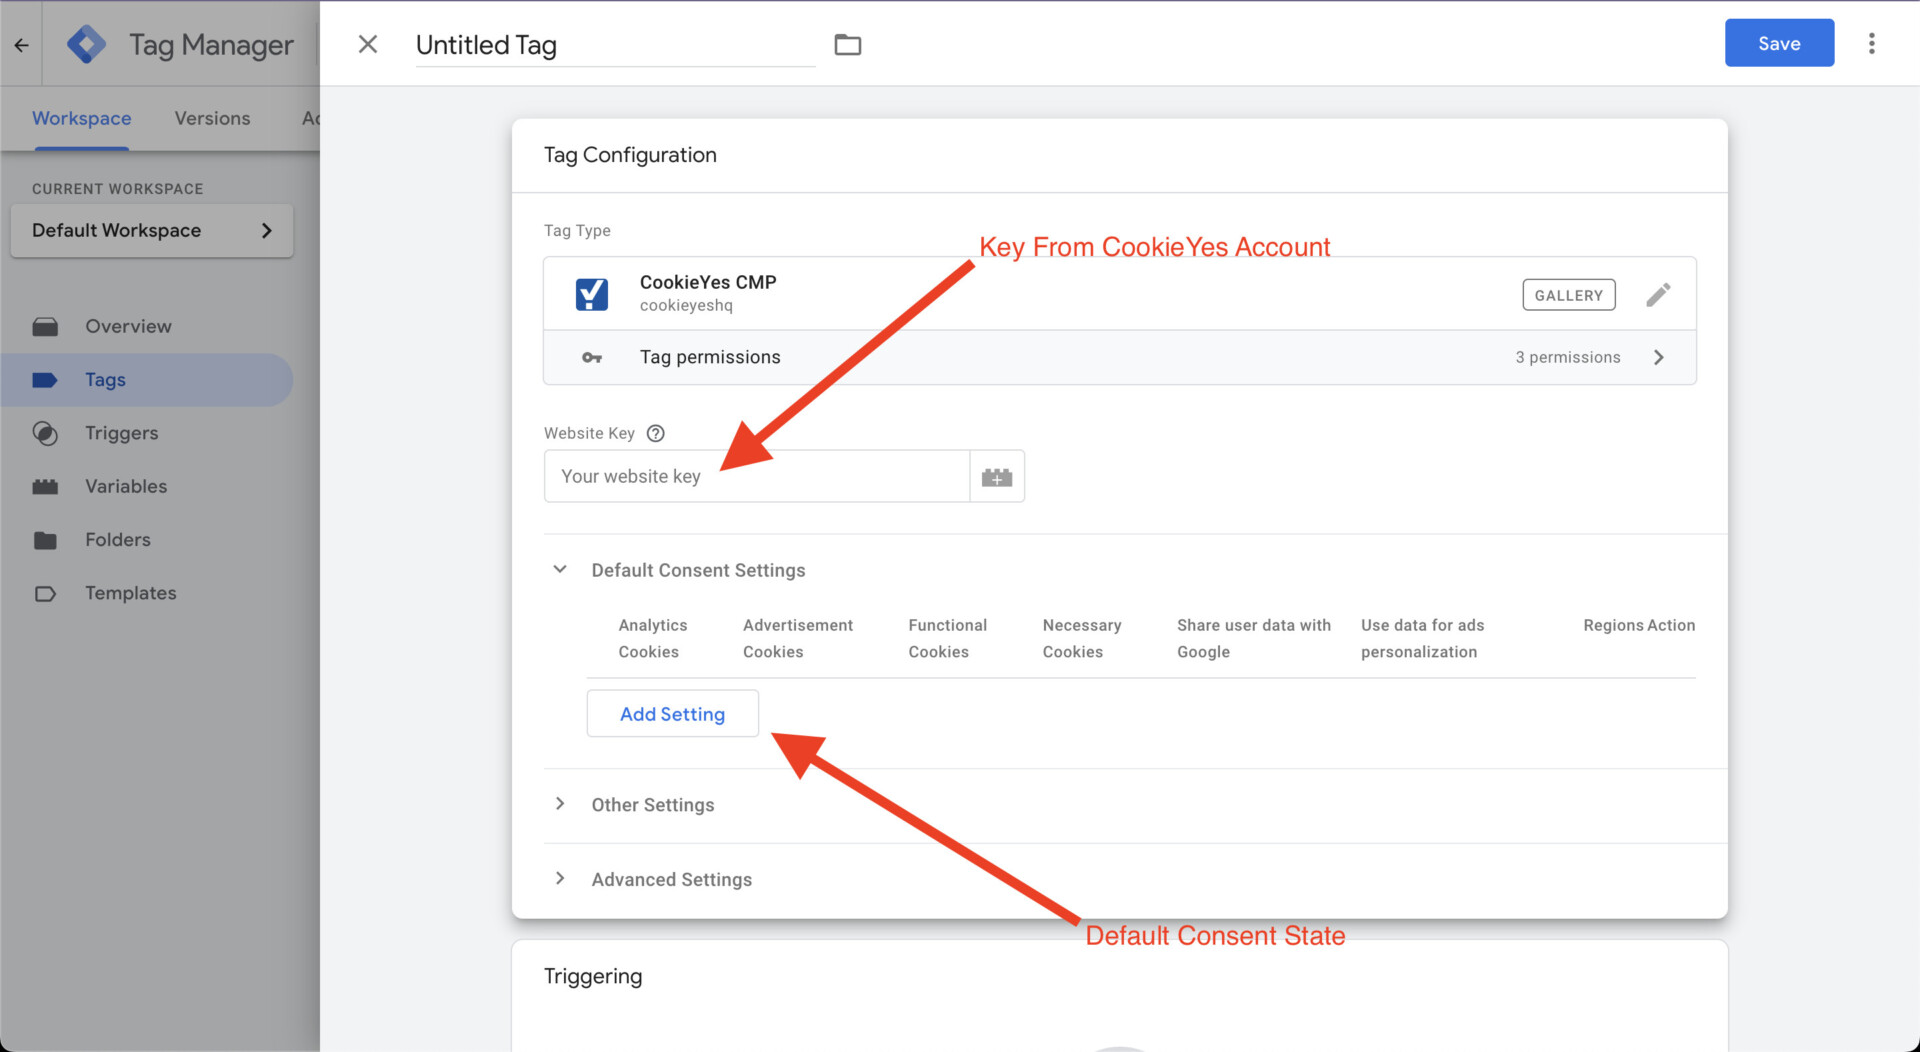

Step 2#: Get CookieYes Key and enable consent mode V2
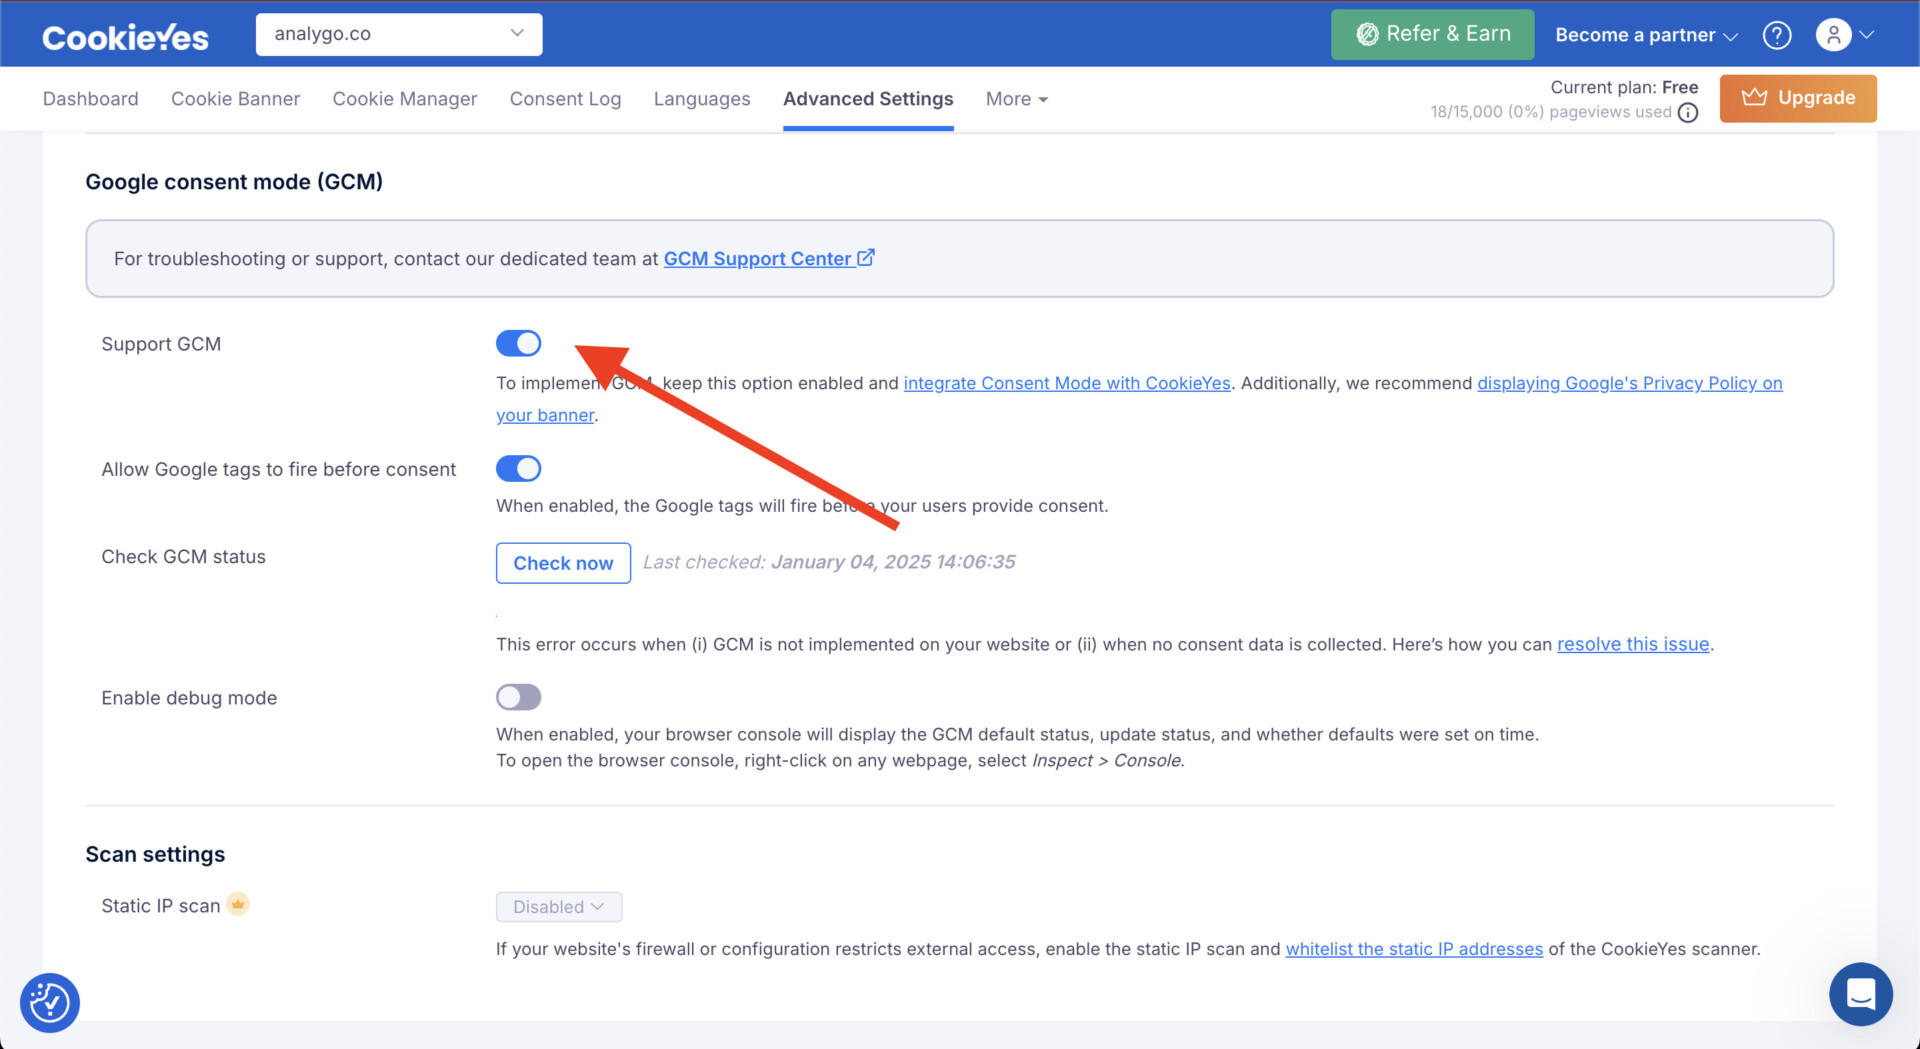
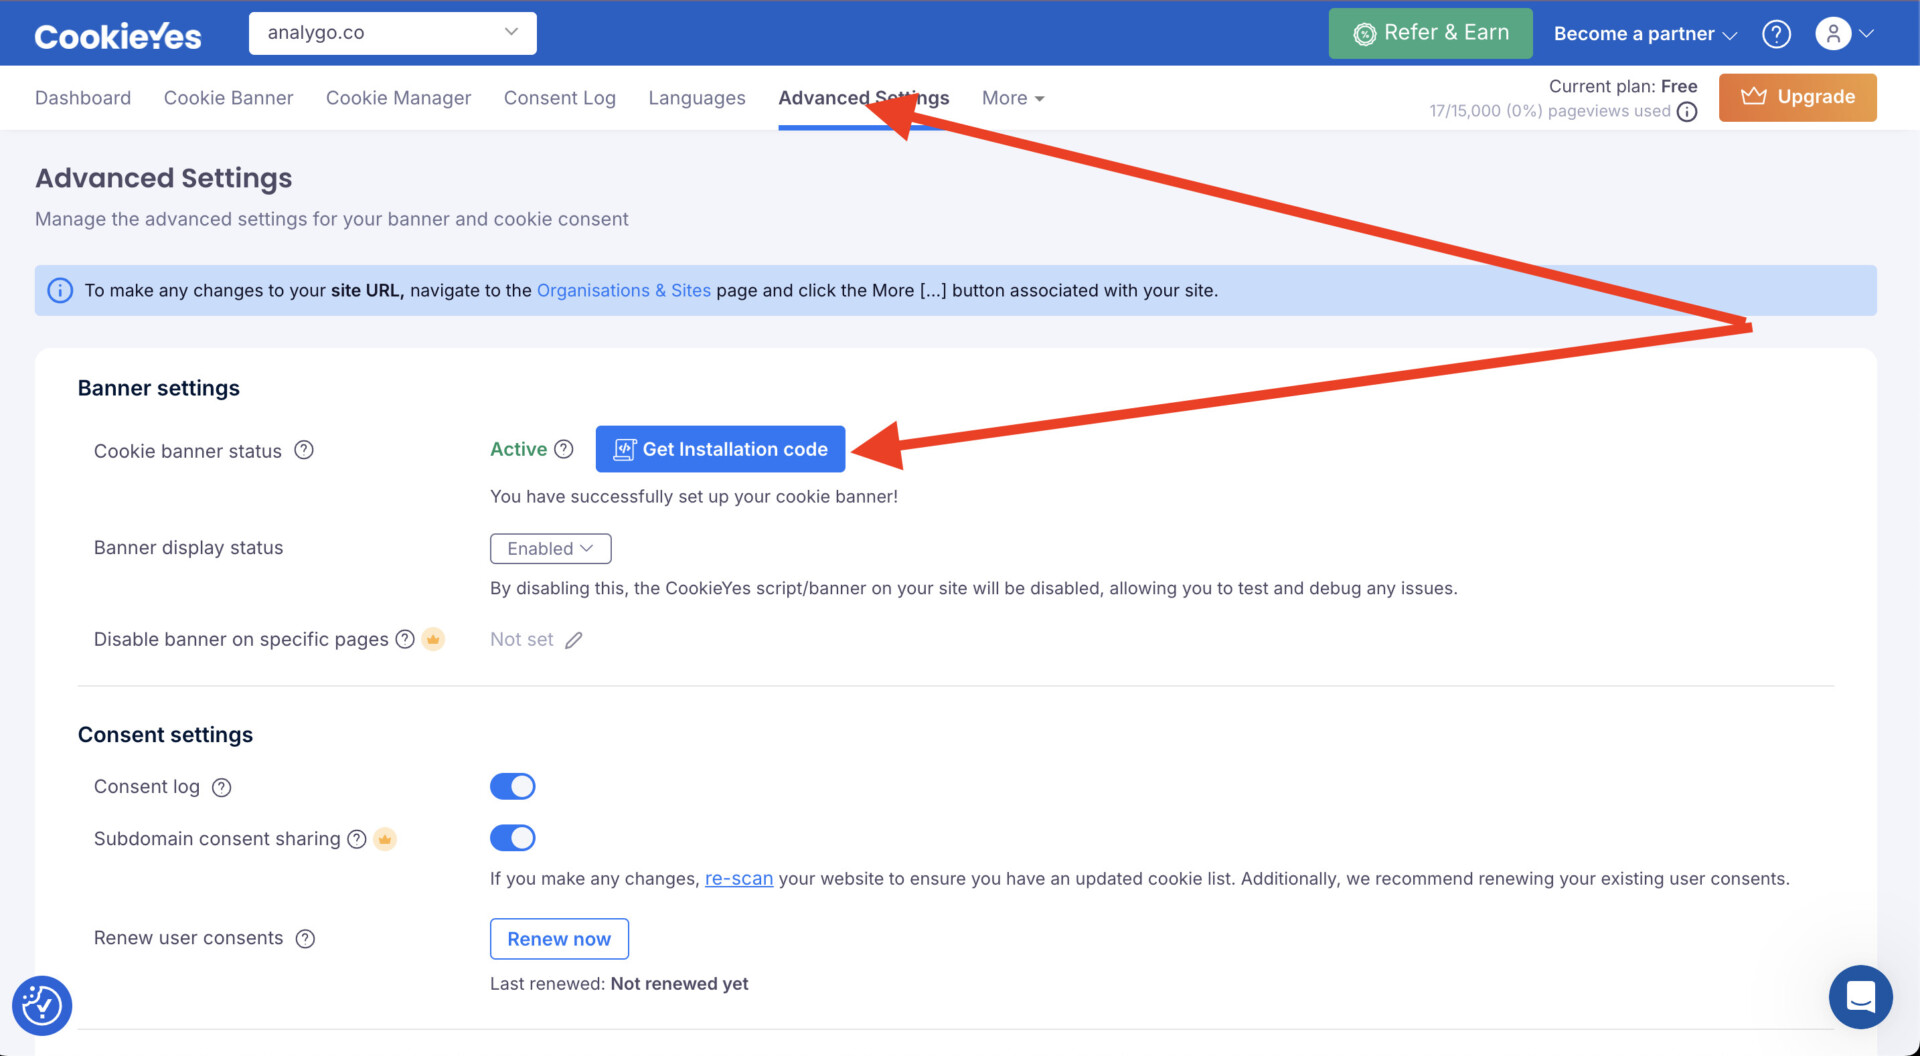
Let’s fetch our key from the UI. In CookieYes, browse to Advanced Settings and click on Get Installation code. Also, make sure that Support GCM toggle is enabled.
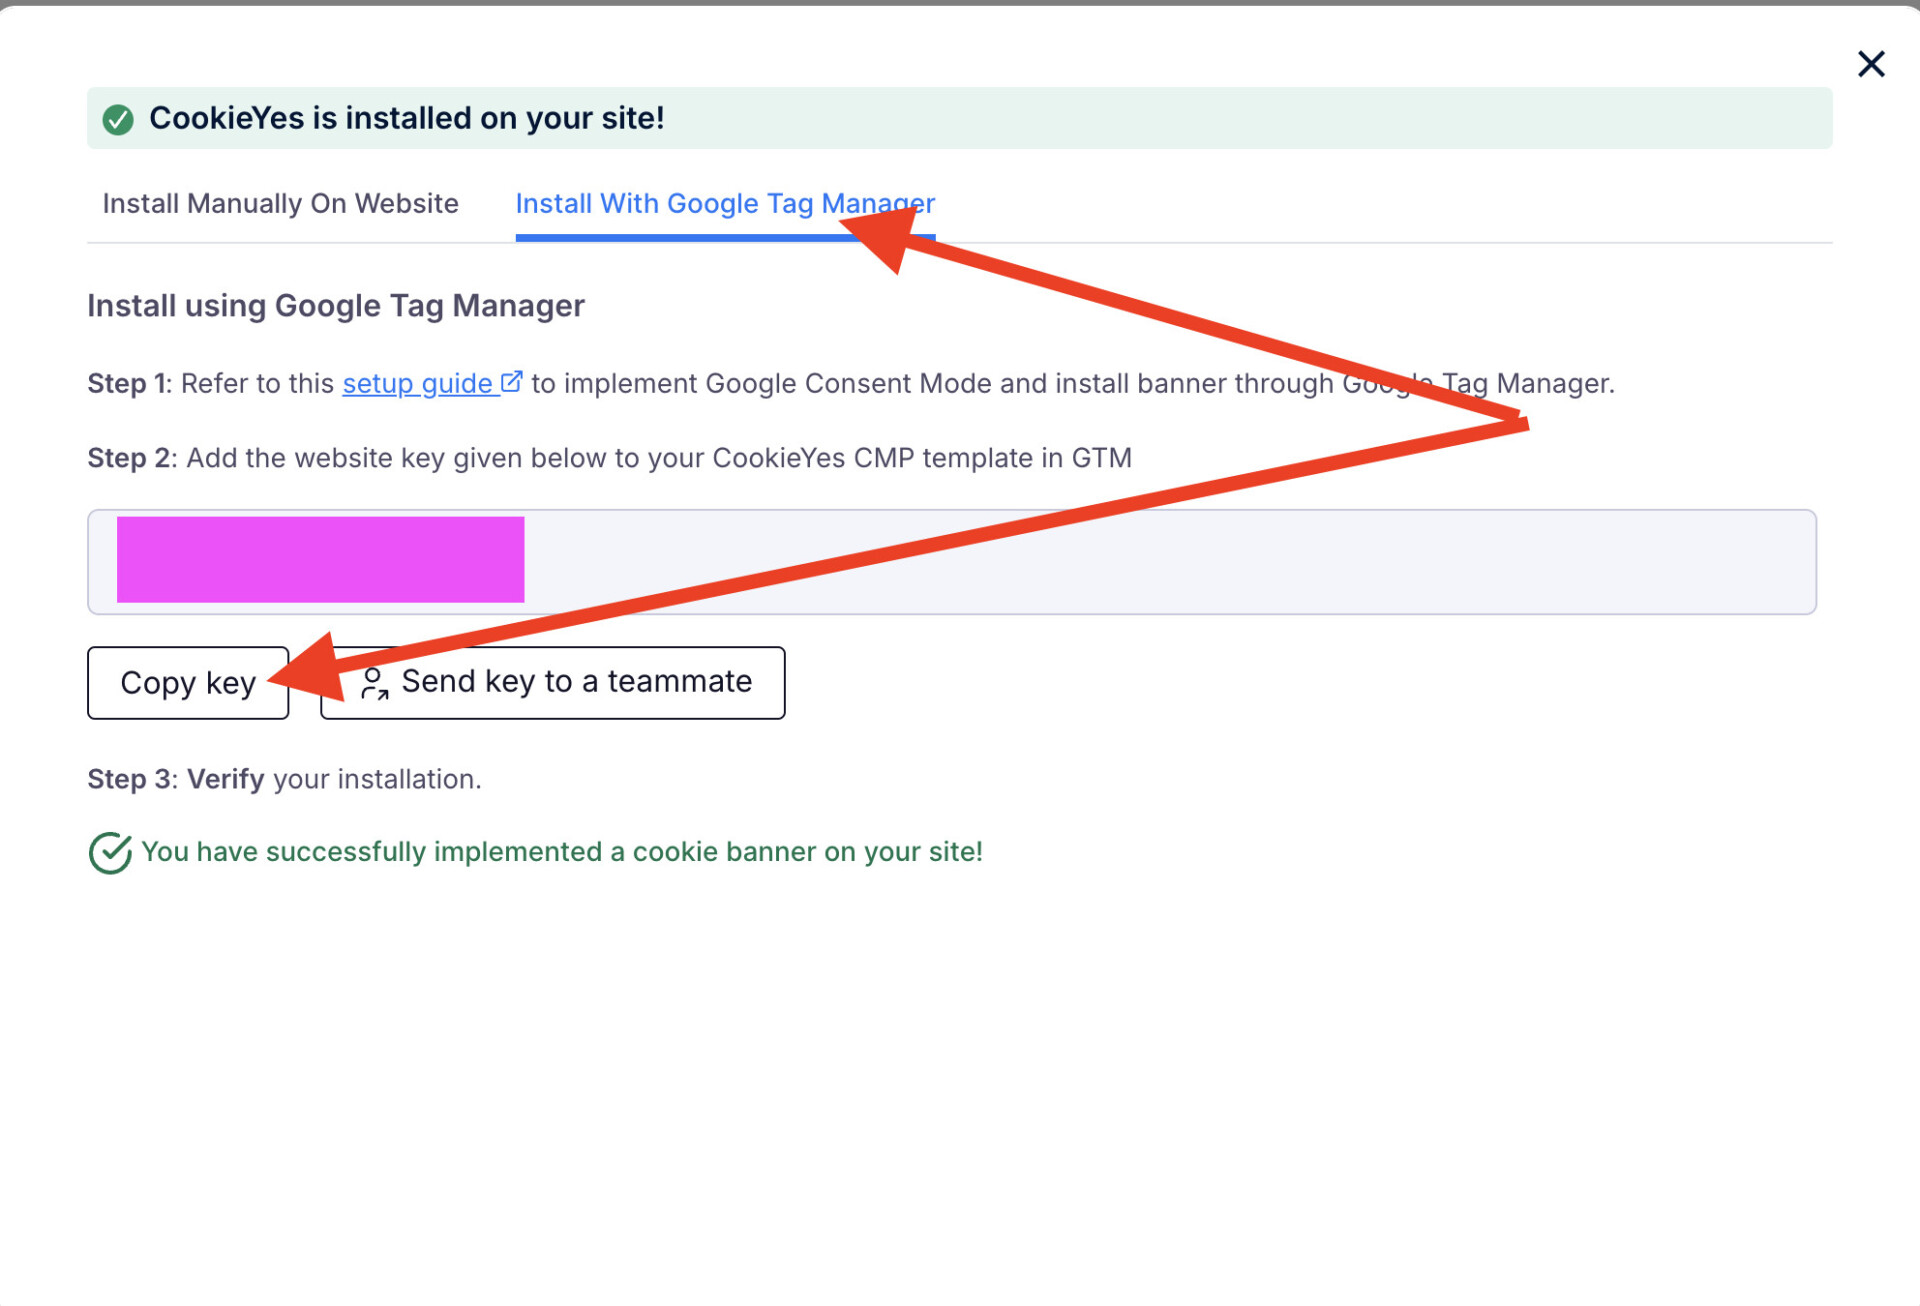


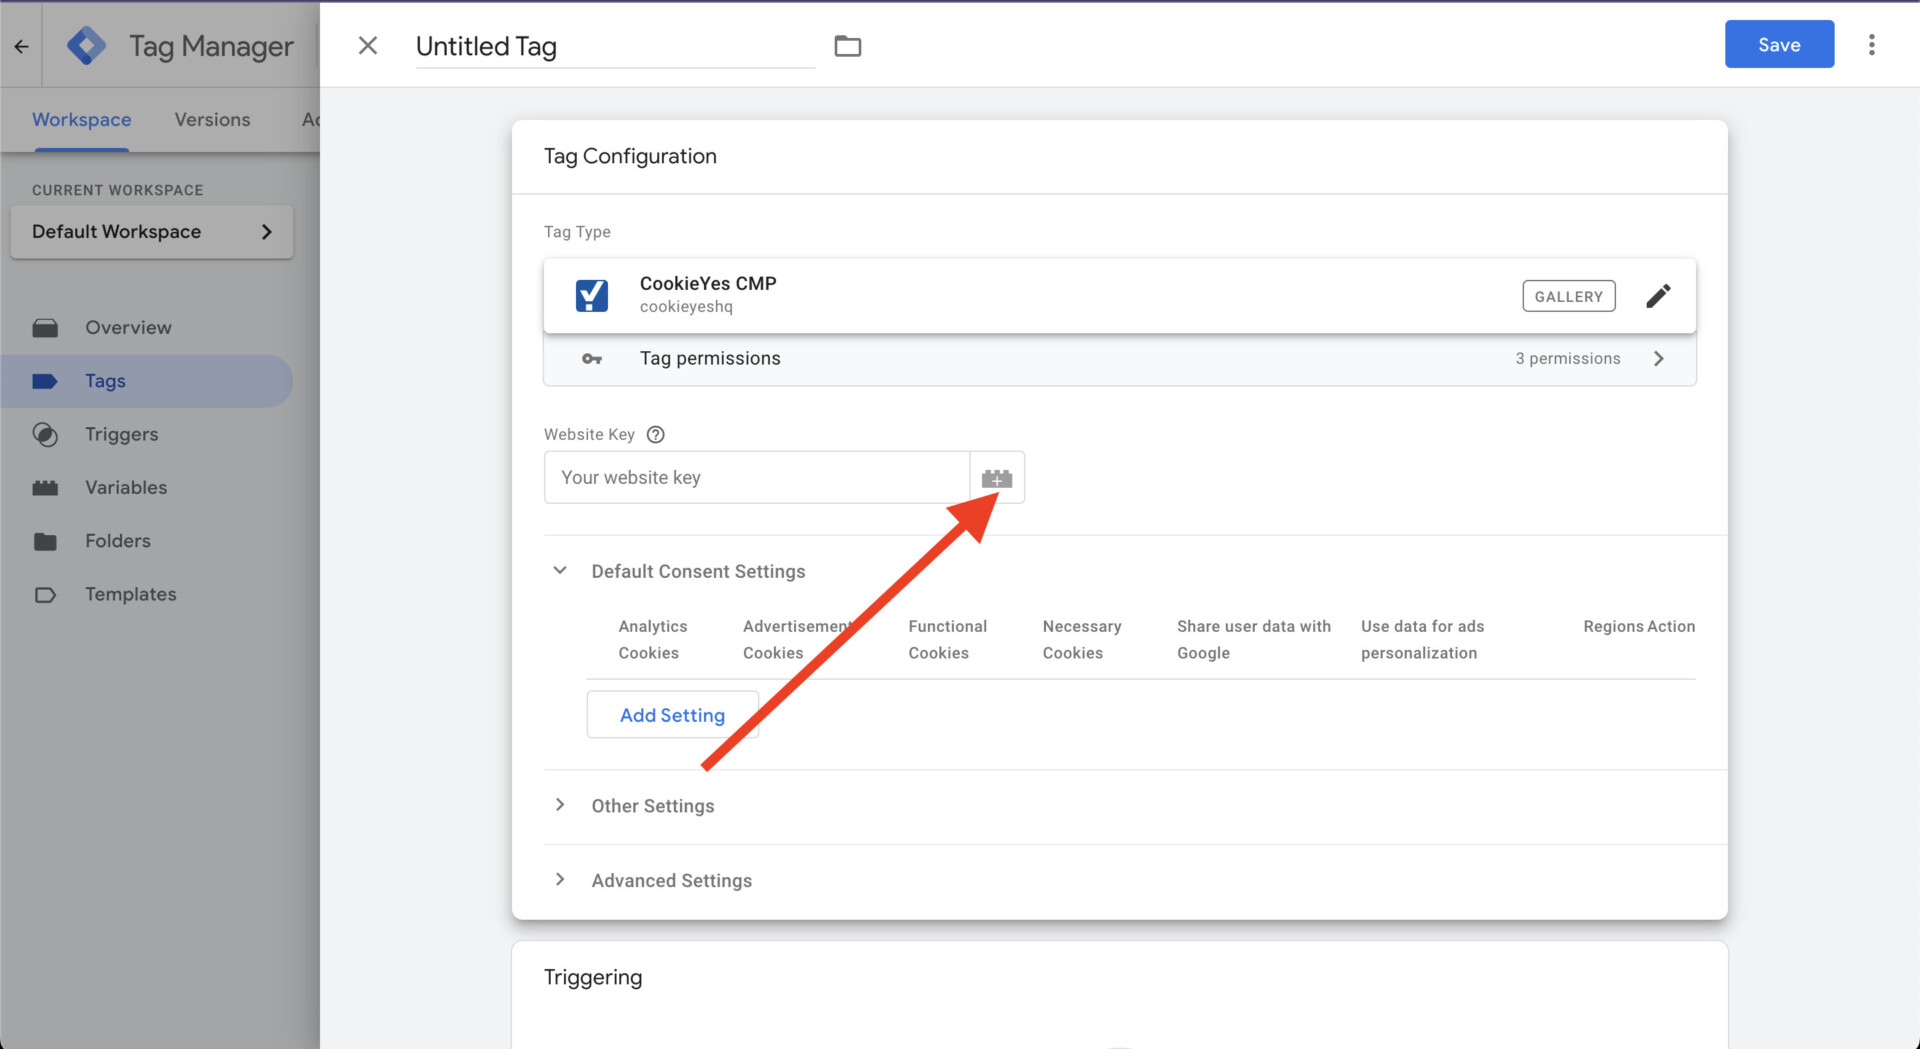
Next, let’s go back to Google Tag Manager and paste the Key.
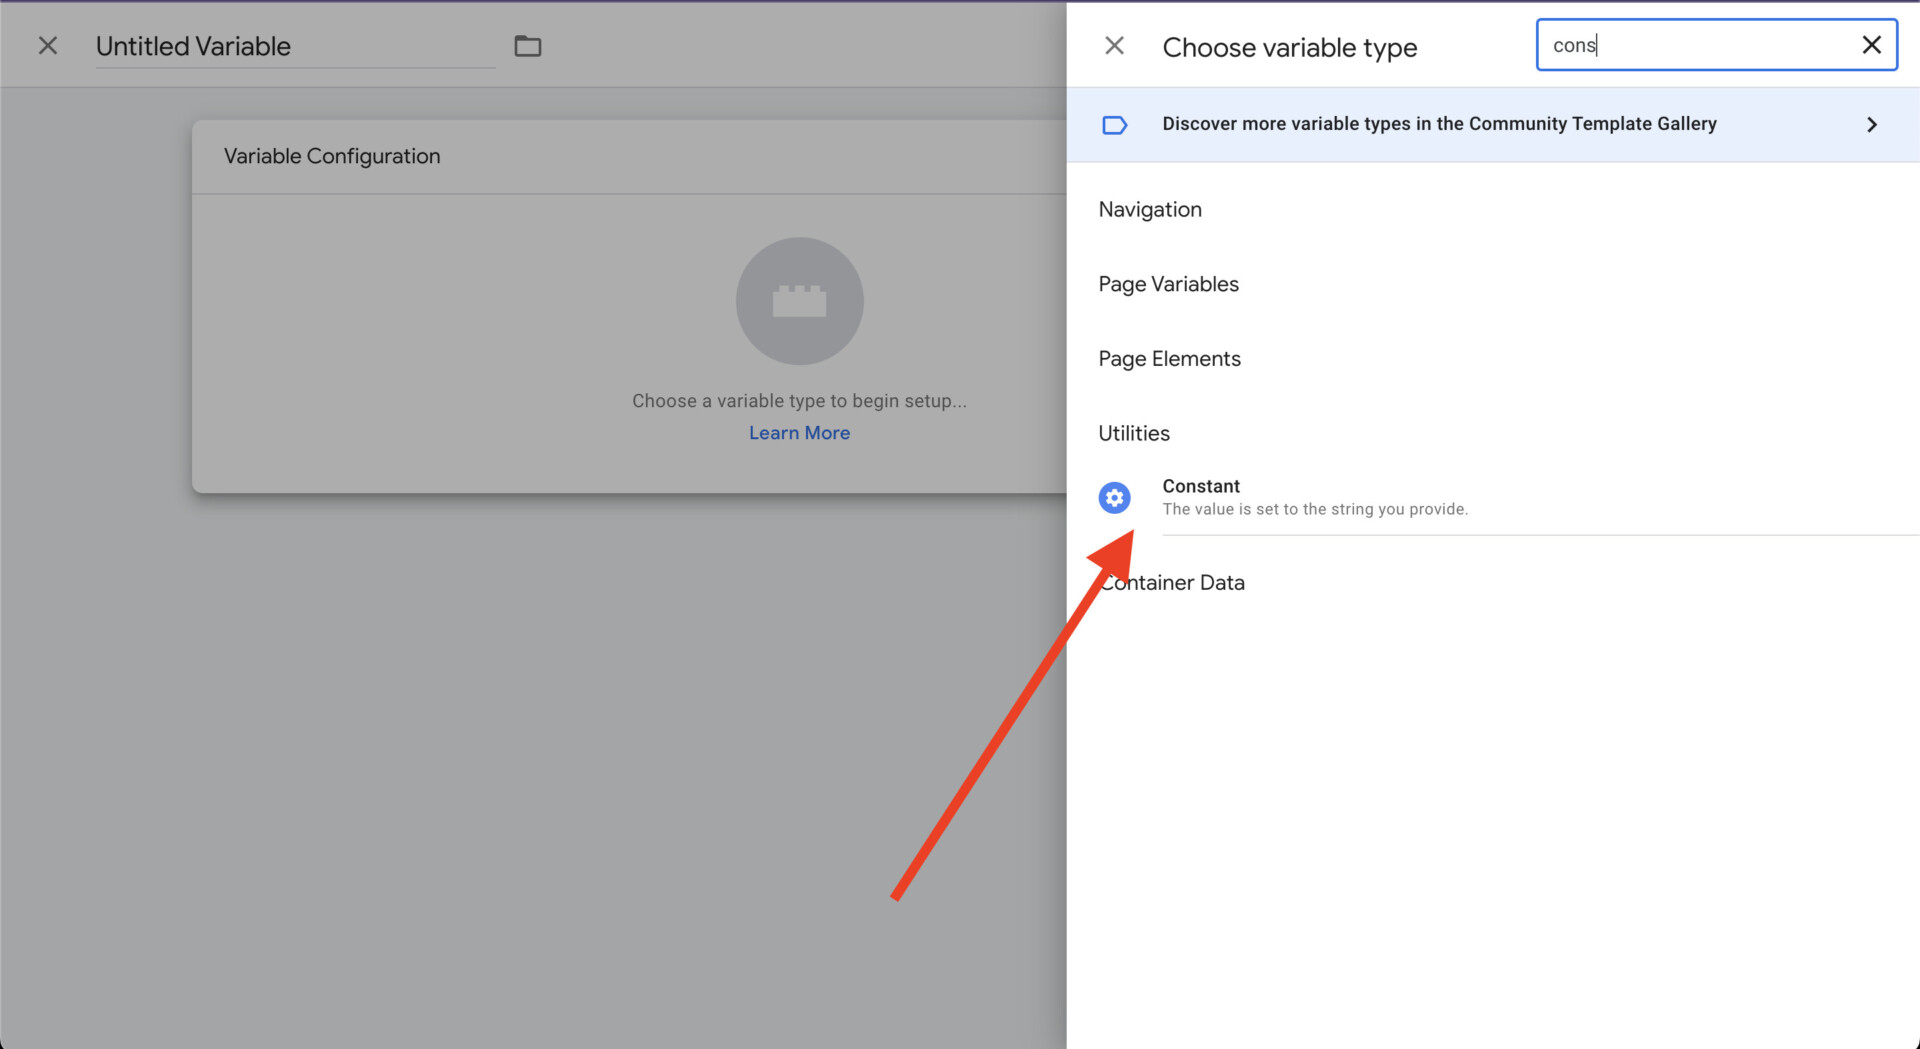
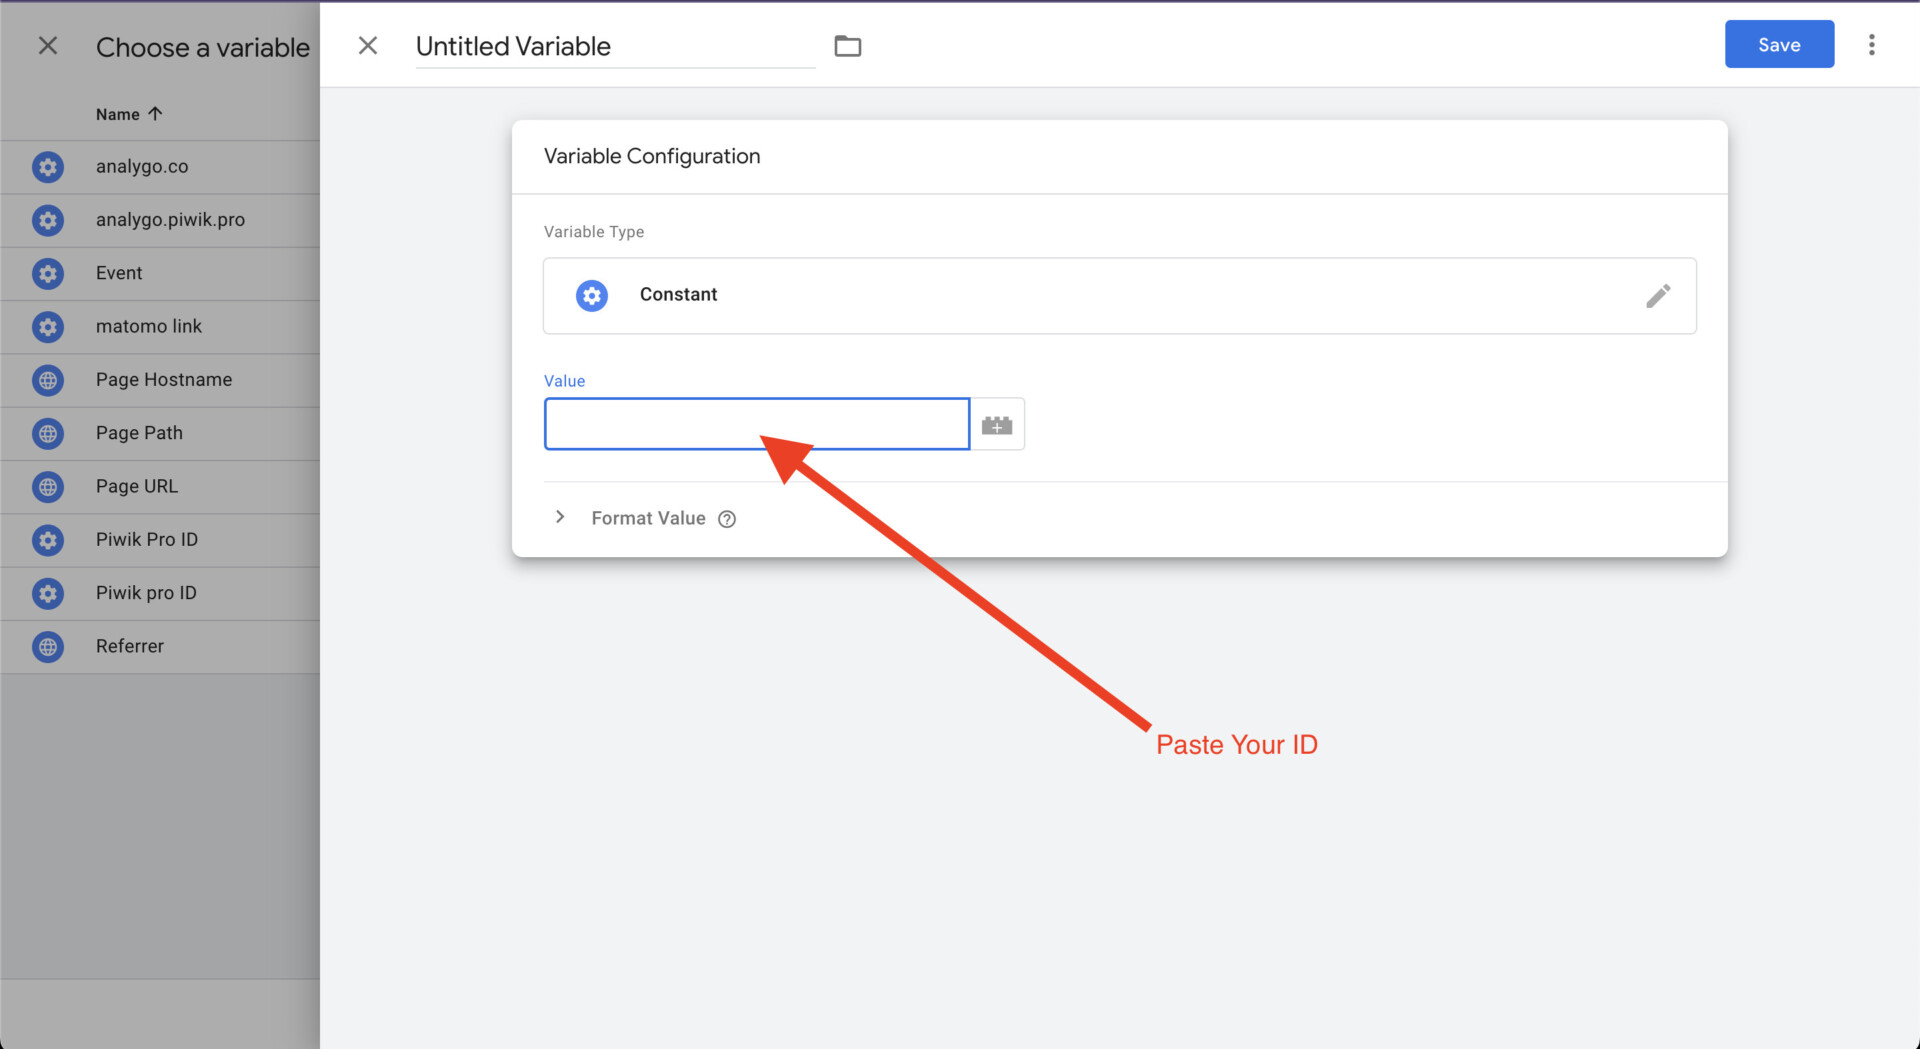
Always Use Constants
Use a constant to save ID’s This way to minimize chances of accidentally copying the wrong ID. Also, making any future chances becomes easier.


Step 3#: Set default consent state and trigger
In the tag template, click on Add Setting.
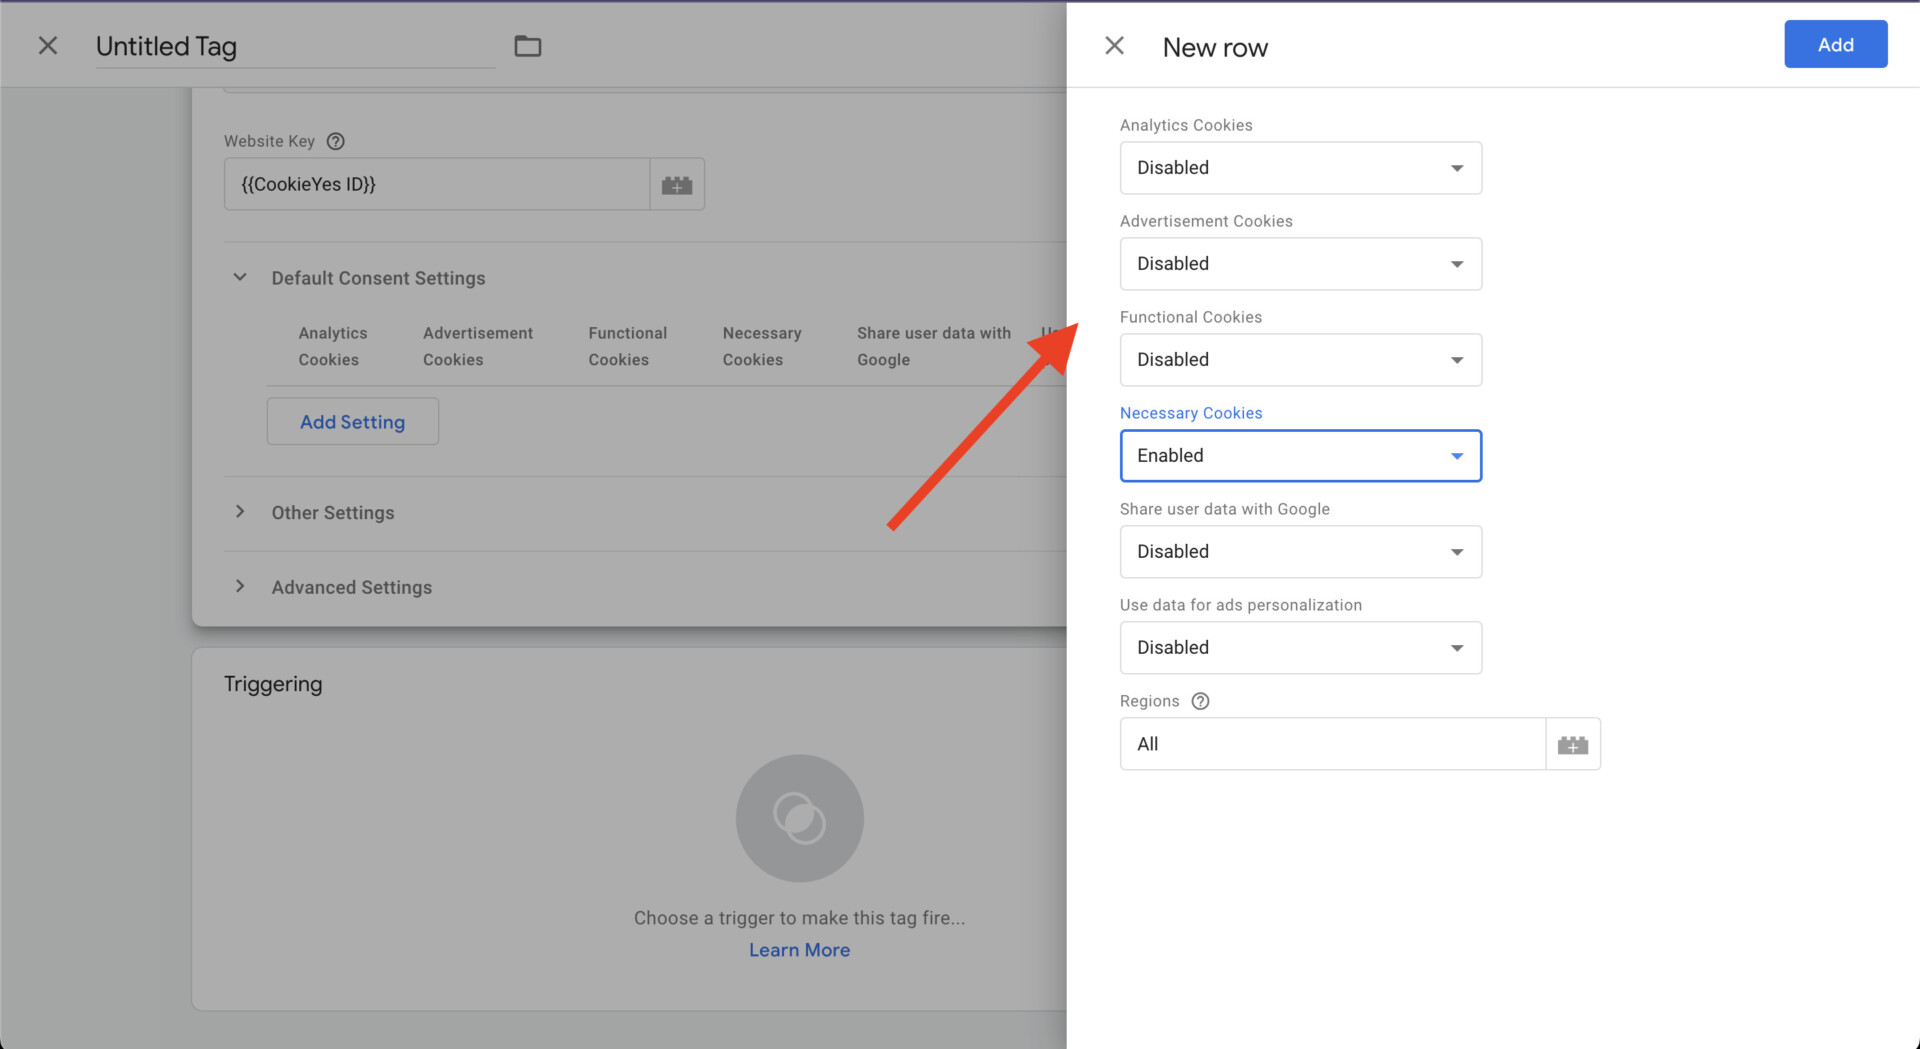
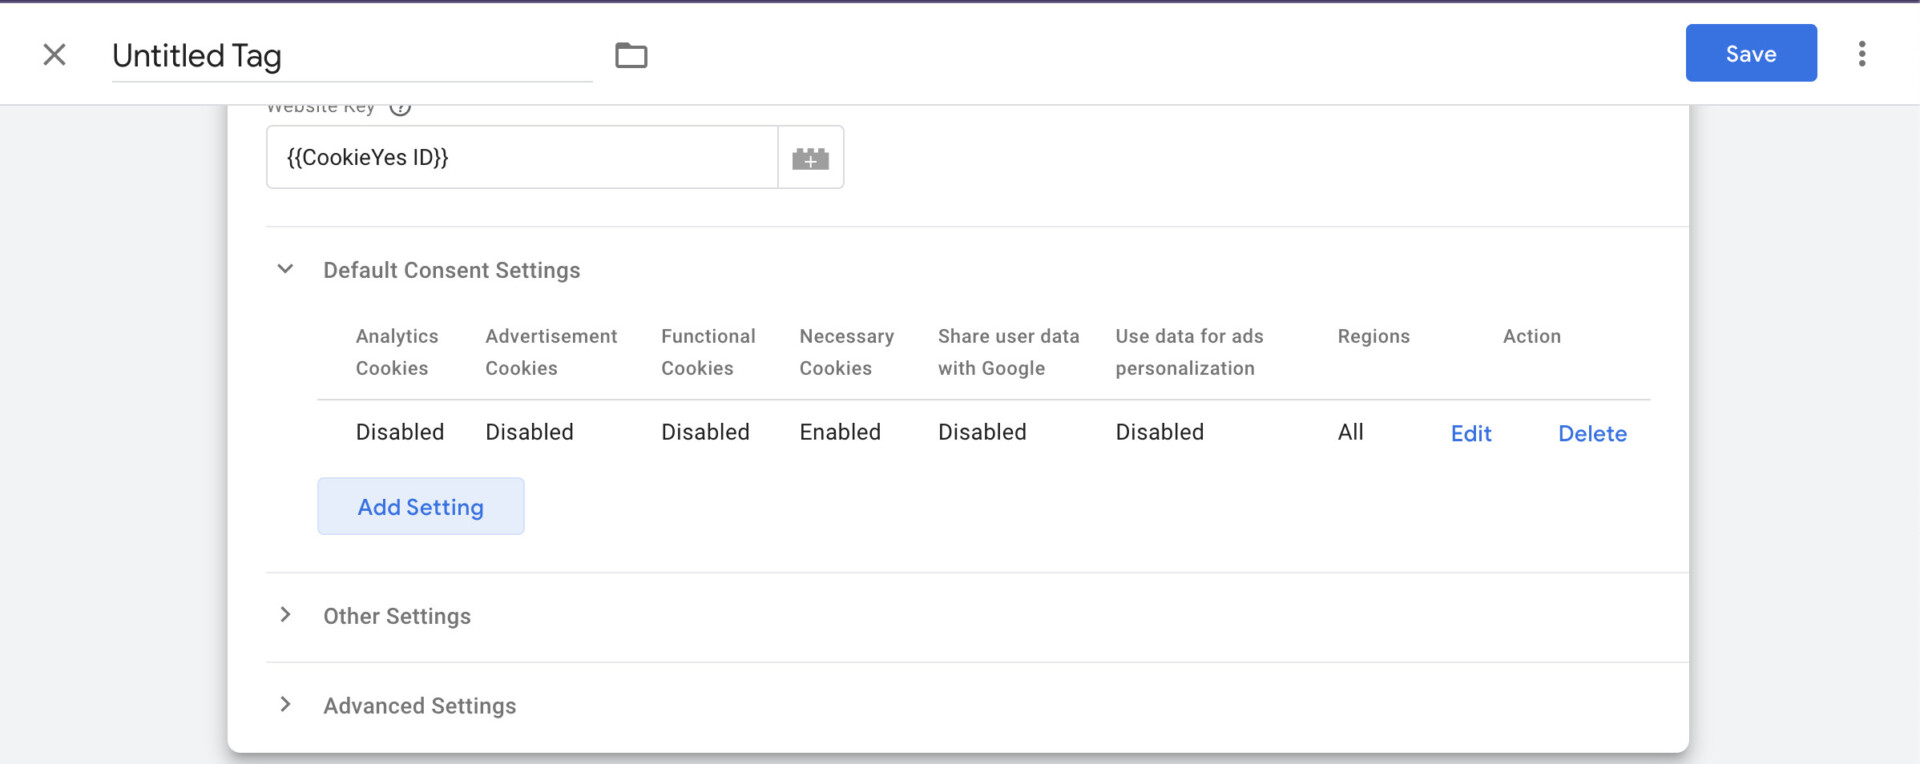


⚠️ Set Default Consent To Denied
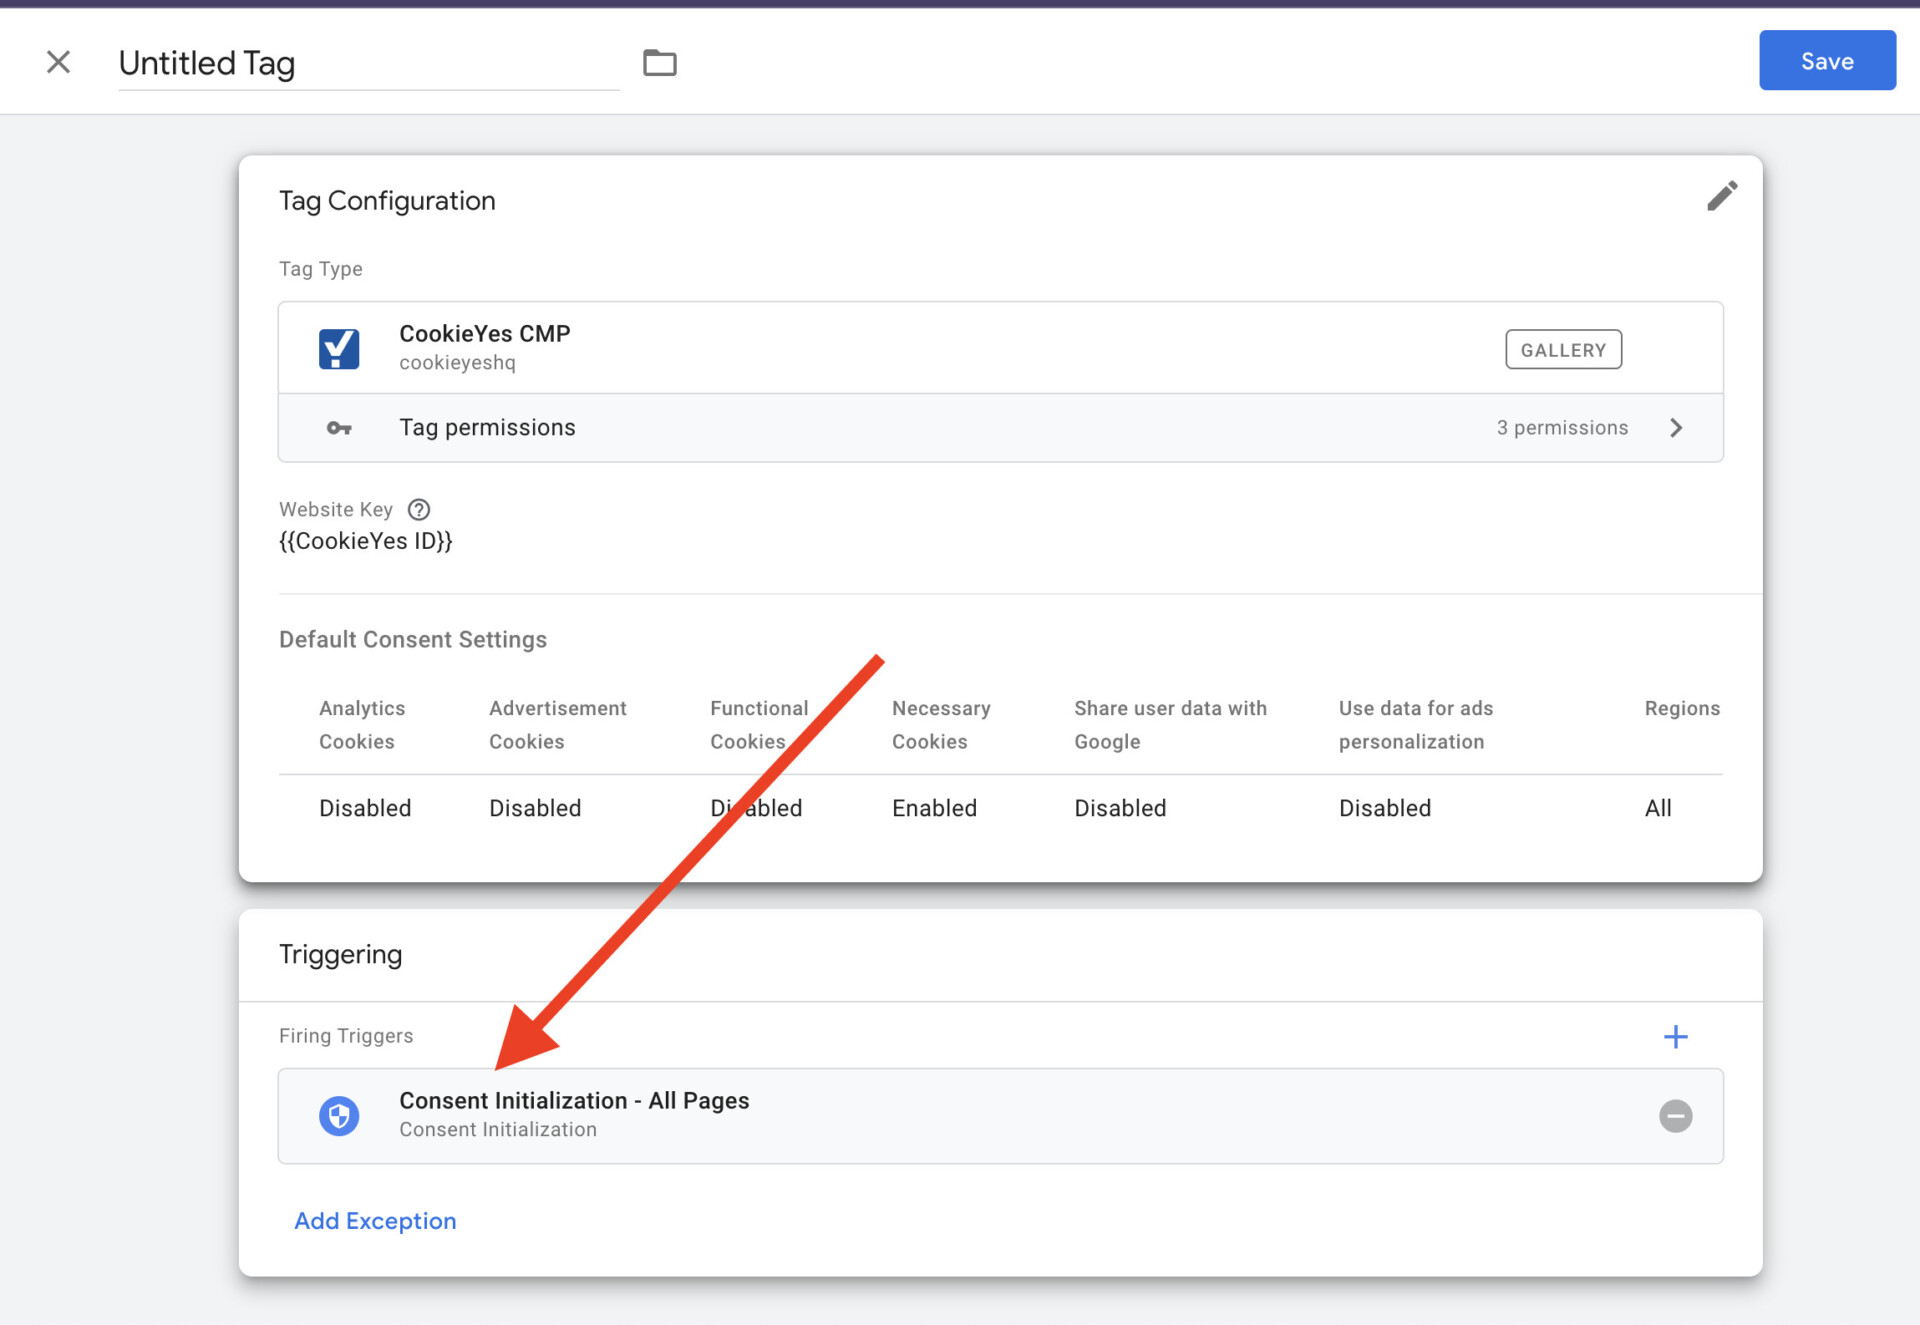
In most cases, you should keep the default consent state set to “denied” unless your legal team advises otherwise, especially if your company operates in a region with less strict regulations.
For the trigger, make sure to select Consent Initialization trigger. The cookie banner should load before marketing tags to set consent defaults.

Step #4: testing the cookie banner
Let’s close our tag and preview our Google Tag Manager workspace.
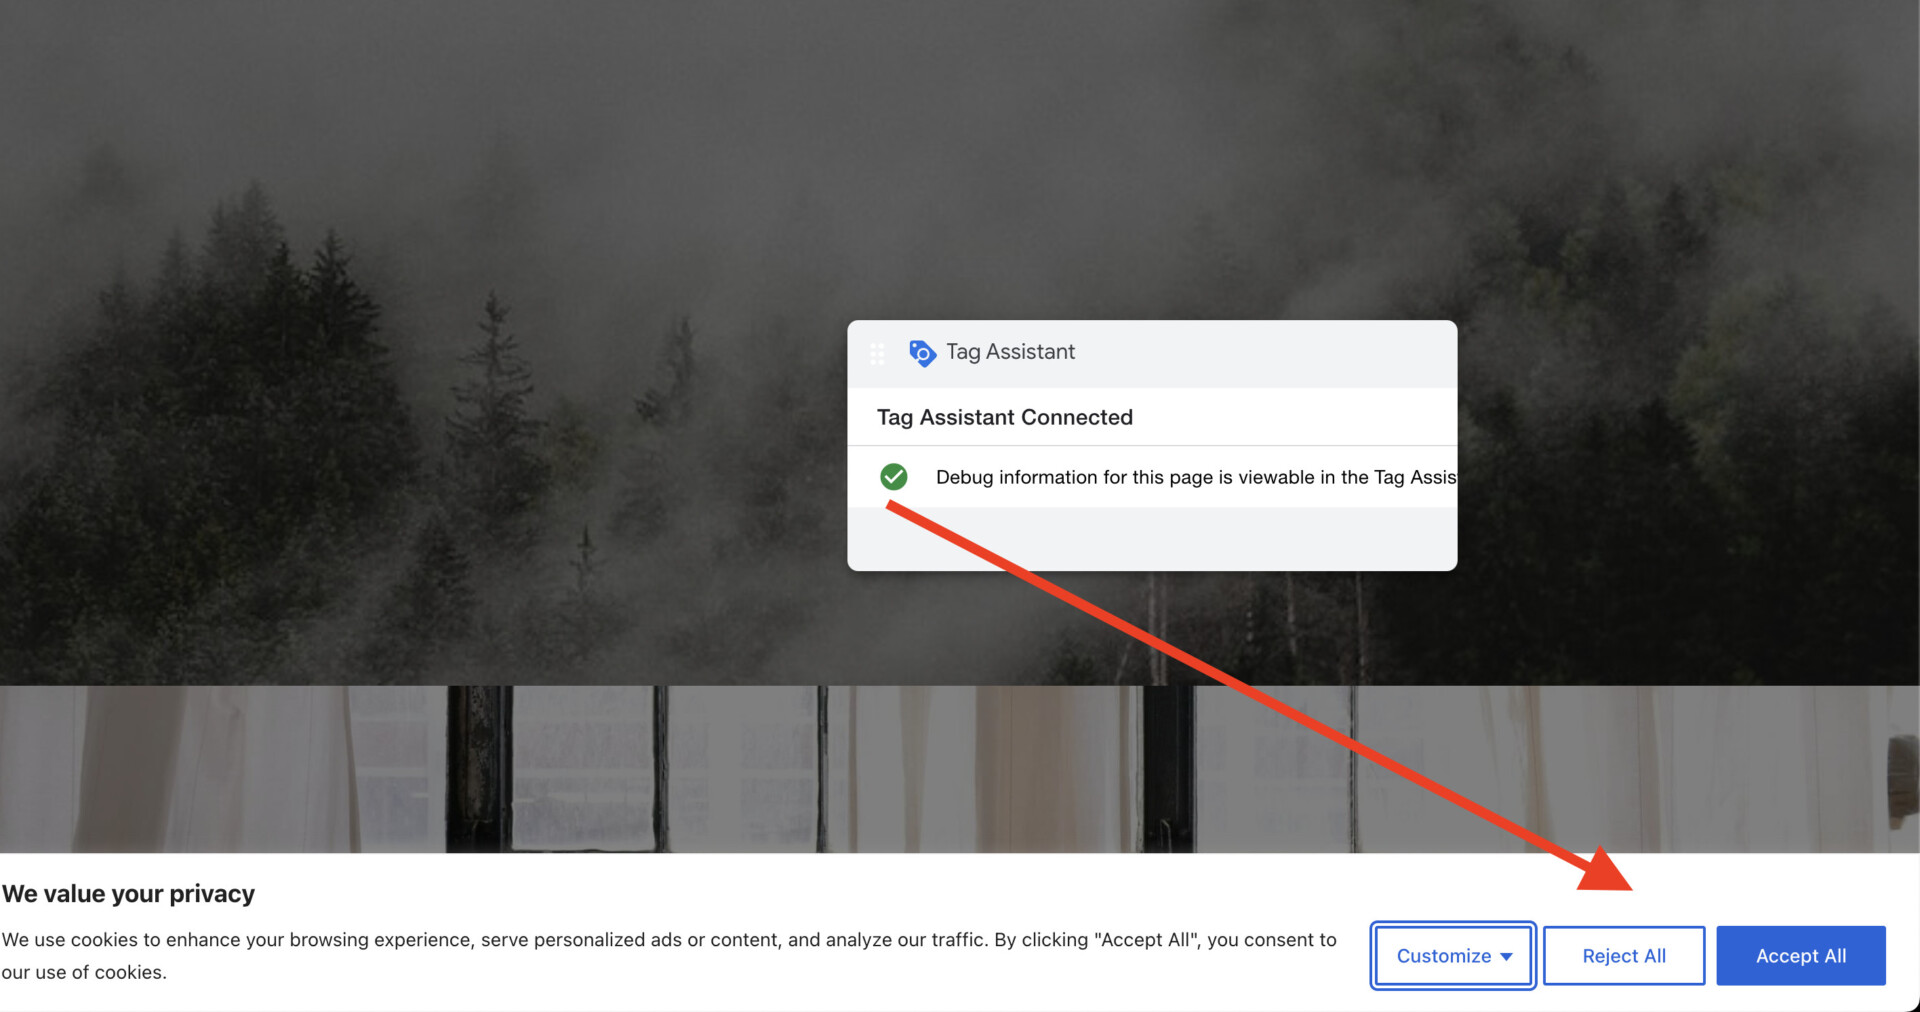
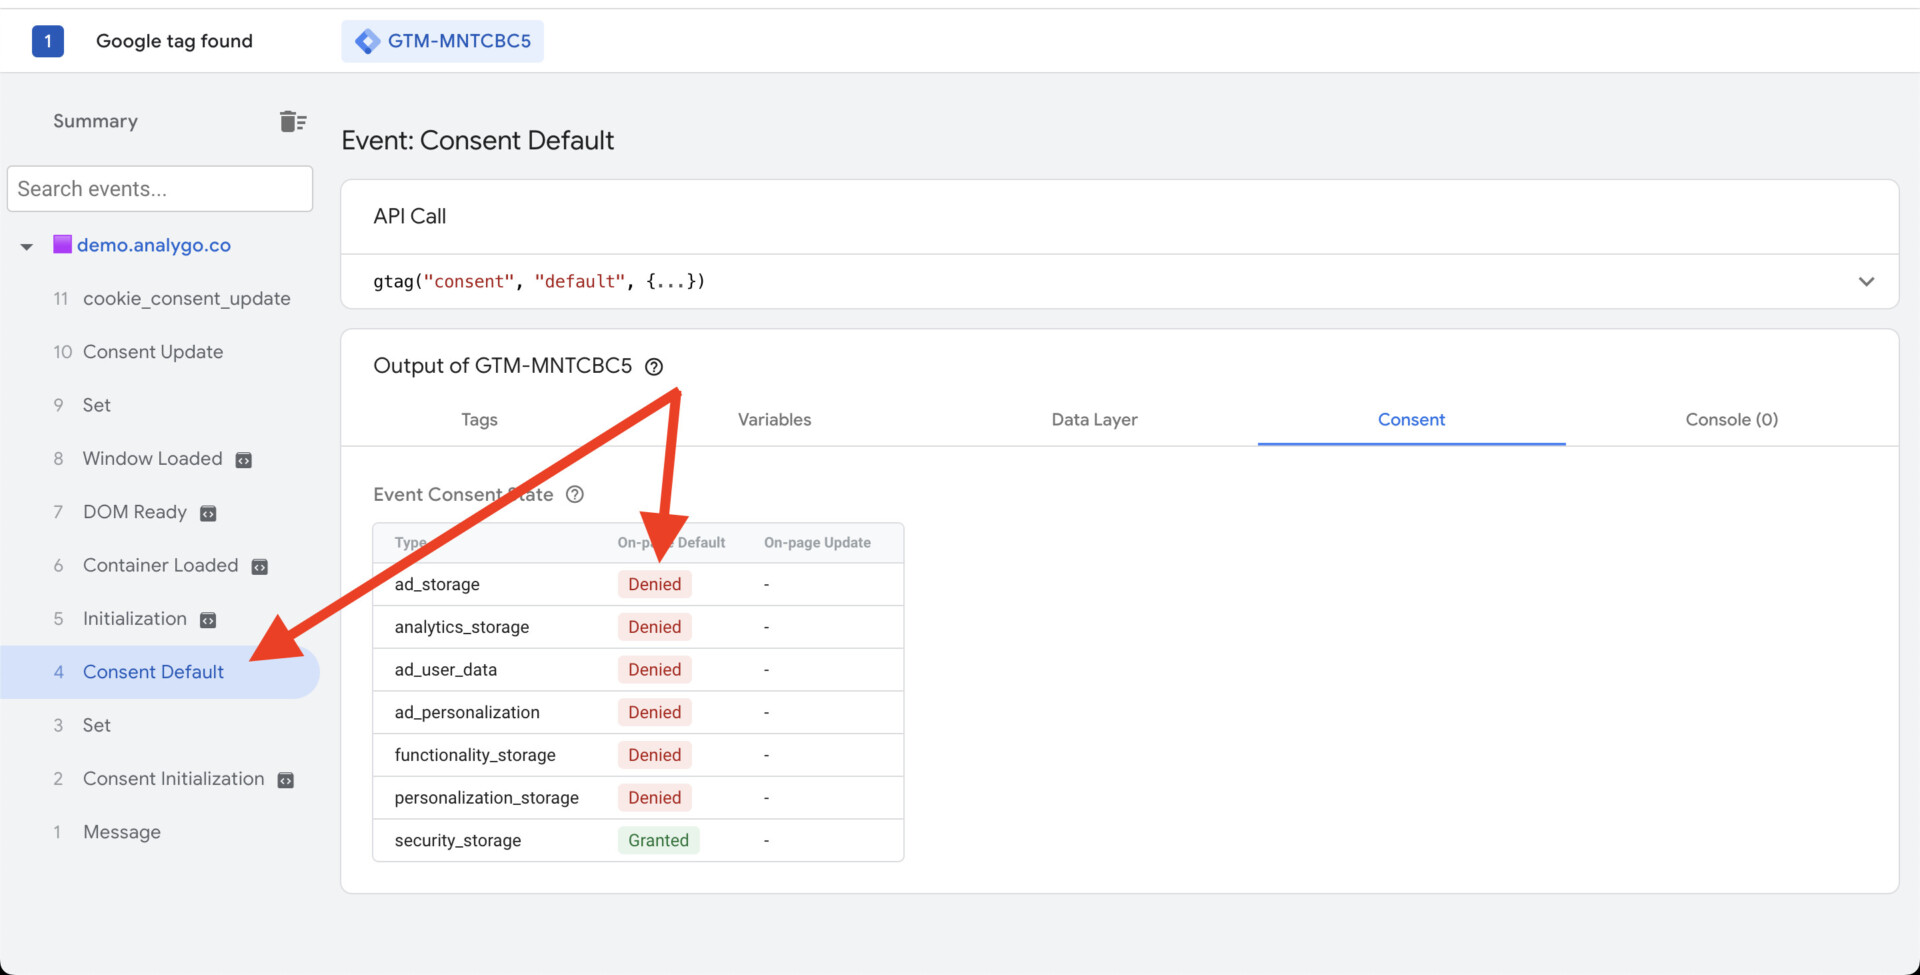
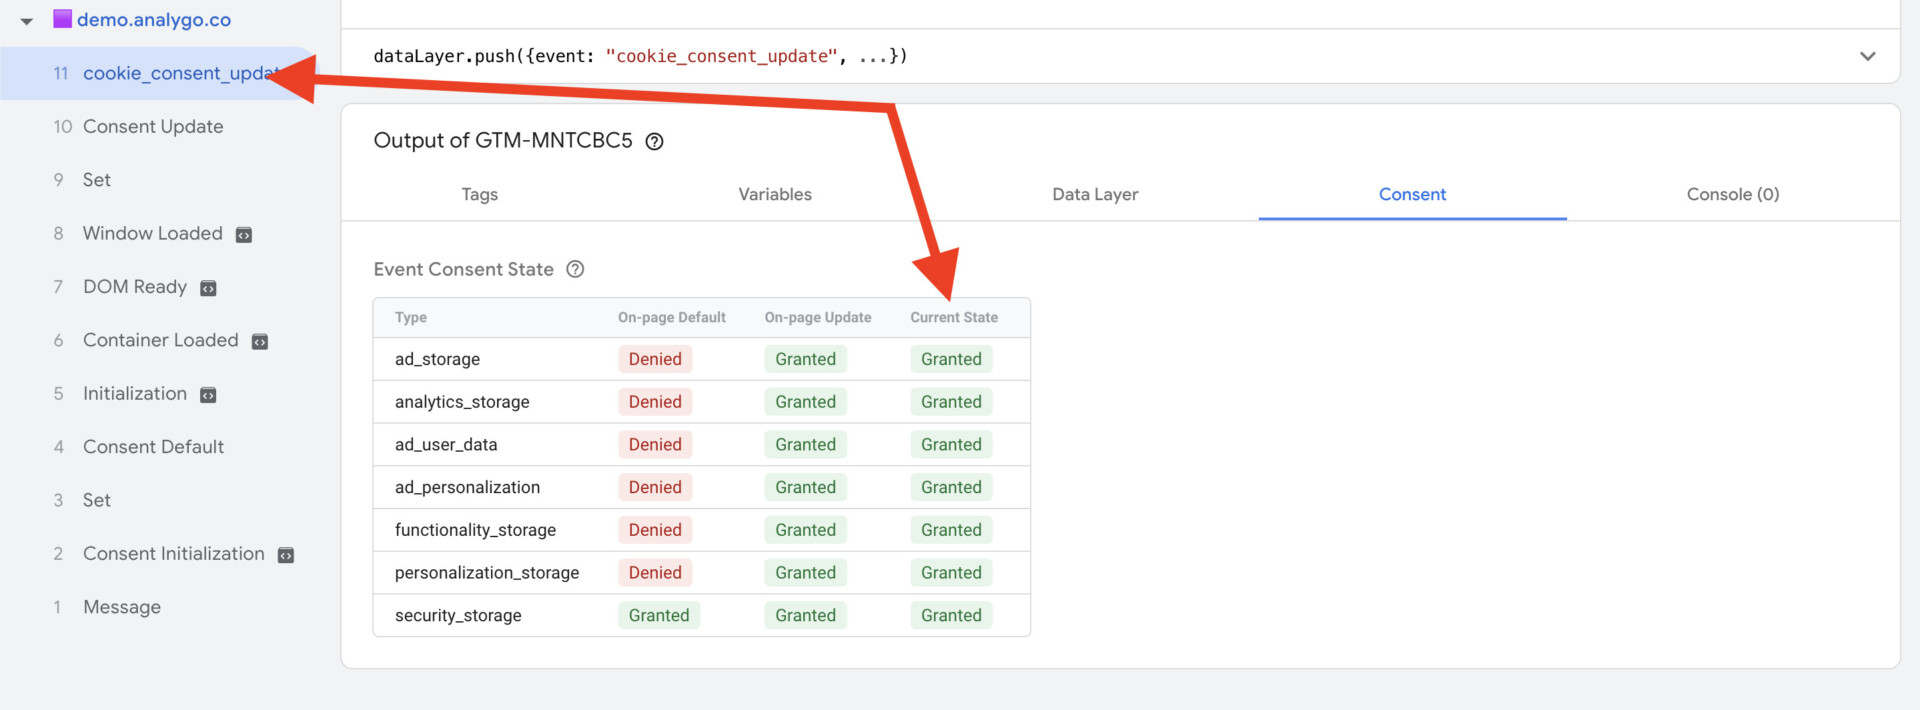


Finally, our cookie banner is loading properly with the right default and update commands. Make sure to test it thoroughly before publishing.
Add CookieYes directly to the website
Alternatively, you can add the cookie script directly to your website. I recommend this approach over the Google Tag Manager implementation. The reason is that GTM is not always guaranteed to load, on the other hand, your cookie banner should always show up to visitors.
Step #1: Add consent Mode v2 script
We need to add our consent mode script to set the default consent states. We need to paste this code to the head of our page.
<script>
    window.dataLayer = window.dataLayer || [];
    function gtag() {
        dataLayer.push(arguments);
    }
    gtag("consent", "default", {
        ad_storage: "denied",
        ad_user_data: "denied",
        ad_personalization: "denied",
        analytics_storage: "denied",
        functionality_storage: "denied",
        personalization_storage: "denied",
        security_storage: "granted",
        wait_for_update: 2000,
    });
    gtag("set", "ads_data_redaction", true);
    gtag("set", "url_passthrough", true);
</script>Let’s go to our website’s code and paste this.
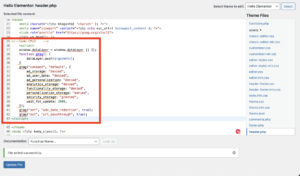
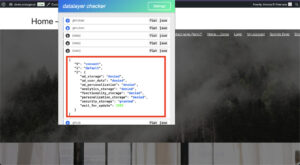
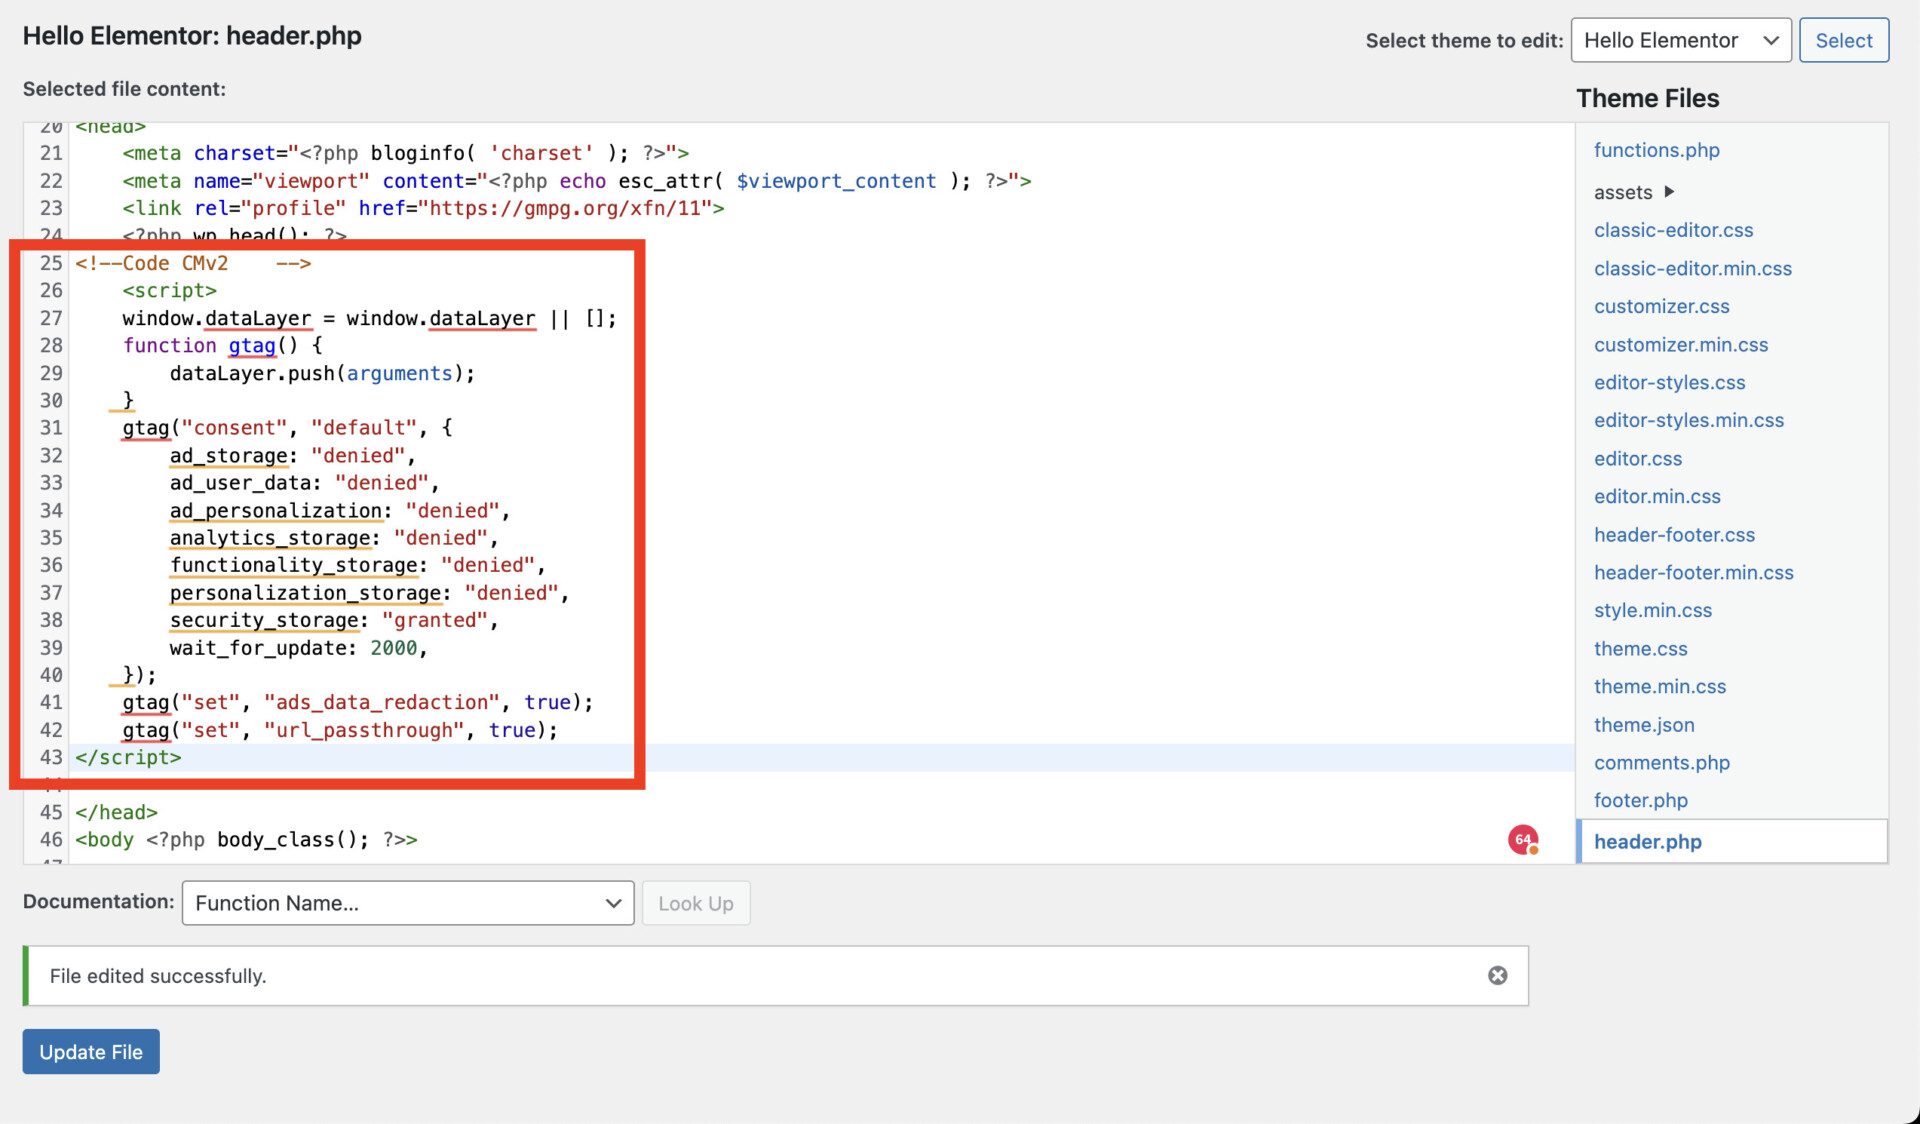
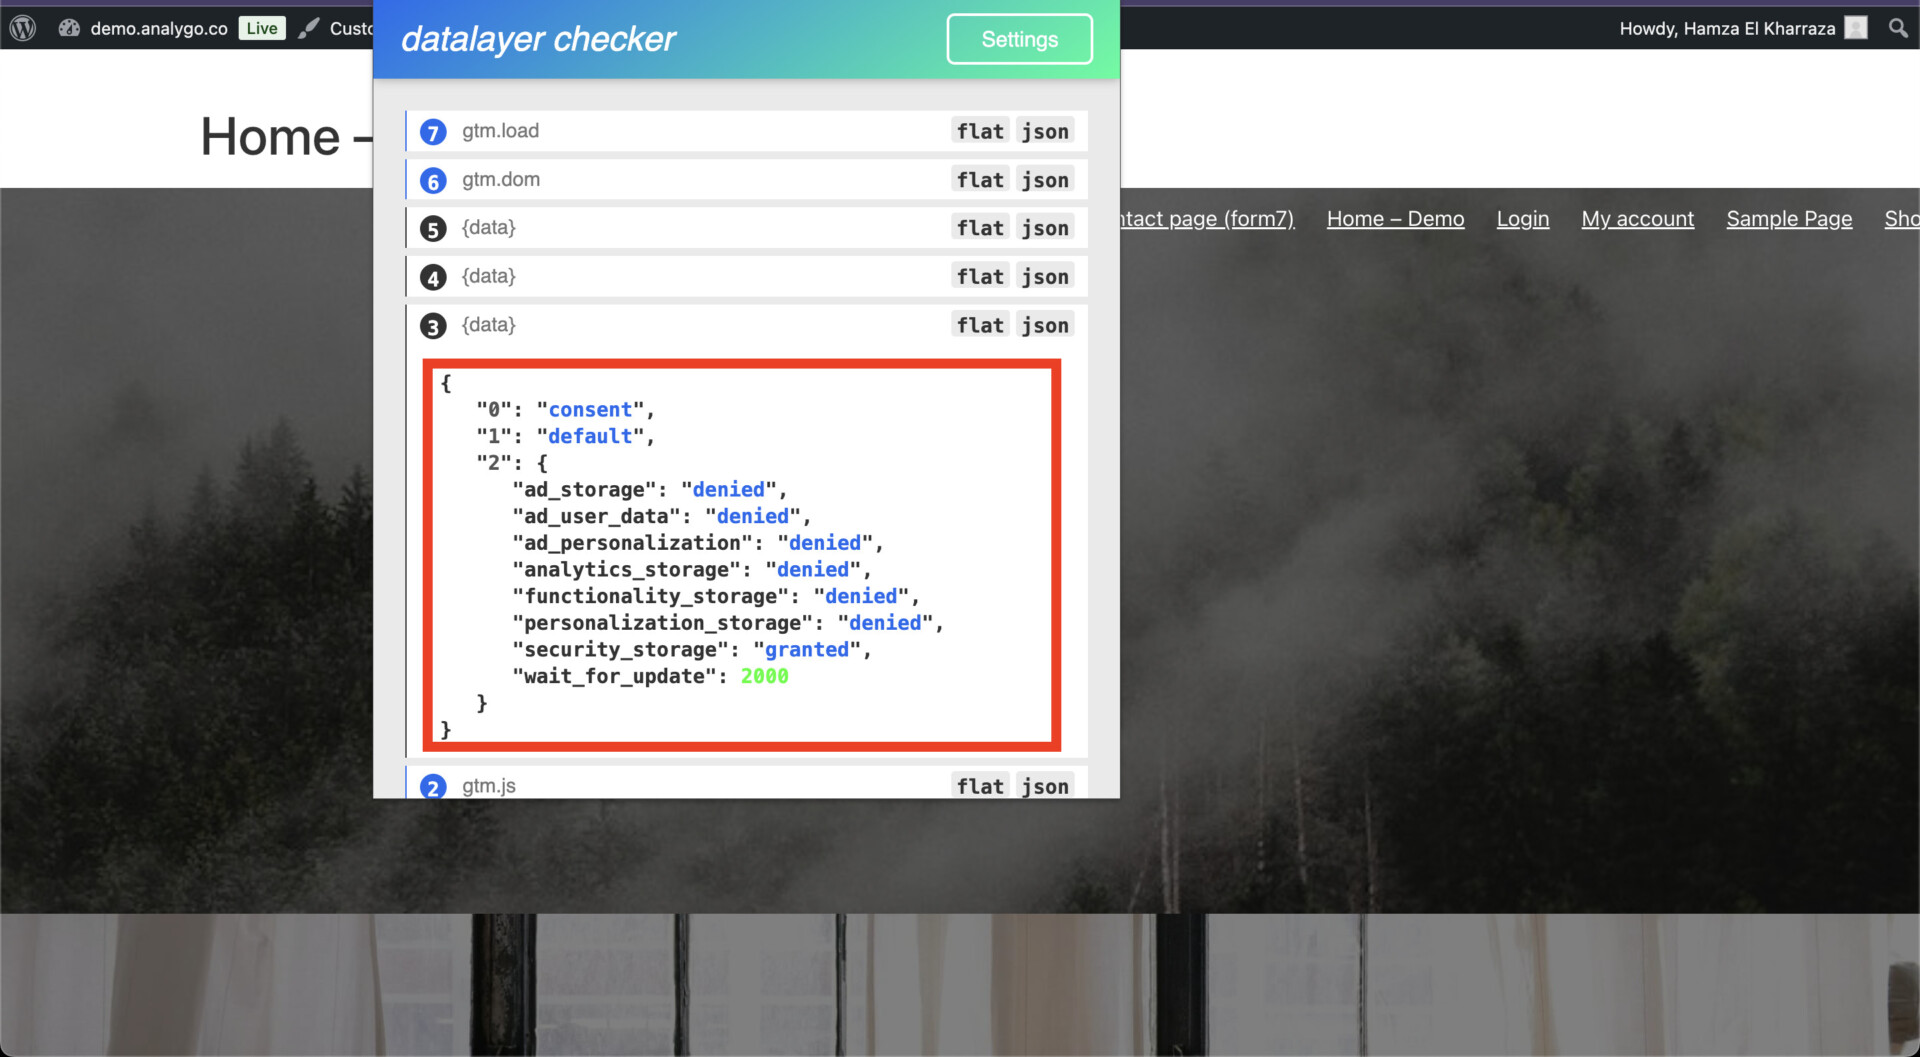
Step #2: Copy the installation code from CookieYes
Next, we need the actual code for CookieYes script to load. We can fetch it from the CMP’s account.

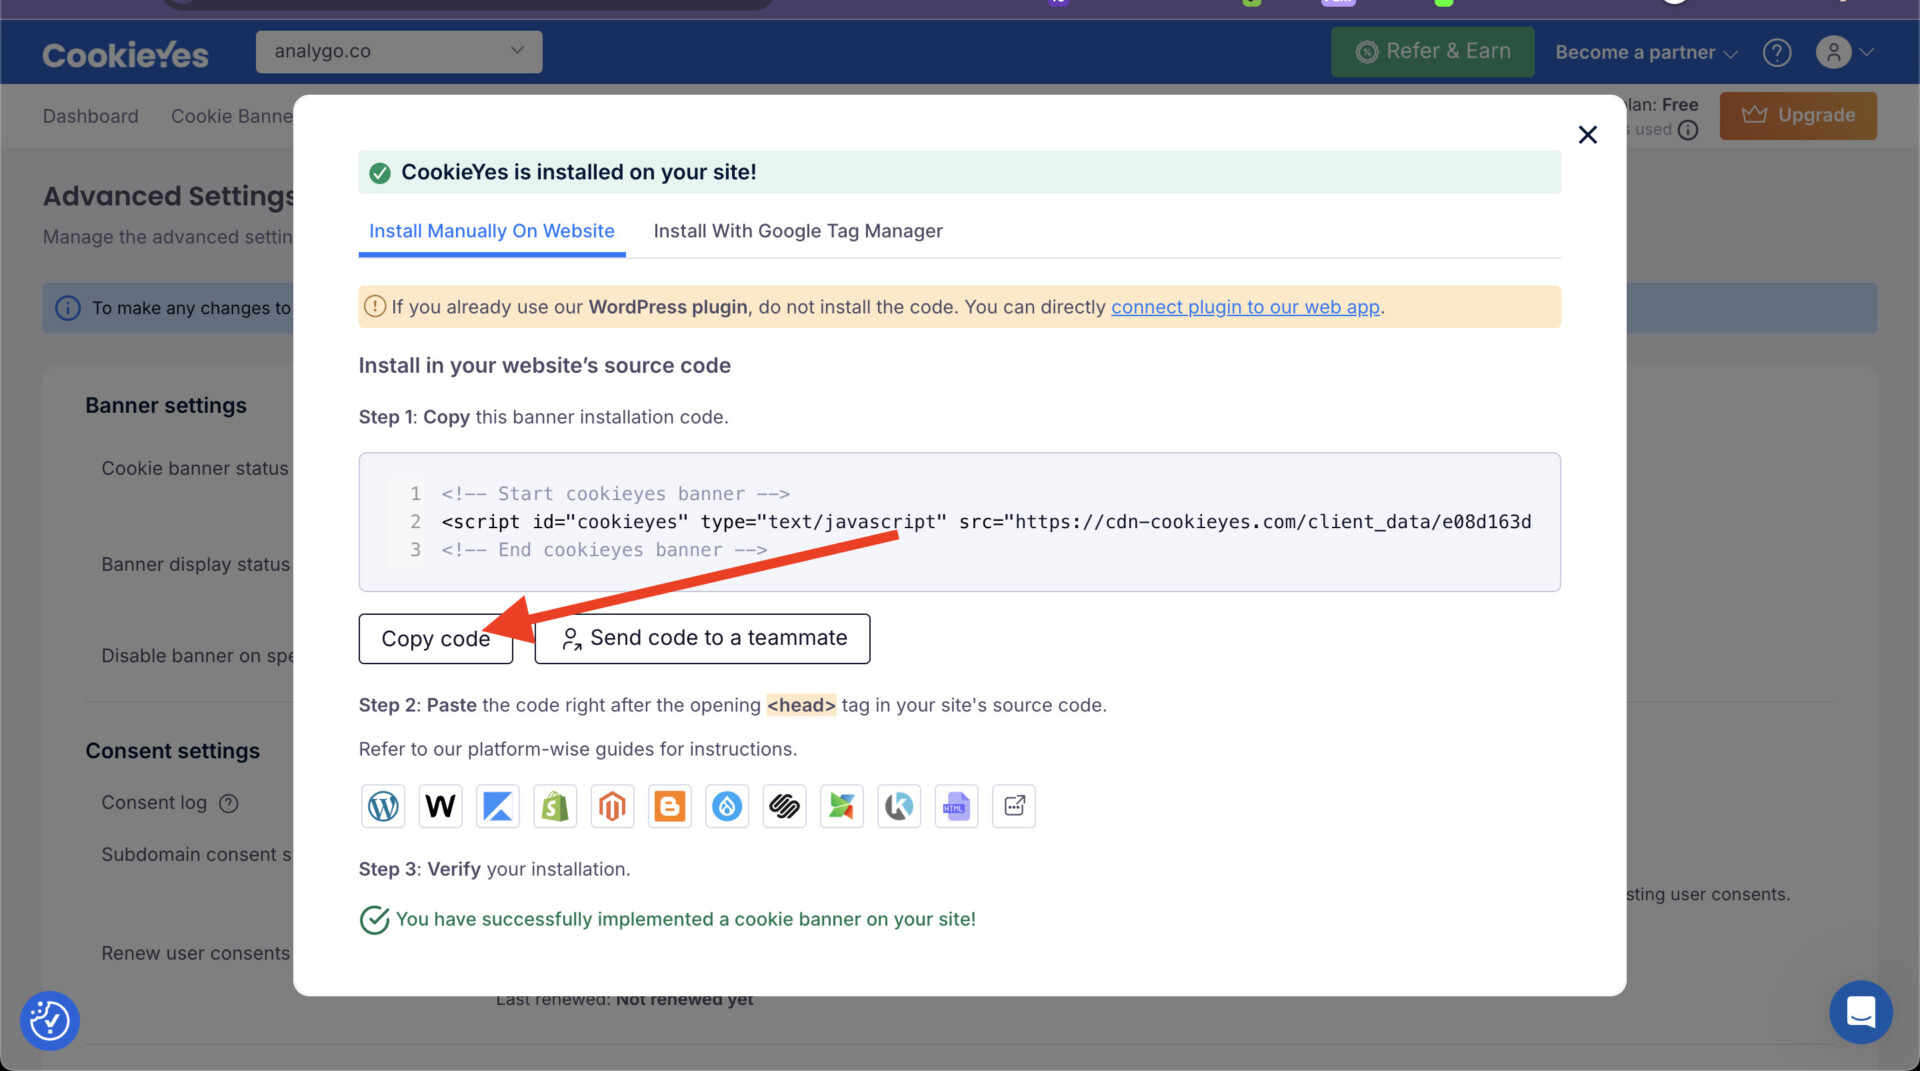


Right below our previous code, paste the new script to load the cookie banner.
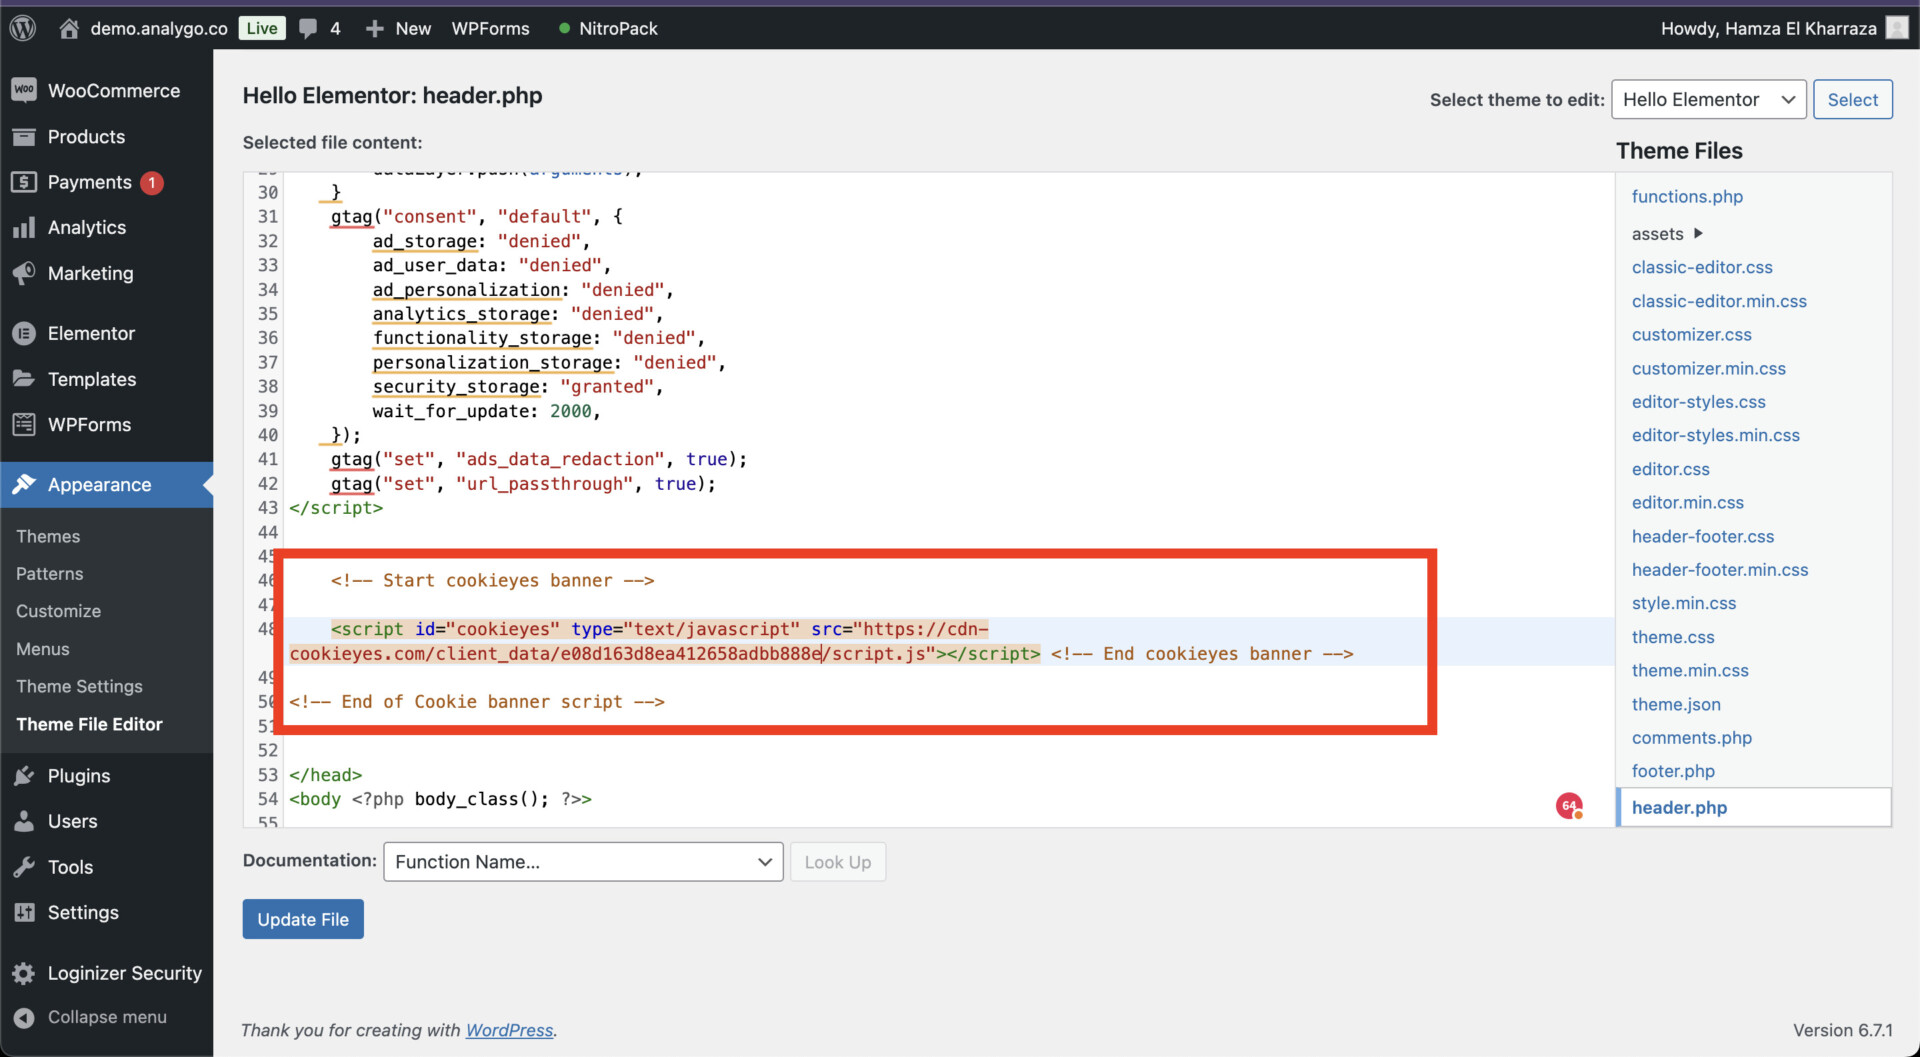
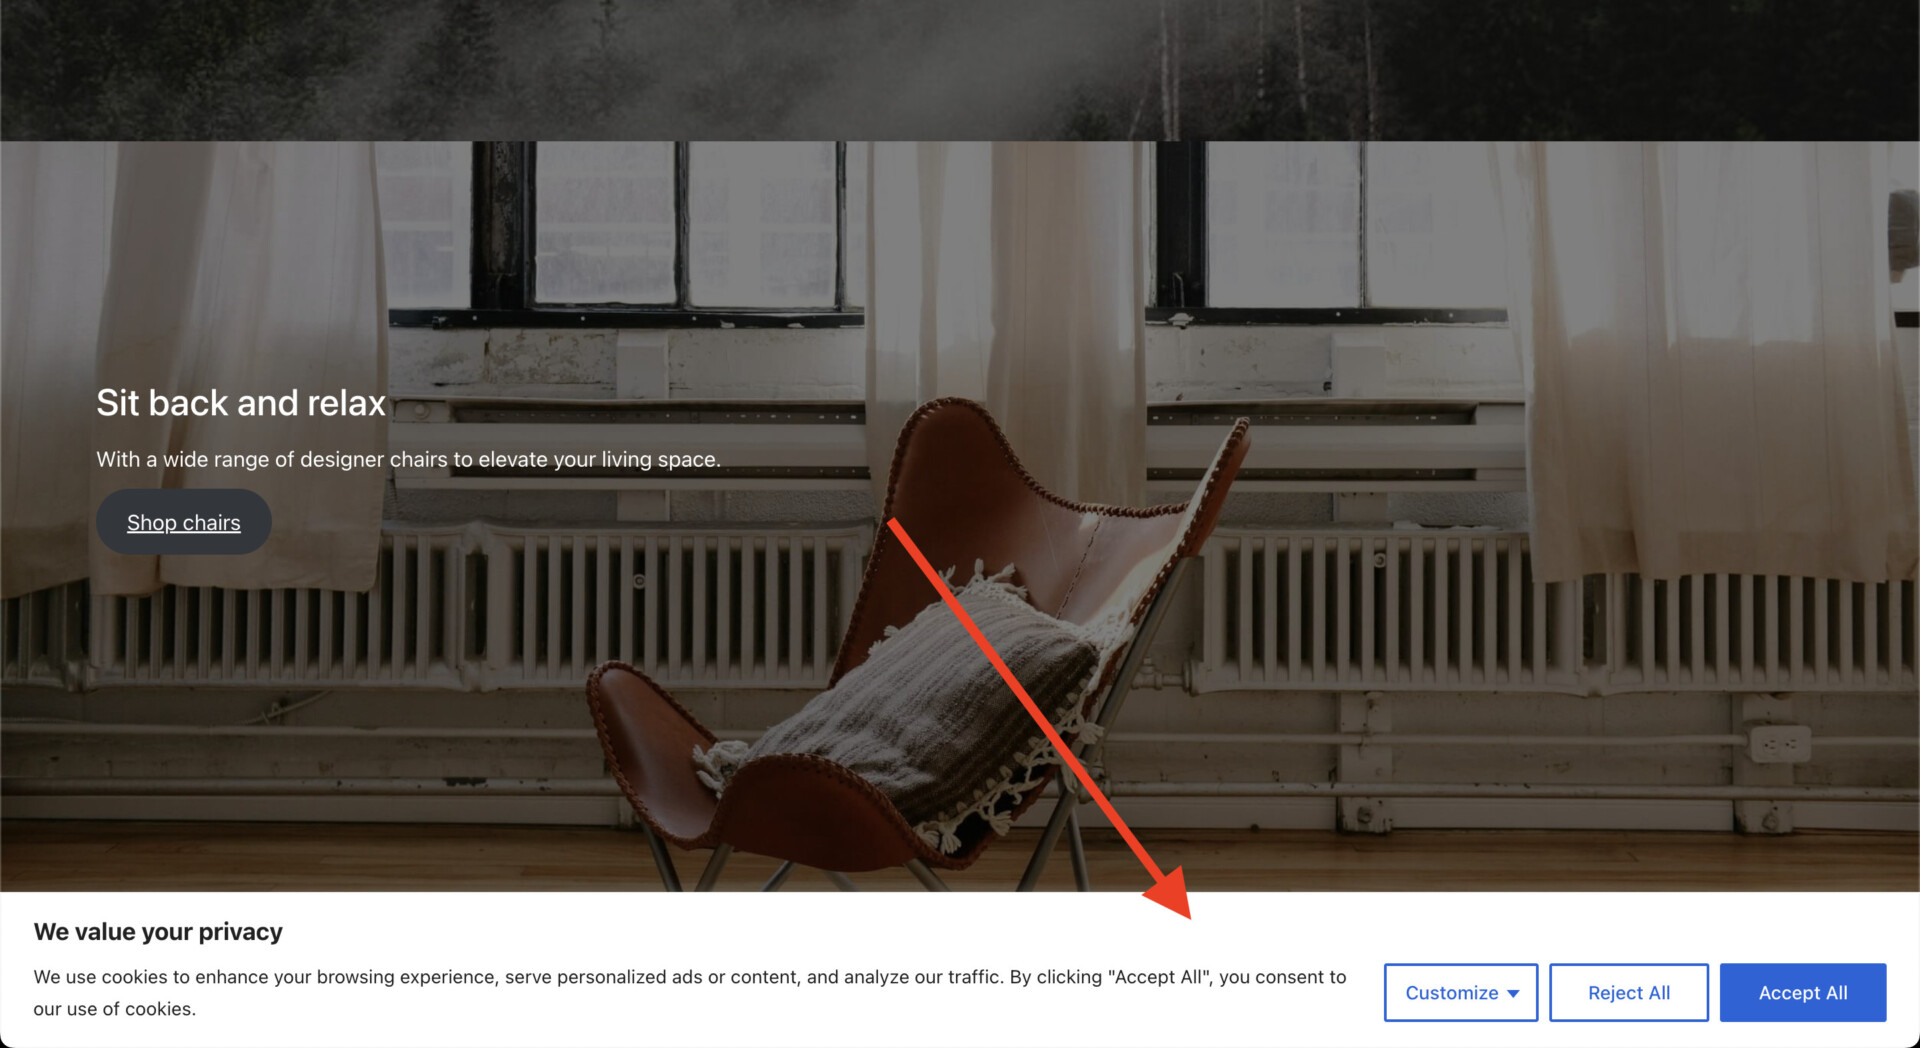


⚠️ Ensure Google Tag Manager is loaded last
Order is crucial here: You need your scripts to work in the following order:
1. Consent default
2. Cookie banner script
3. GTM or manual tracking script installation
Configure tags to fire on consent update
Whether you choose to add the script directly to your website or via GTM, the most important thing is to have a correct implementation. I’m going to show an example of implementation consent and advanced consent mode using CookieYes.
Basic Consent mode using CookieYes
The goal of basic consent mode is to block your marketing tags from firing, when a user rejects tracking. Let’s start by adding a Google tag and make sure it fires on consent_update.
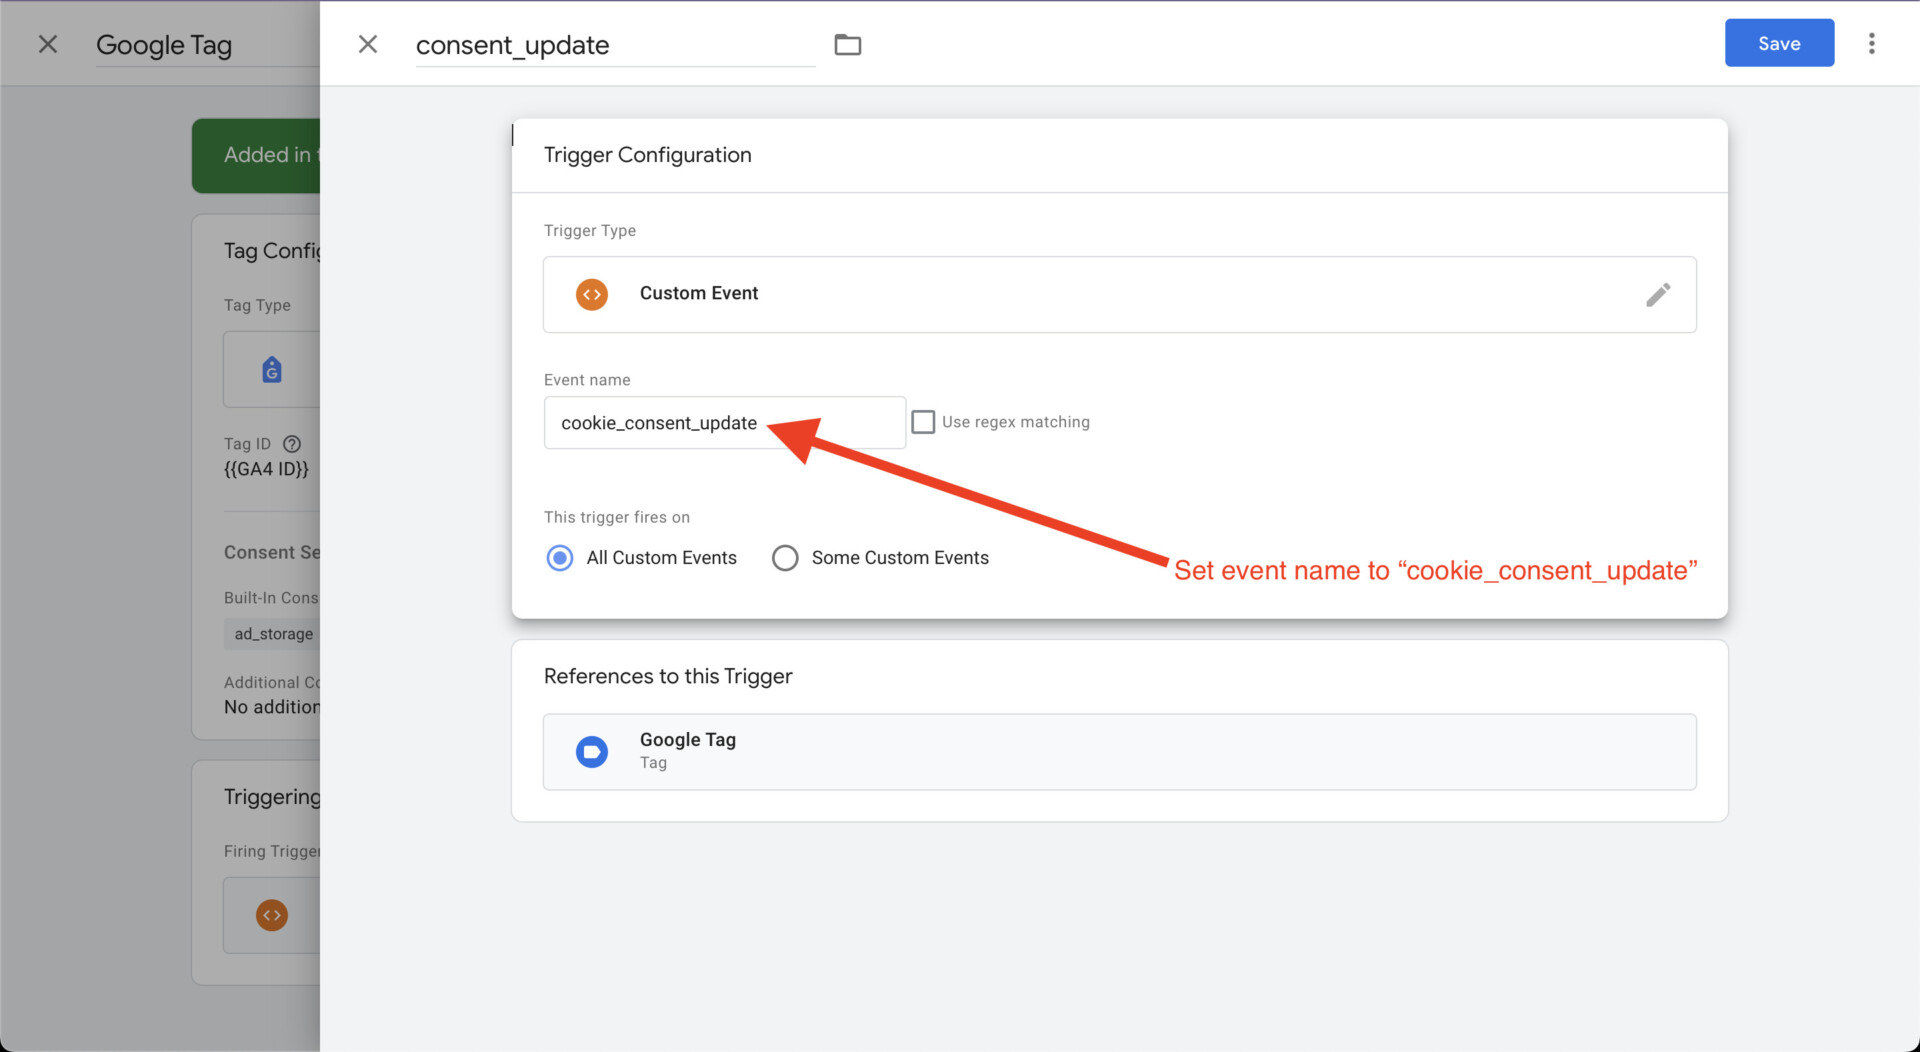
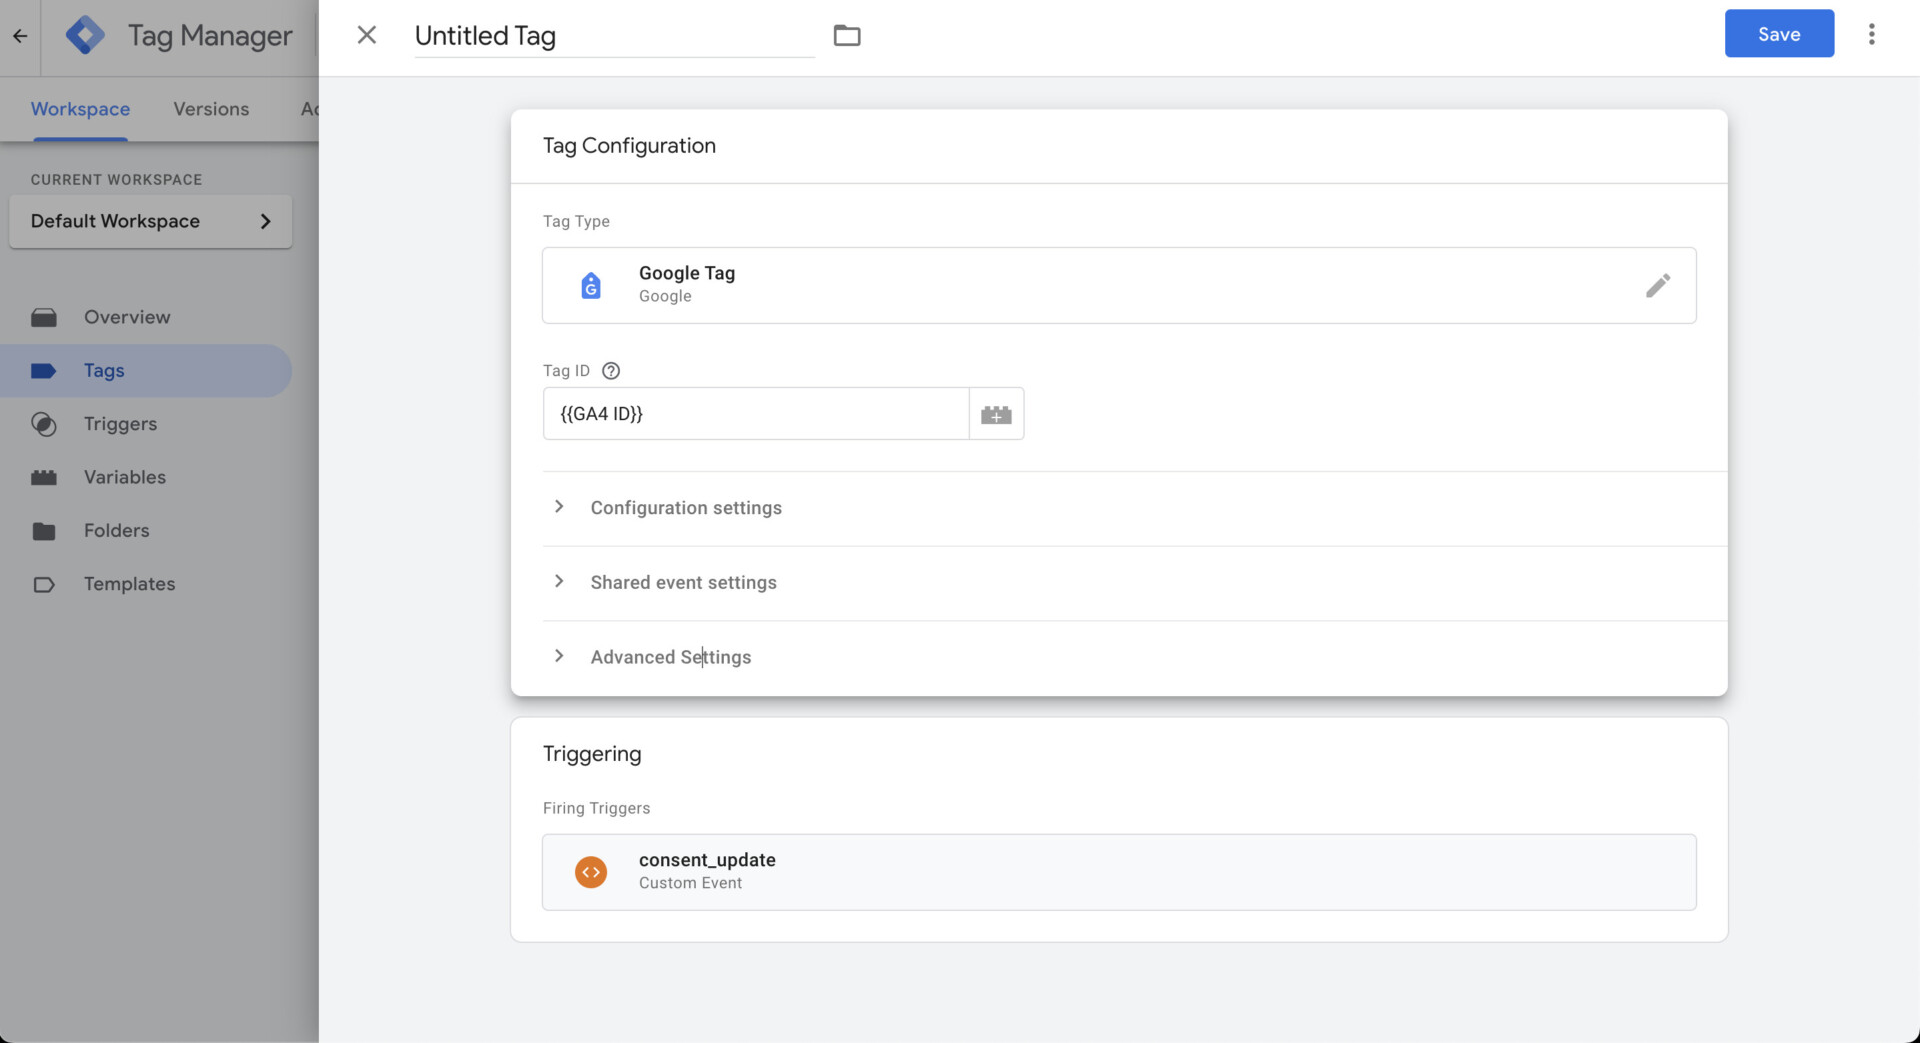


There are 2 methods to block tags from firing:
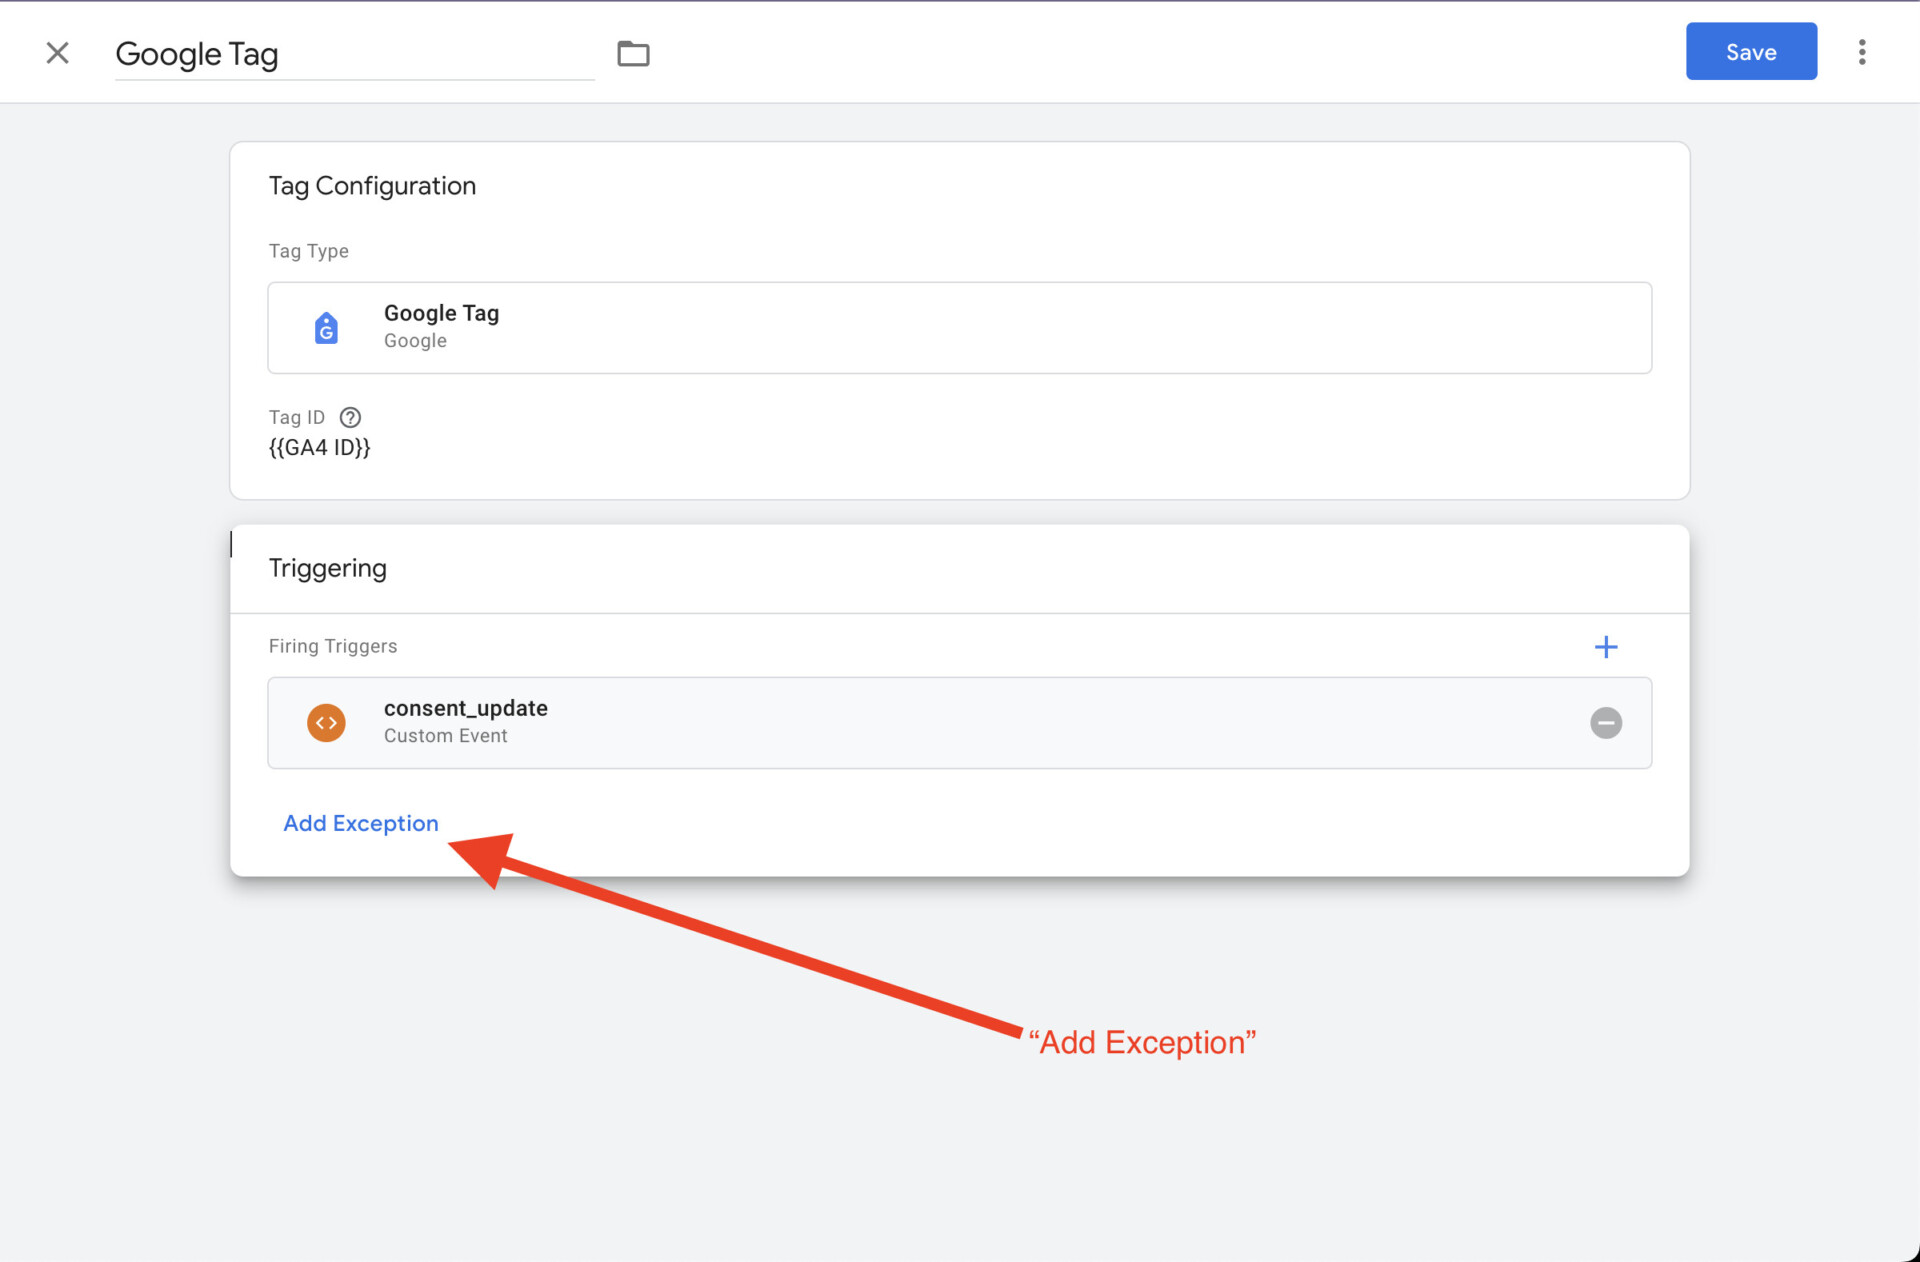
Option A): Blocking trigger (recommended)
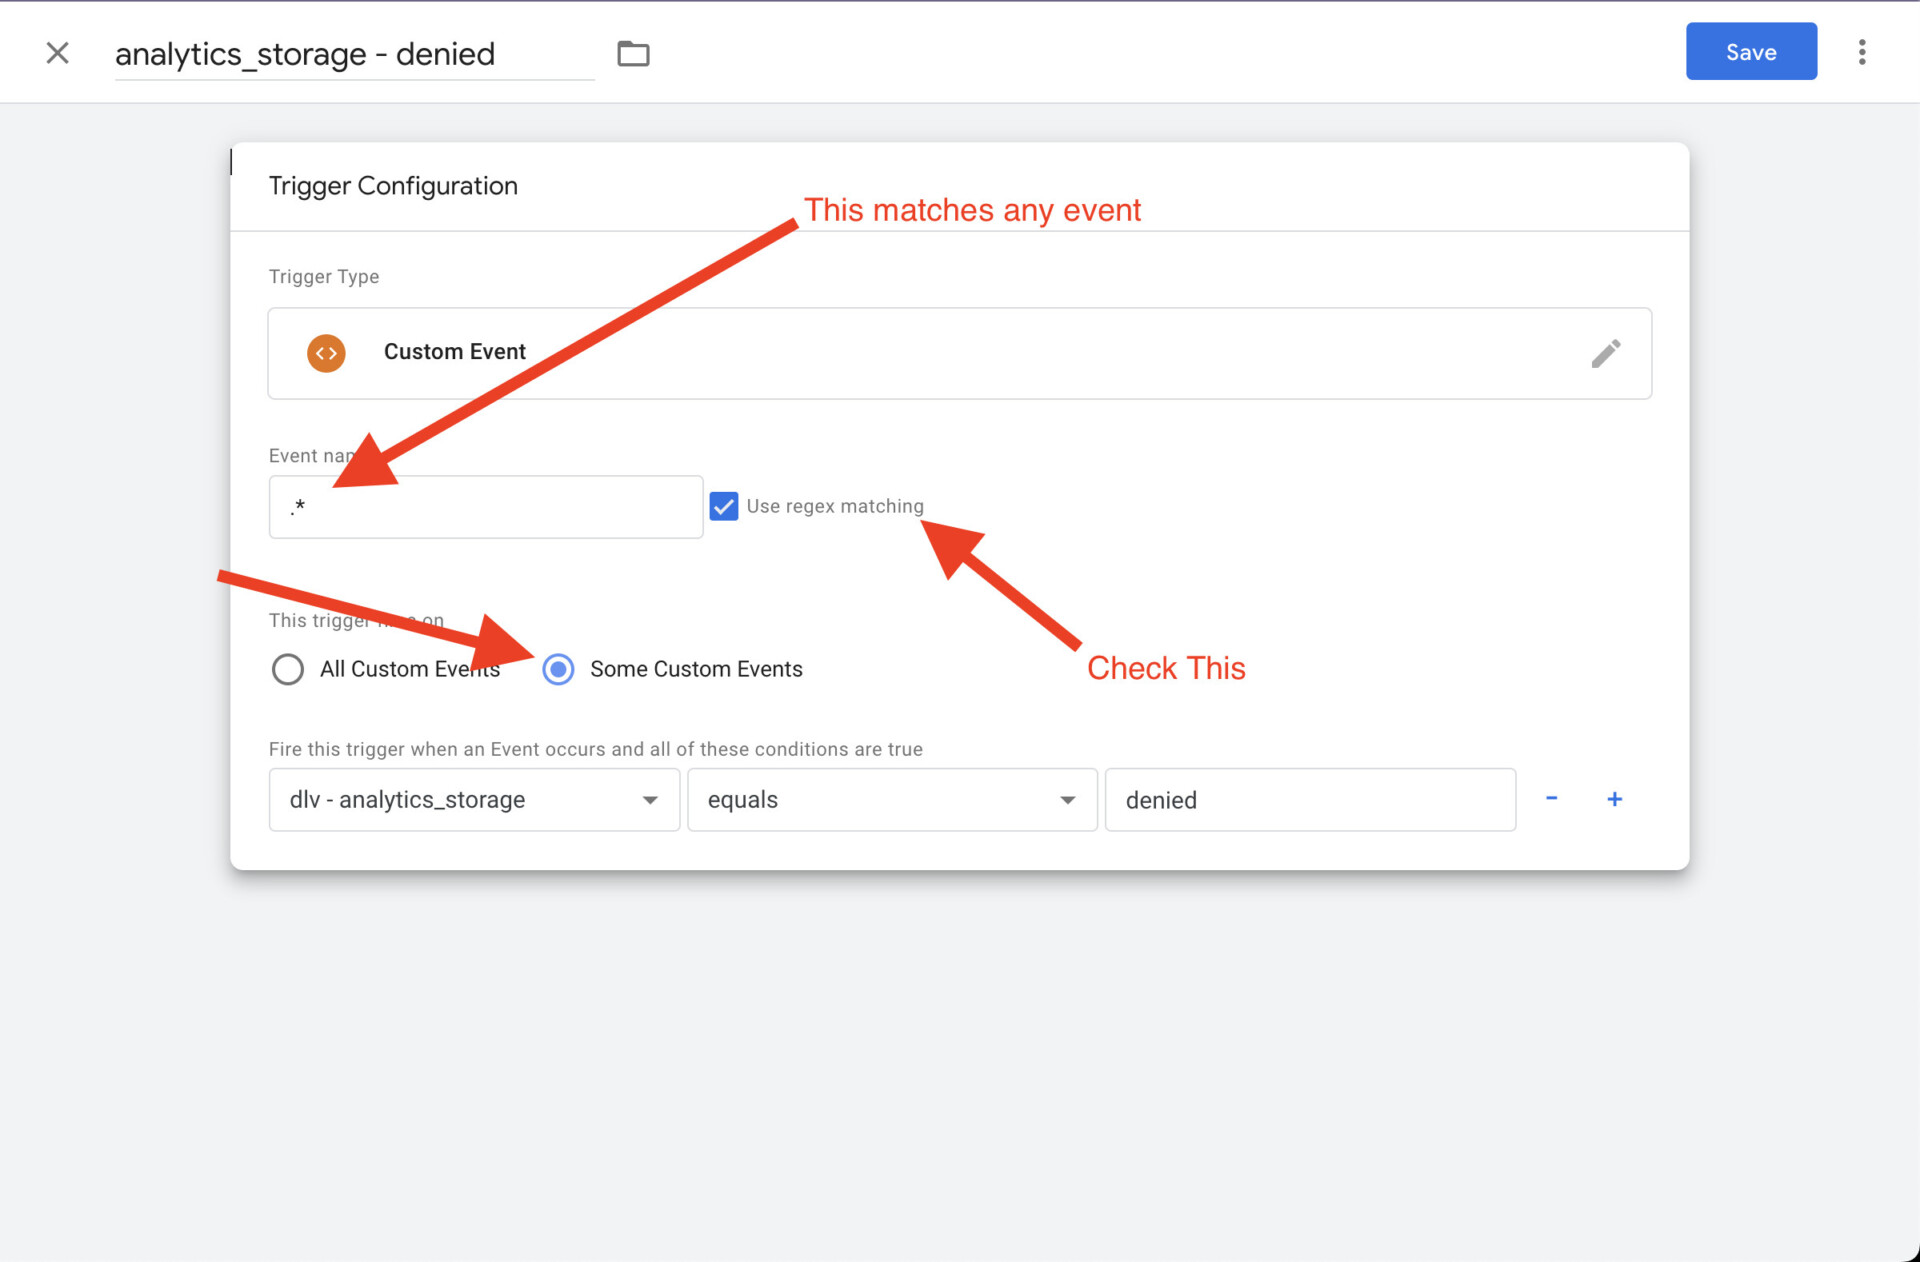
You add a condition as the exception to prevent tags from firing. First, you need to create a new data layer variable to fetch the parameter value of analytics_storage.
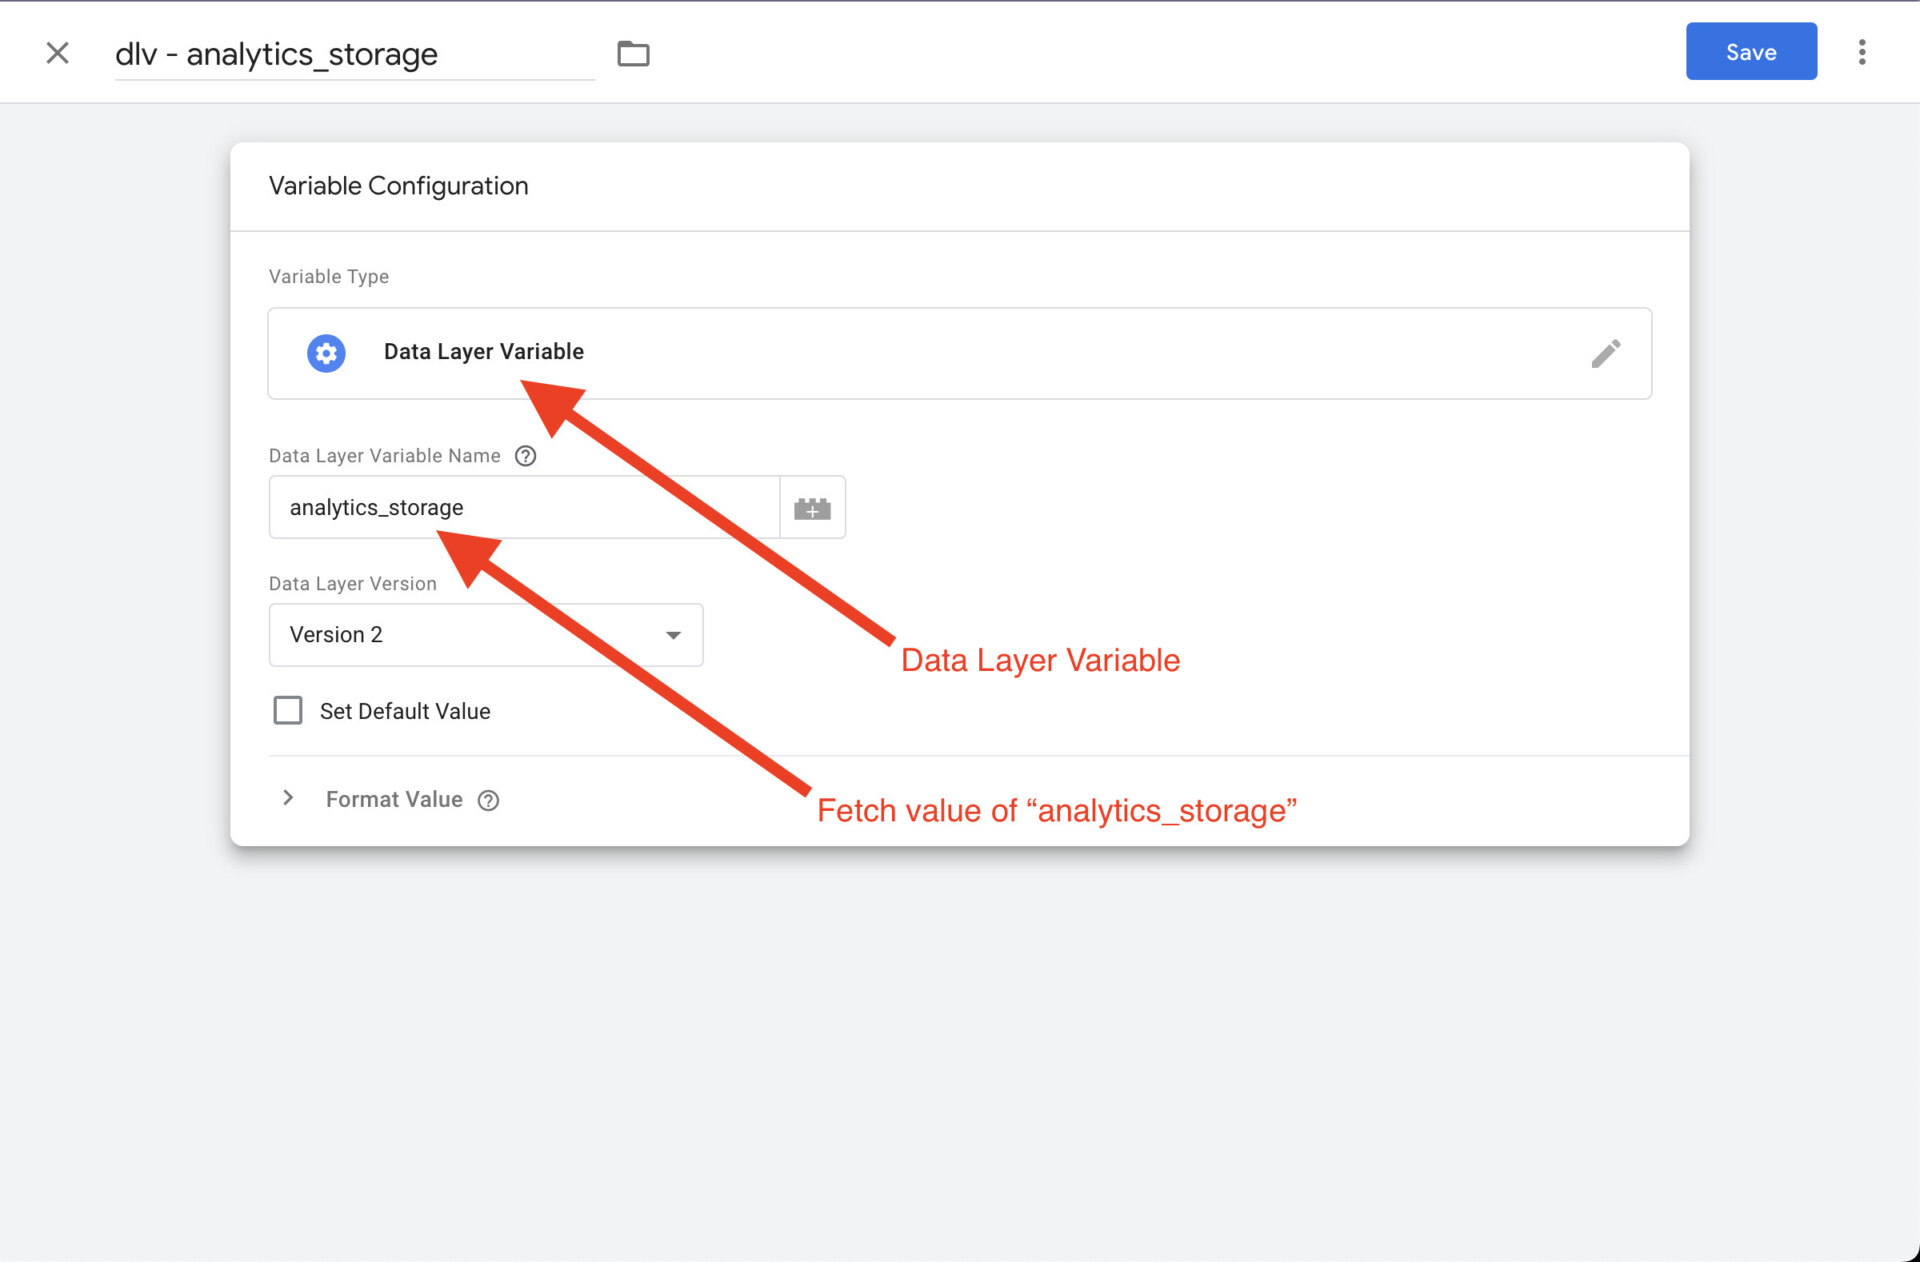

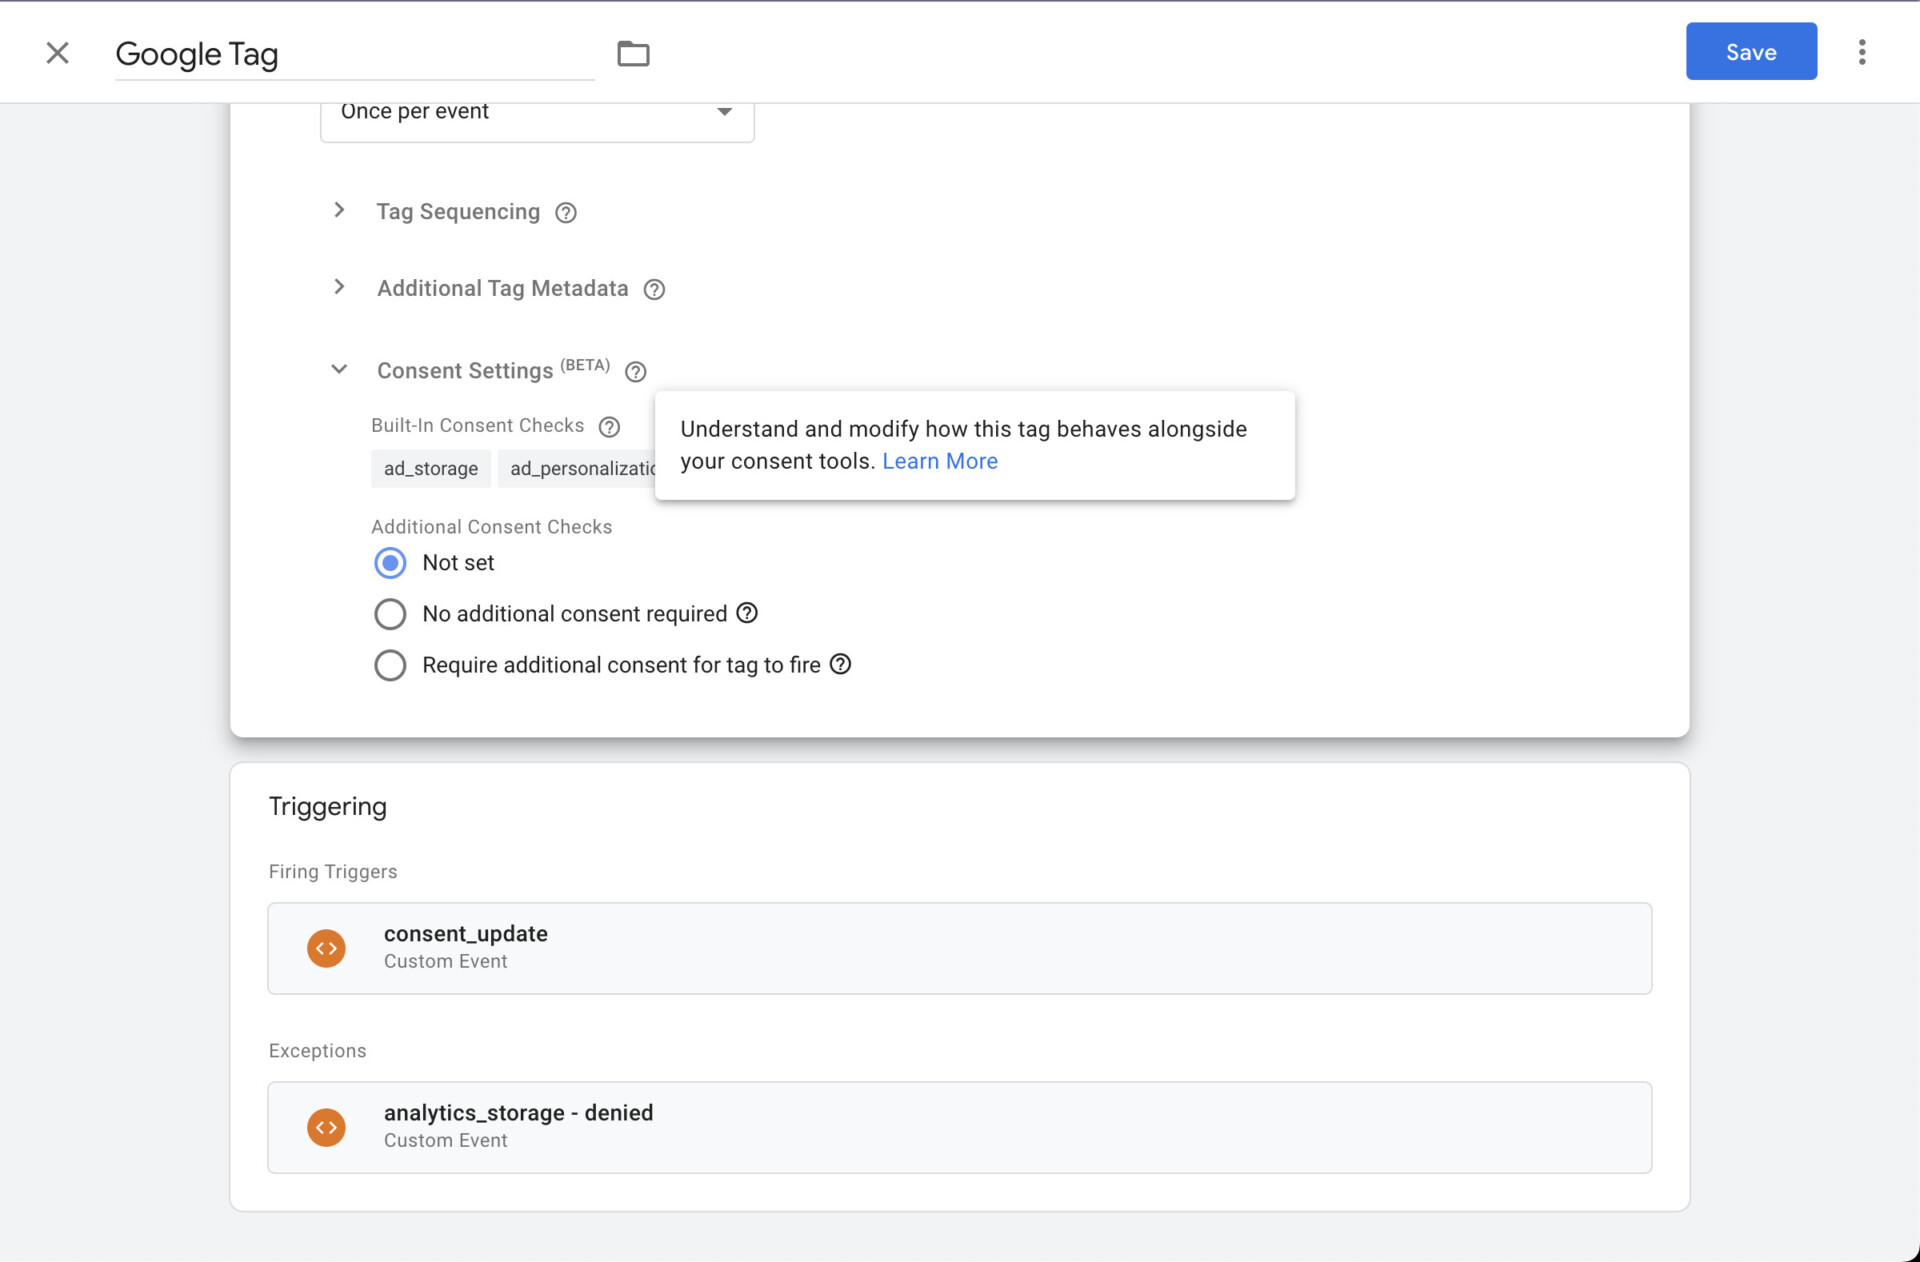
Next, let’s add an exception trigger. We want to prevent the tag from firing when the analytics_storage is set to denied.


Option B): Additional consent checks
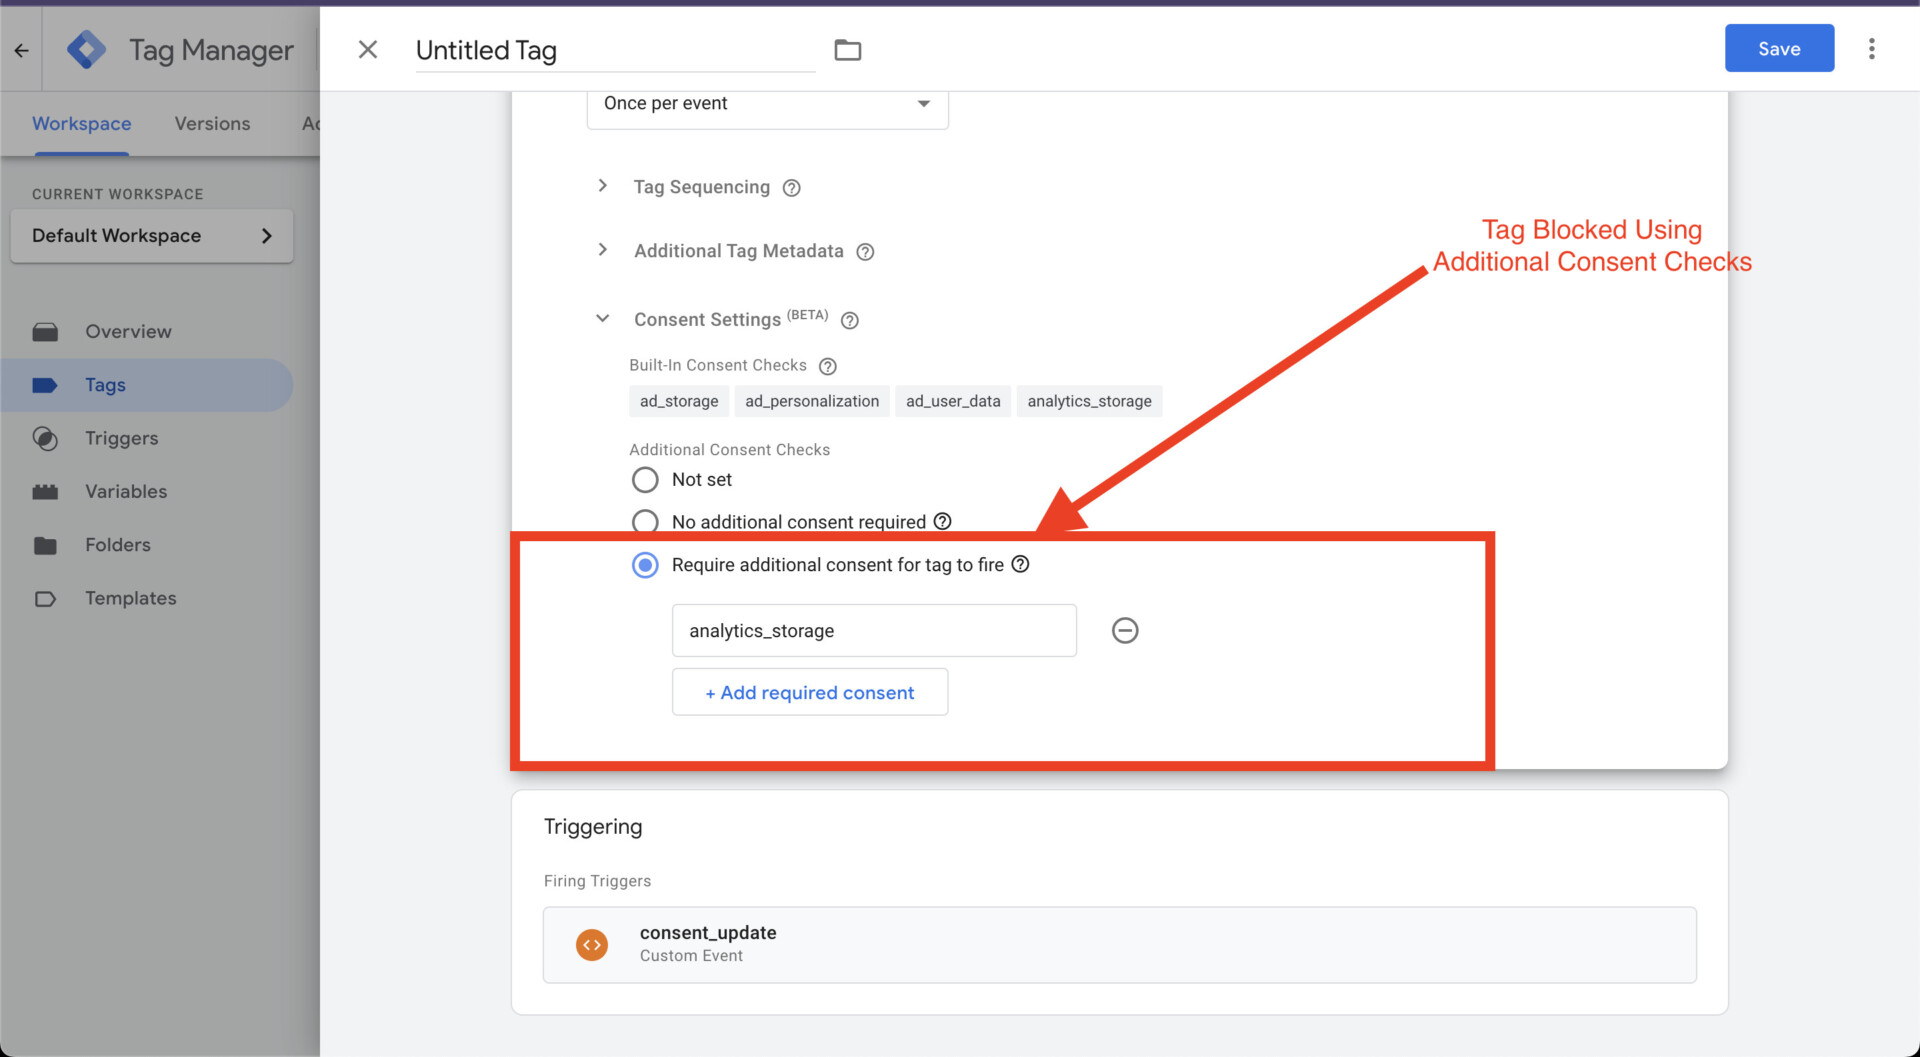
This is a feature available within the tag template. We do not recommend it because it’s still in beta mode, and we encountered issues with it in the past.

Test Basic Consent Mode
Let’s preview our tag and reject tracking. Our tags should not fire in this case.
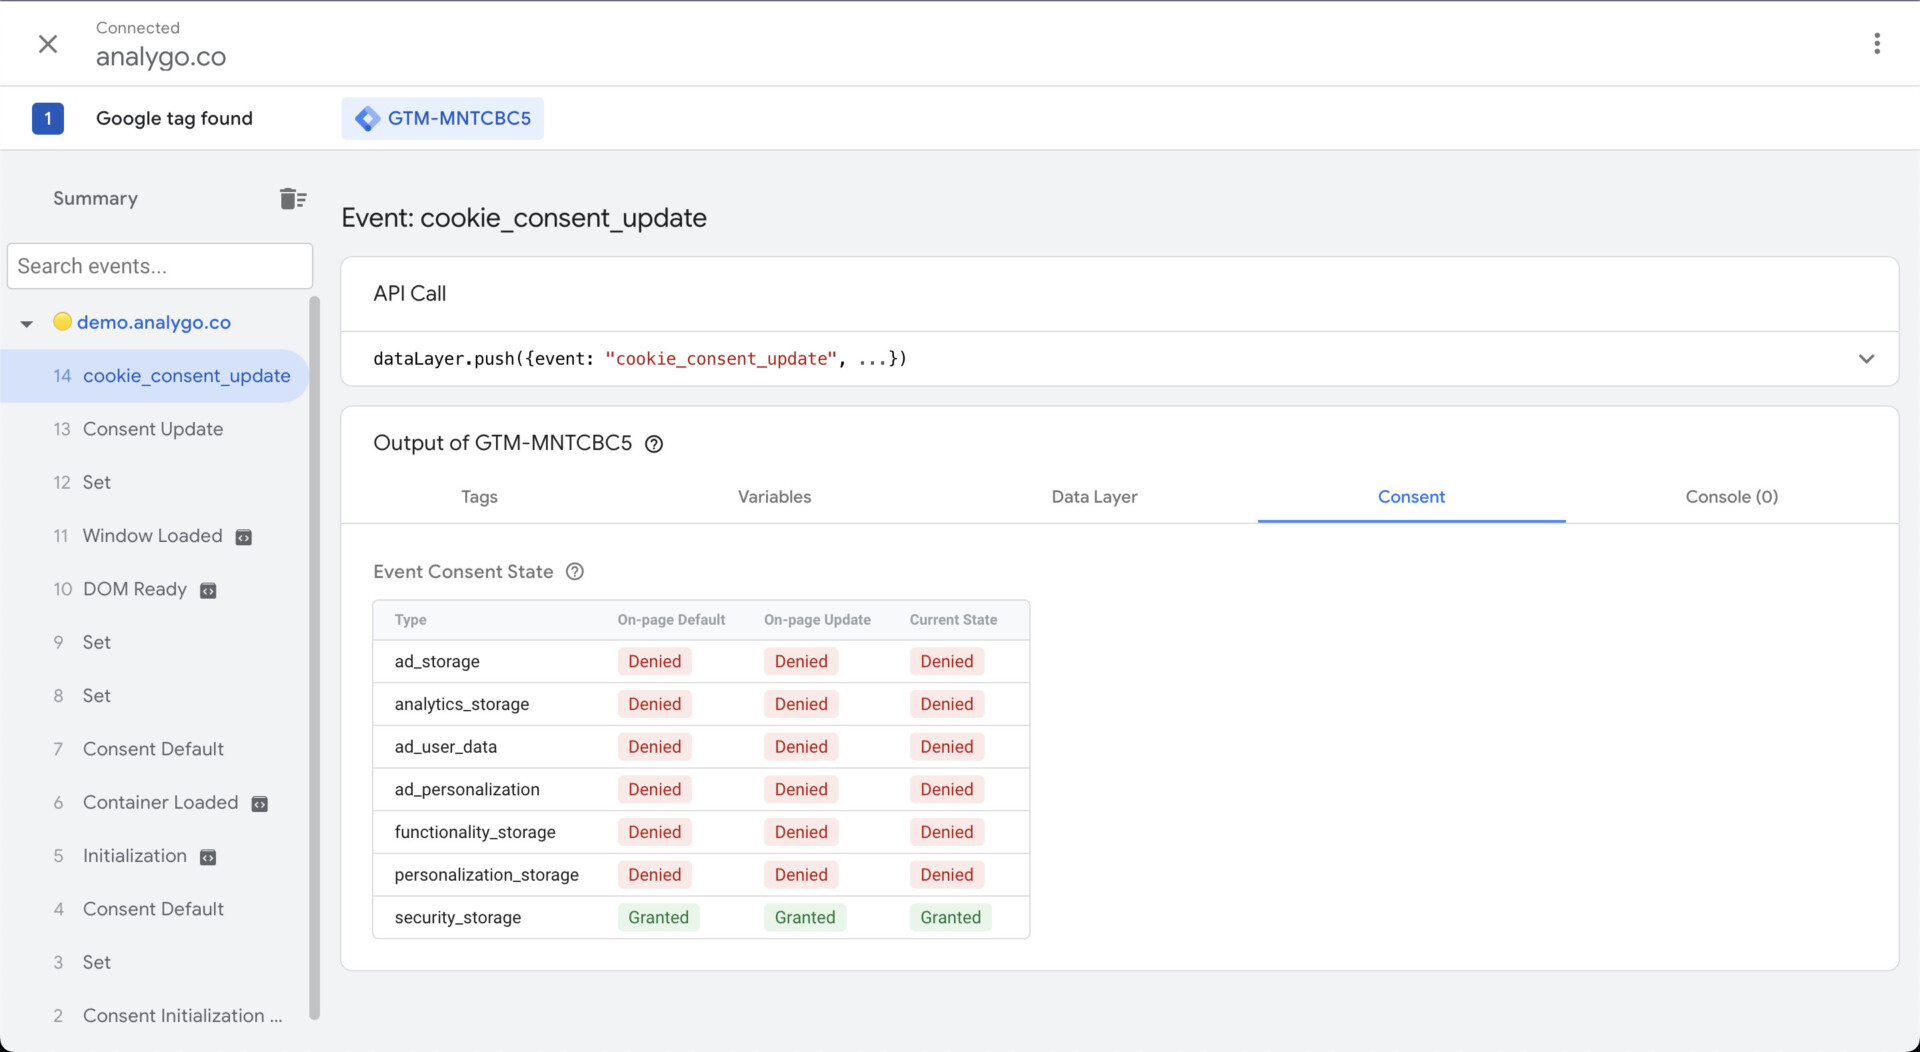
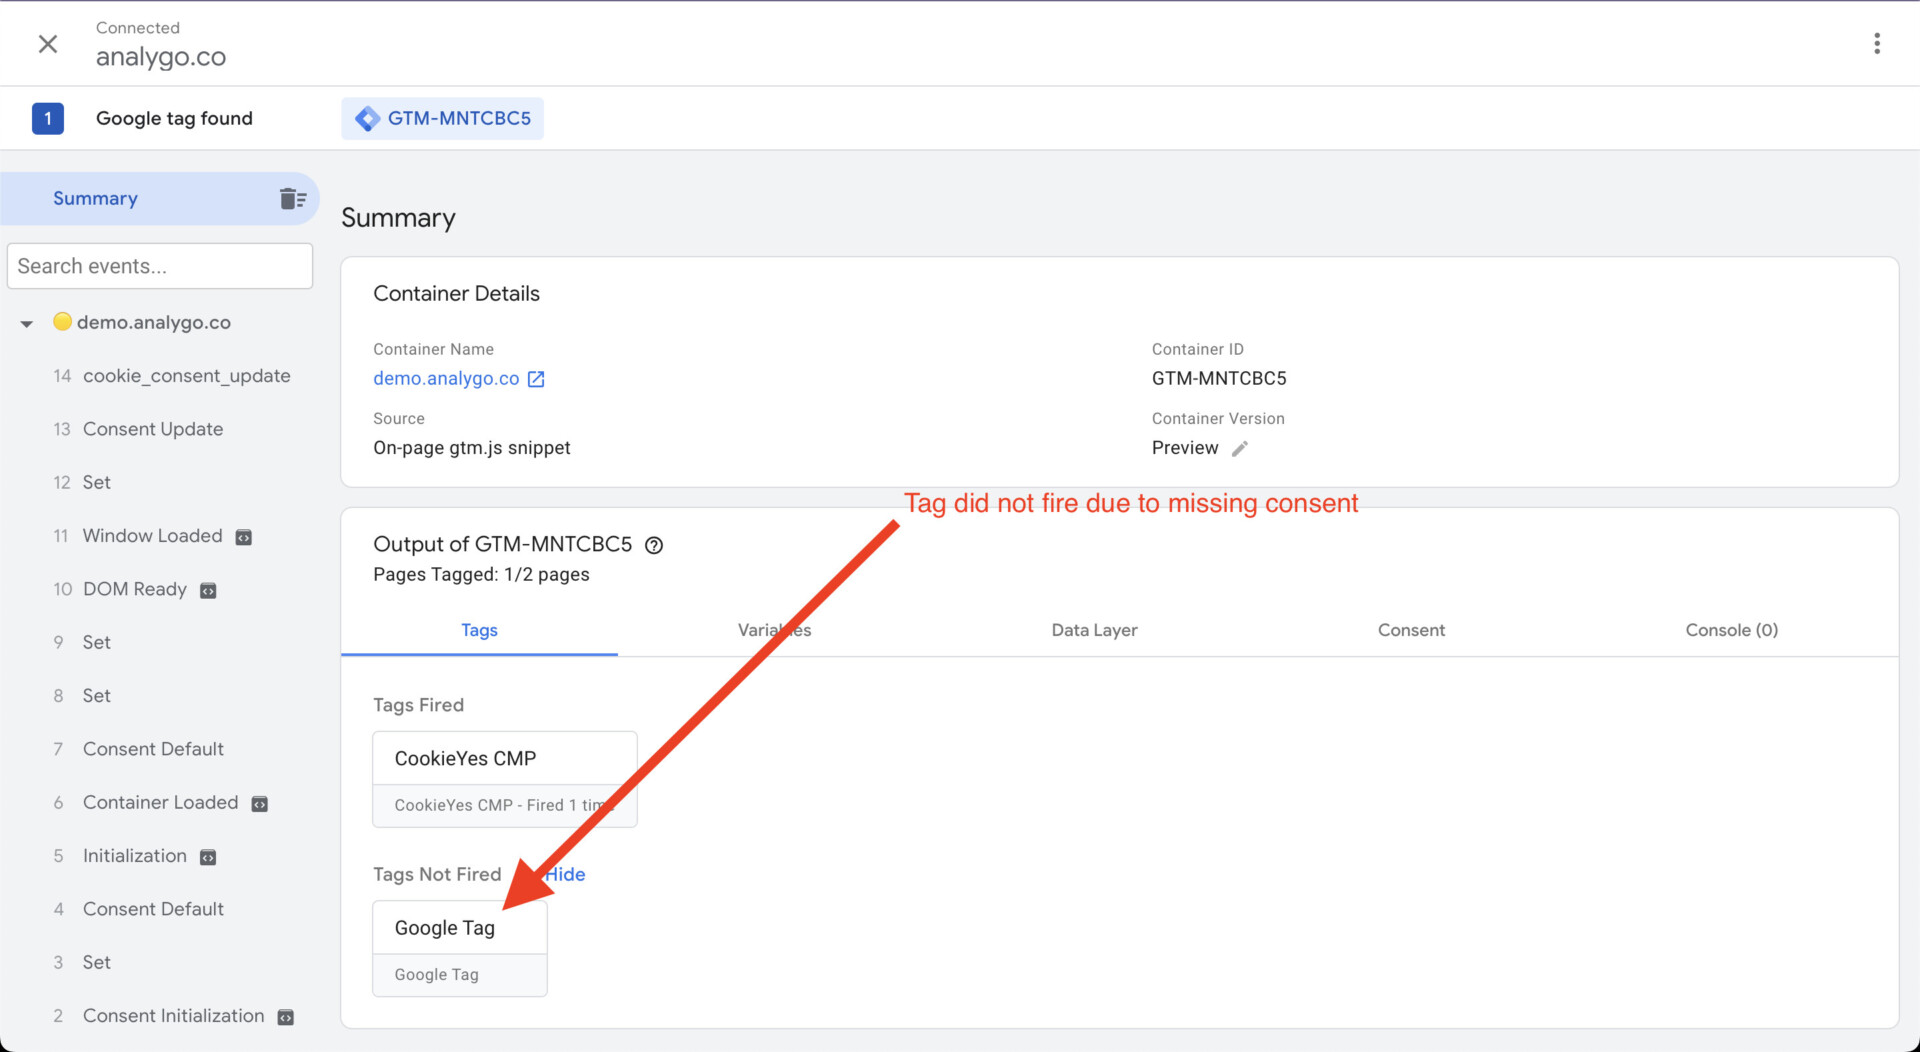


Our tag is behaving as expected.
Advanced consent mode using CookieYes
Contrary to what the name suggest, advanced consent mode is quite simple. All we need to do is to remove blocking triggers and let our tags fire no matter what the consent state is.
Scenario A): remove blocking triggers
If you are using blocking triggers to prevent tags from firing, all you need to do is remove them. Once done, you are officially using advanced consent mode.
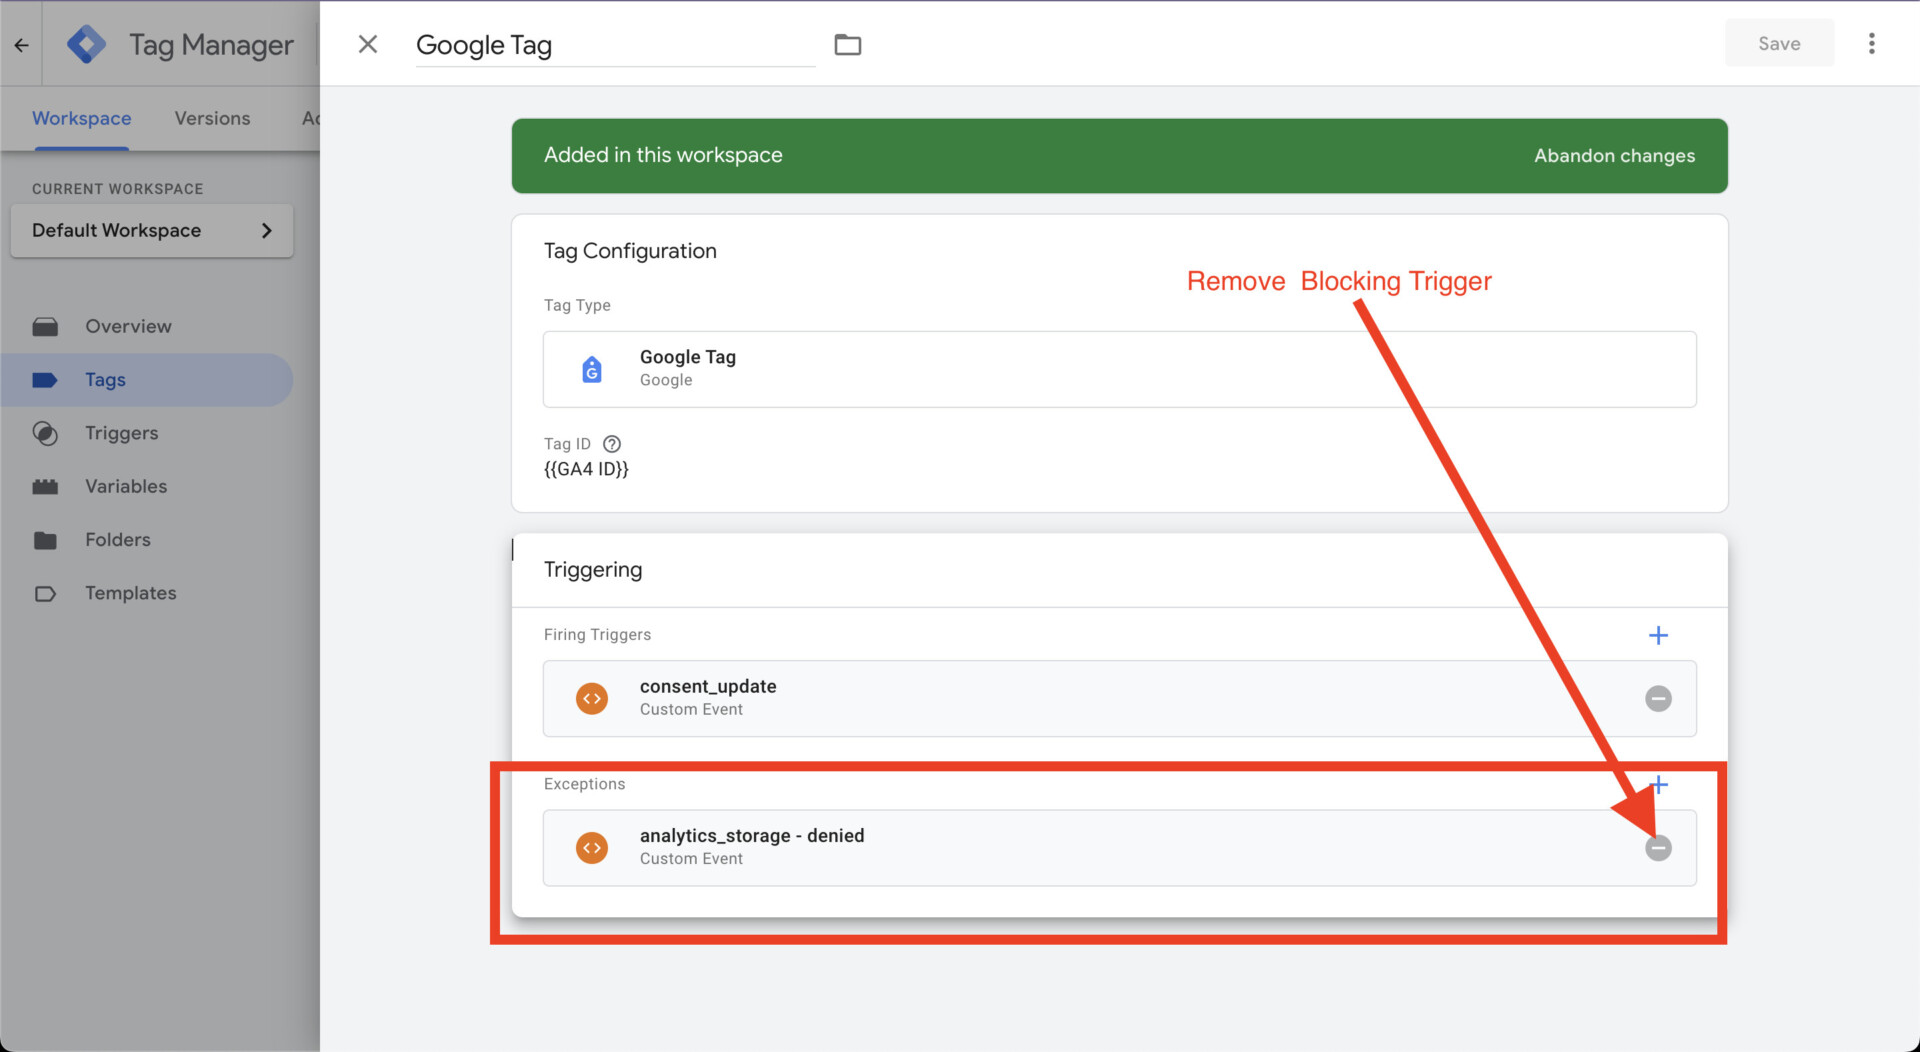

Scenario B): Remove Additional Consent Checks
On the other hand, If you are using Additional Consent Checks, make sure to toggle No additional consent required.
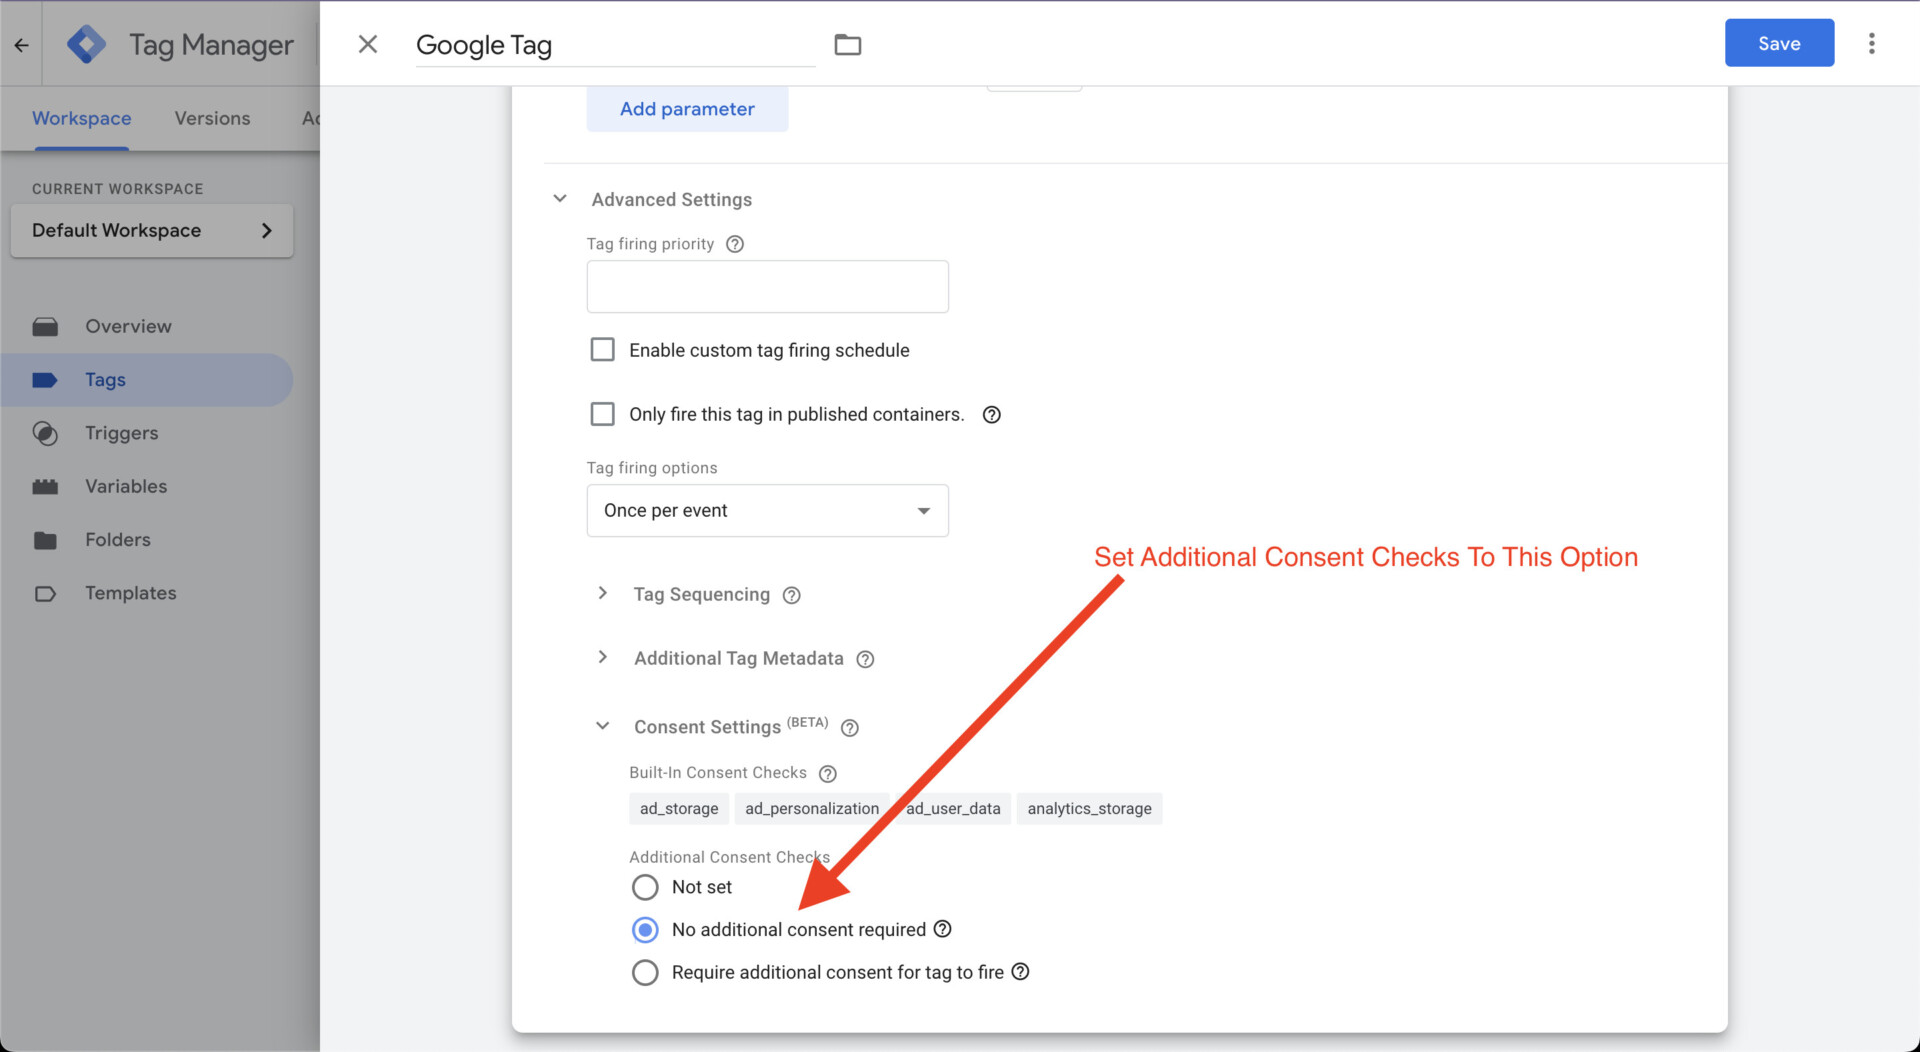

Test Advanced Consent Mode
Let’s preview our GTM tag and see what would happen when we reject tracking.

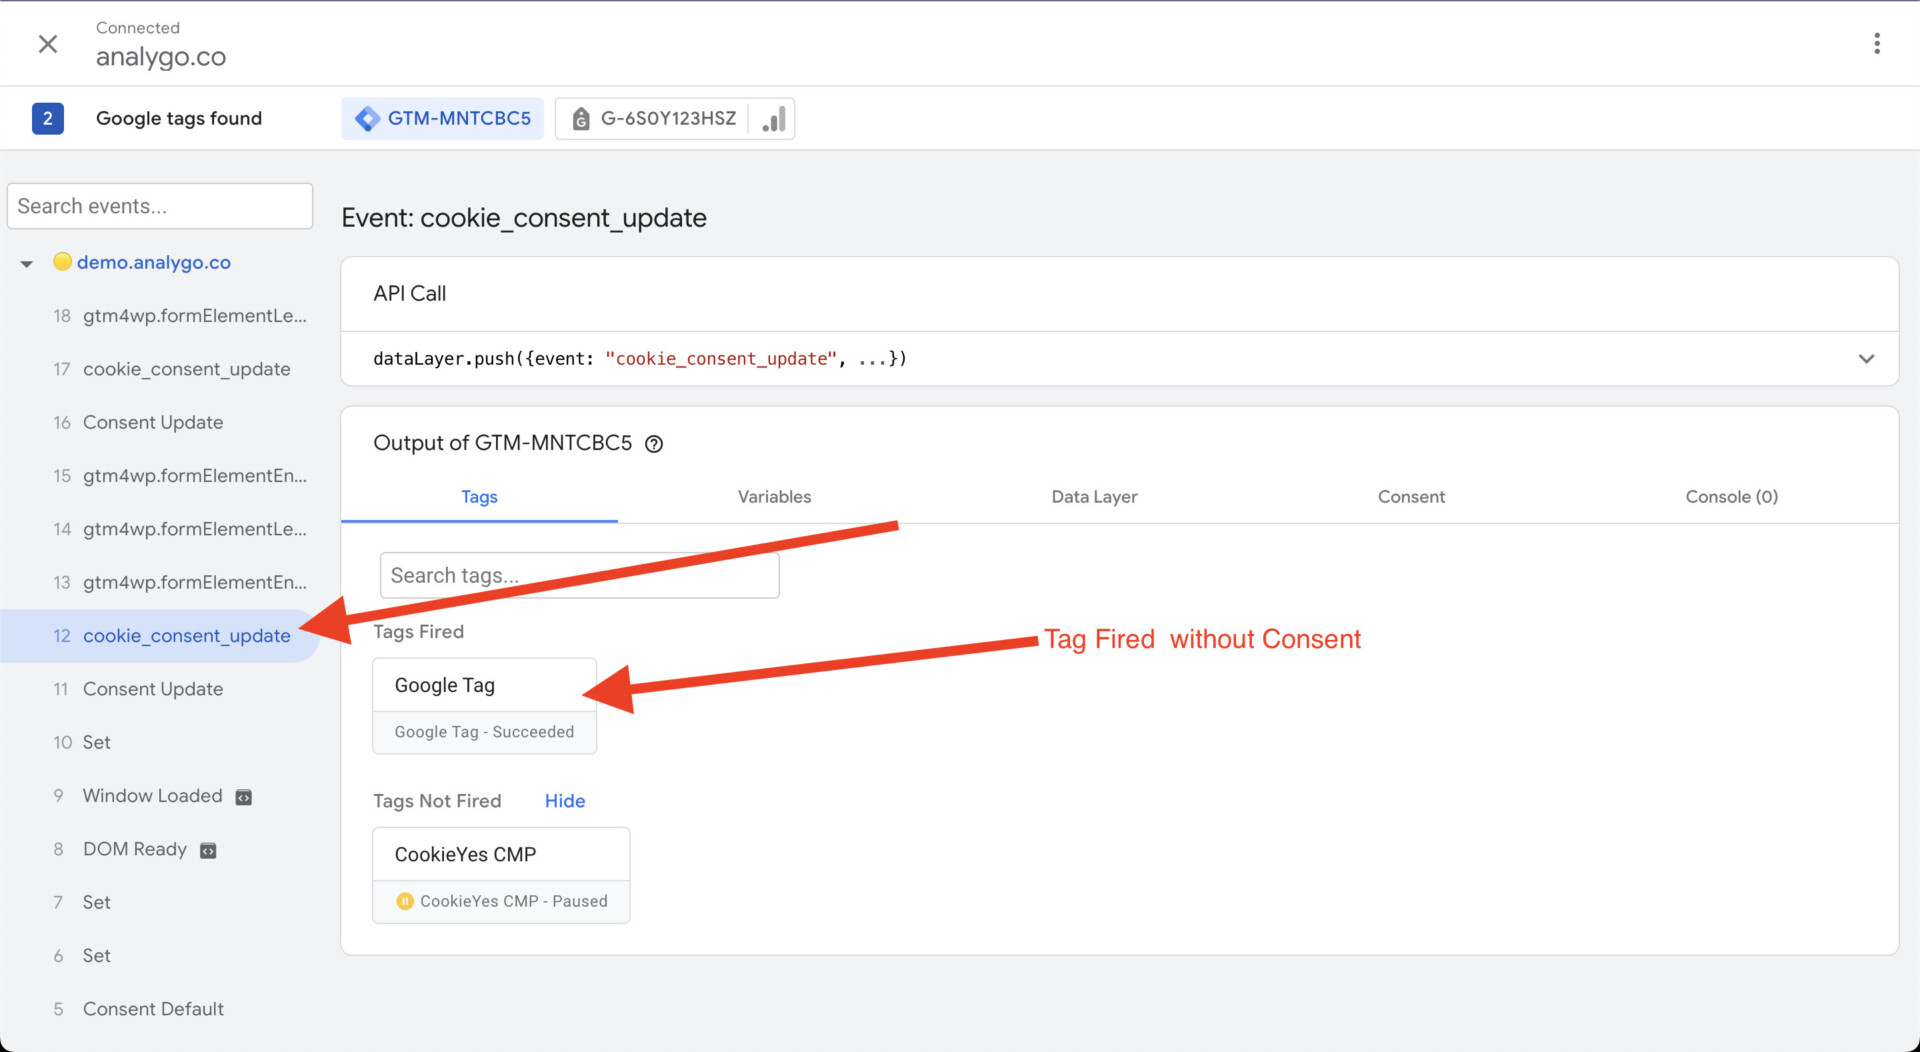


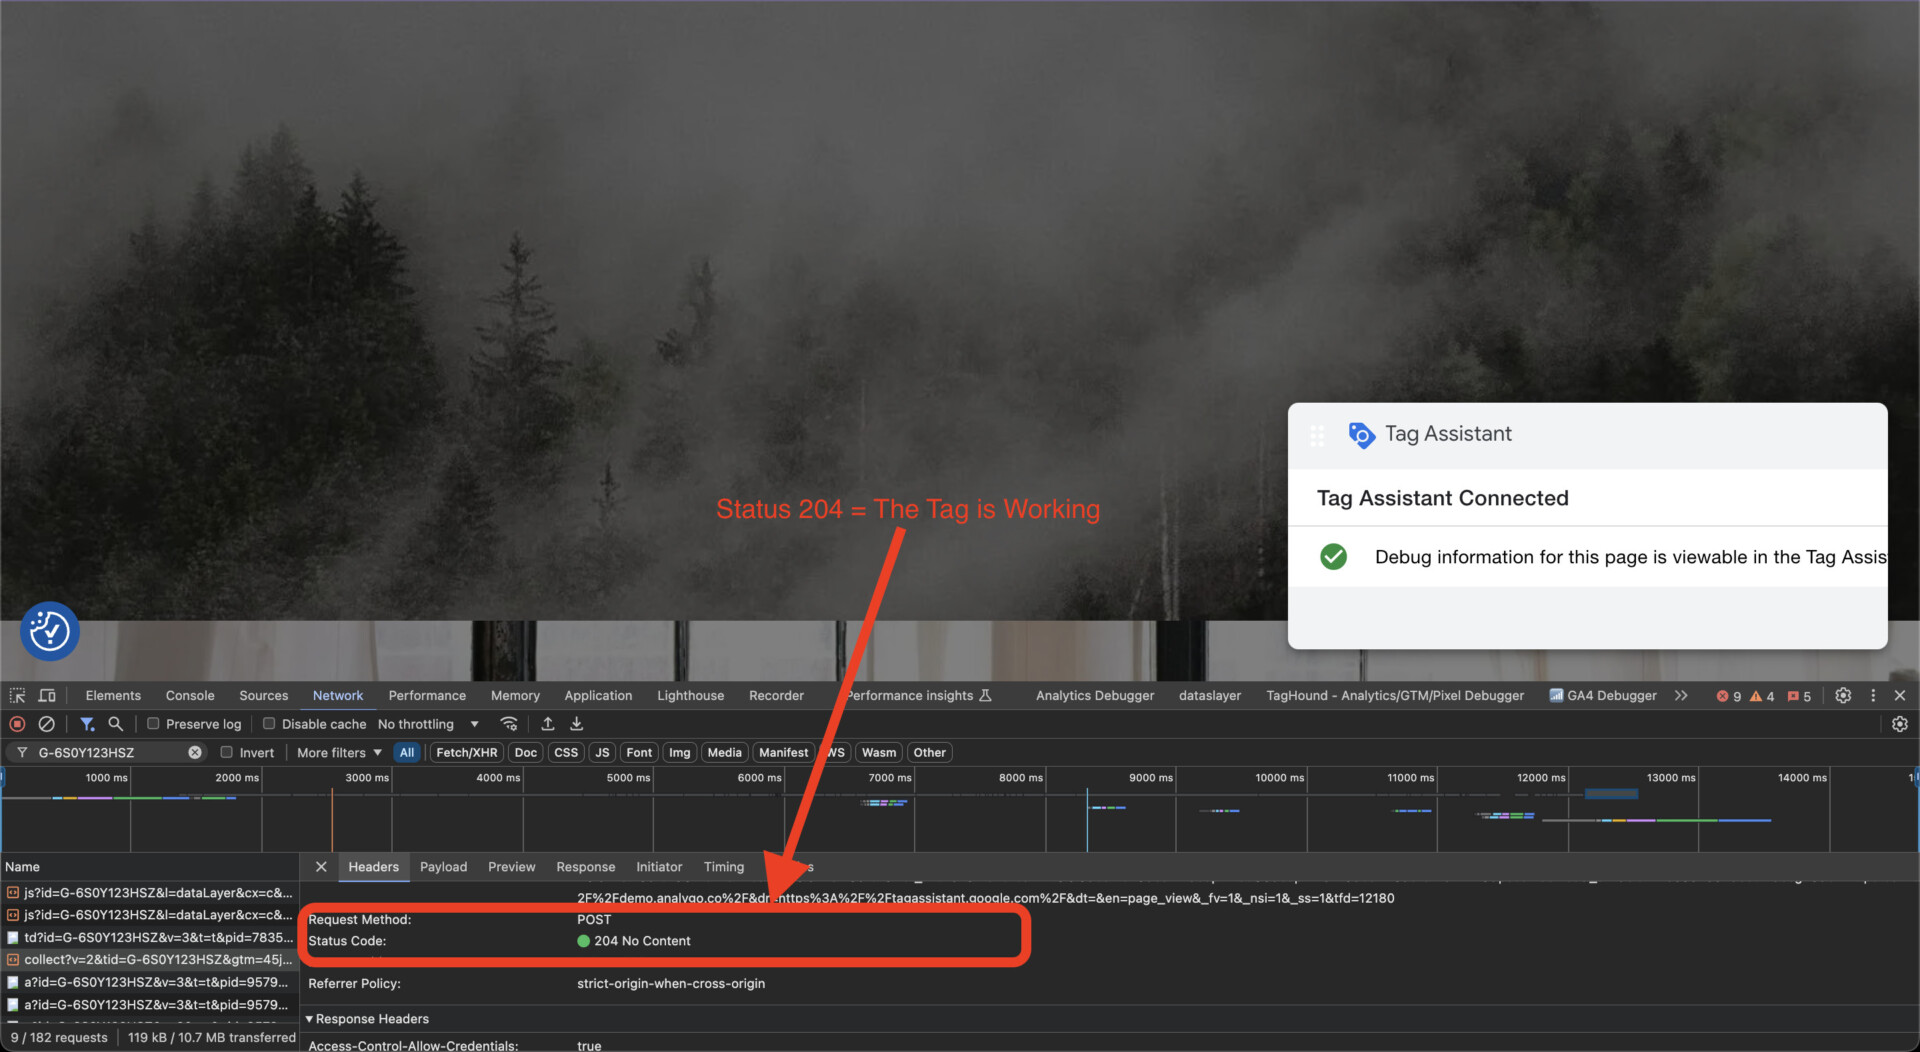
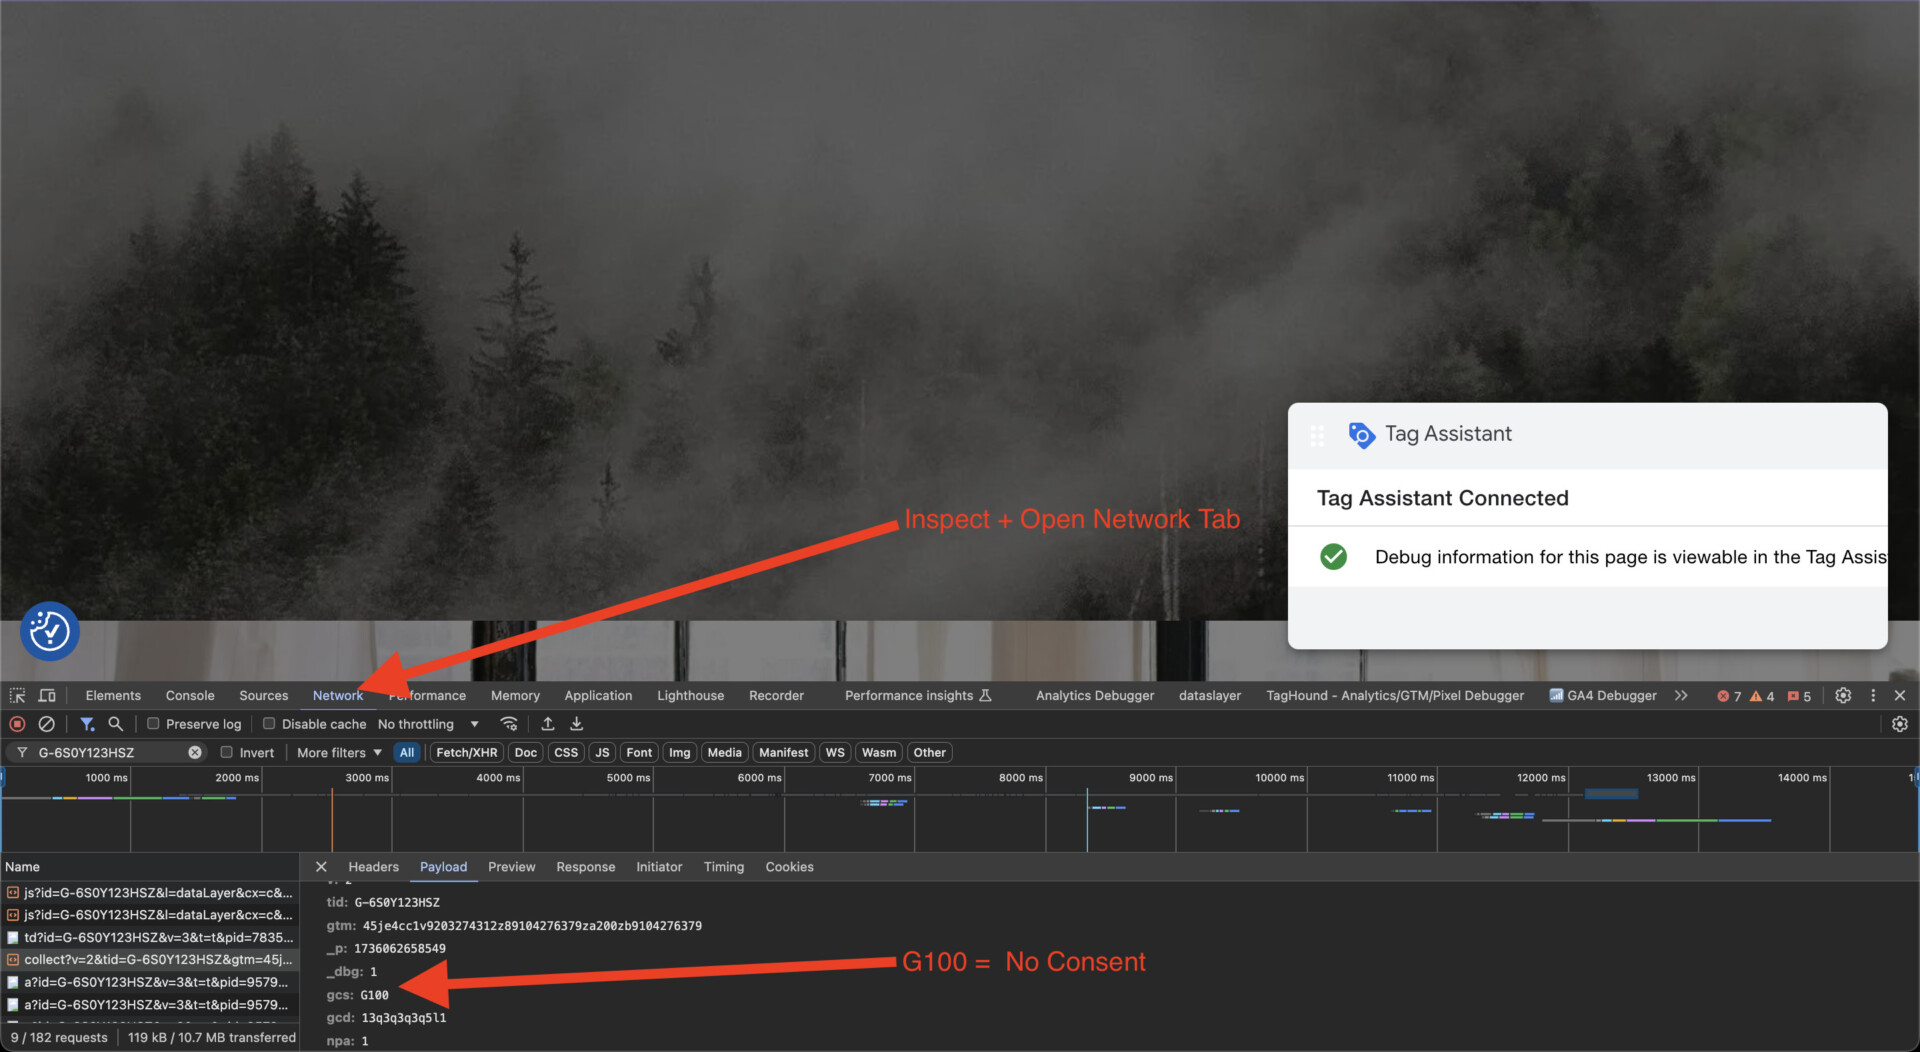
Additionally, when you inspect your website, you will see G100 sent along your GA4 hit. This means that your tag is firing with missing consent.
