[9-step Checklist] Google Tag Manager Server-Side Tagging
Table of Contents
Introduction
This guide is designed to get you started as soon as possible with server-side tracking. You can think of it as a practical checklist to refer to each time you set up server-side tracking for your clients. If you are looking for a more detailed explanation, please refer to our introduction to server-side tracking article.
Step 1: Create server-side container
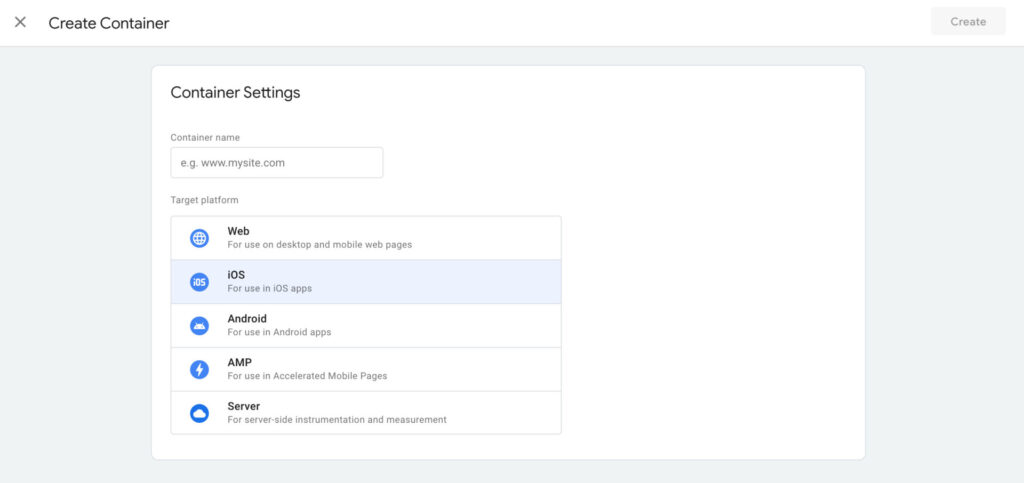
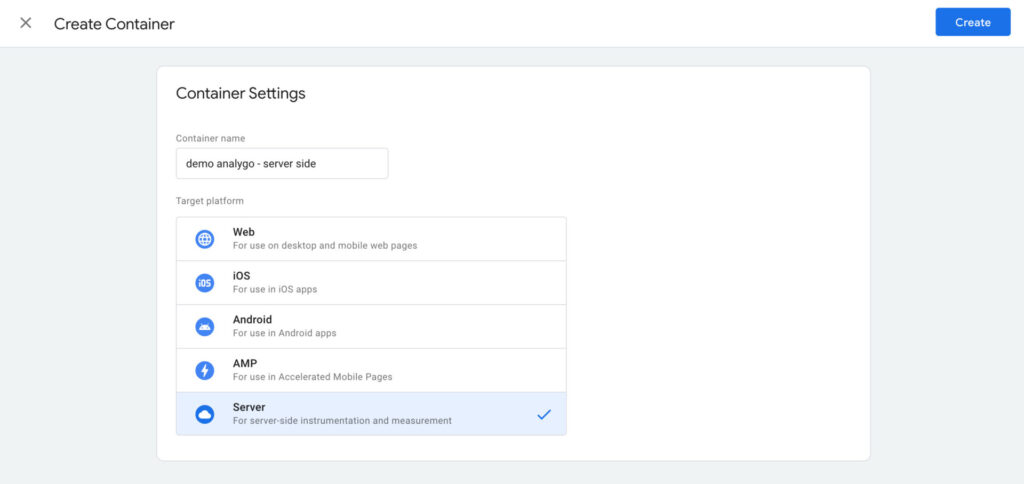
There are many types of containers in GTM. Up until now, you probably used only the web container.
🎬 Your Turn
It’s time to create a server container. Go to your GTM account > Admin > Create Container > Server.
Step 2: Provision your tagging server
The tagging server will be responsible for forwarding the data you collect to platforms like Facebook. Before, you sent this data directly using a tracking pixel.
🎬 Your Turn
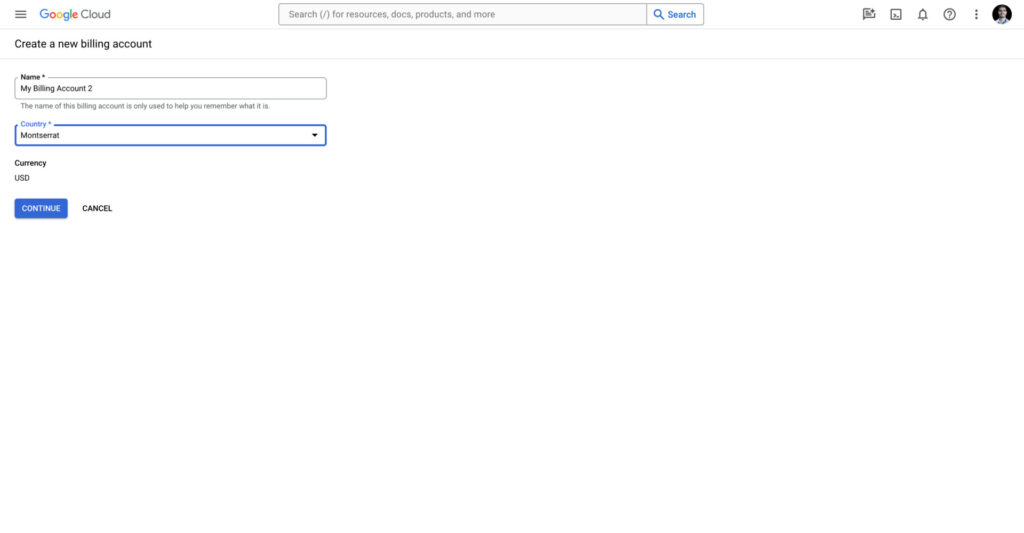
Select the Automatic provisioning option. Make sure to add your billing account as well.
Note: This configuration is free until you increase the number of servers to handle more traffic.
Step 3: Test Your deployment
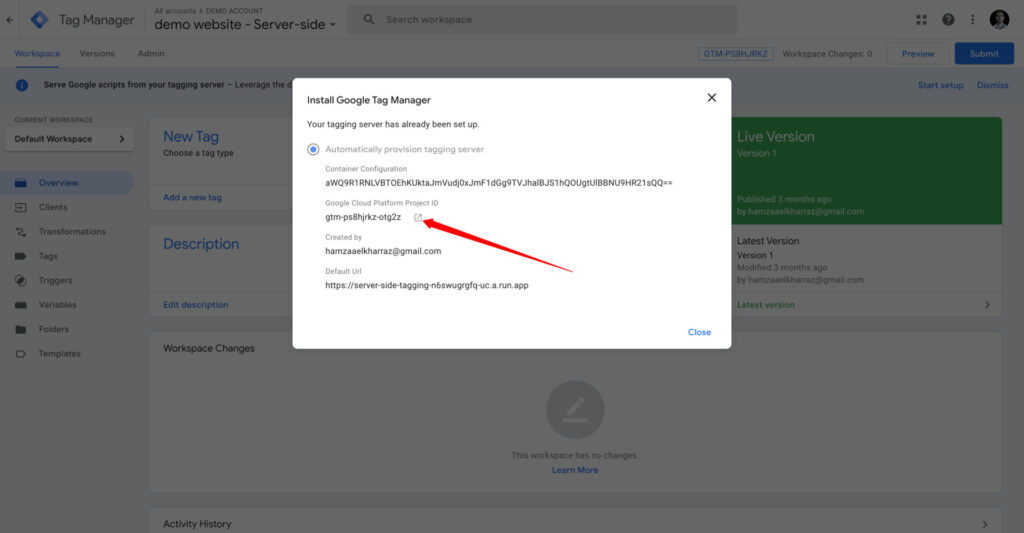
You will see a window with your server’s information. The URL of your tagging server will look like this:
https://server-side-tagging-[XXXXXX]-uc.a.run.app
🎬 Your Turn
Test the tagging server by adding “/healthy” to your tagging server URL. You will see an “OK” if everything is working as expected.
Google will set up a server for you in the us-central1 region. you can change this setting later on.
This configuration is for testing purposes only. You will not be charged until you increase the number of servers (more on this later on).
Step 4: Set up a custom domain
The next step is to replace the default URL with our own custom domain. the data you will collect after this process is considered first-party. As long as you keep using the URL provided by Google, the tracking will be done in a third-party context.
🎬 Your Turn
Go to your Google cloud project by clicking on the icon next to your Project ID.
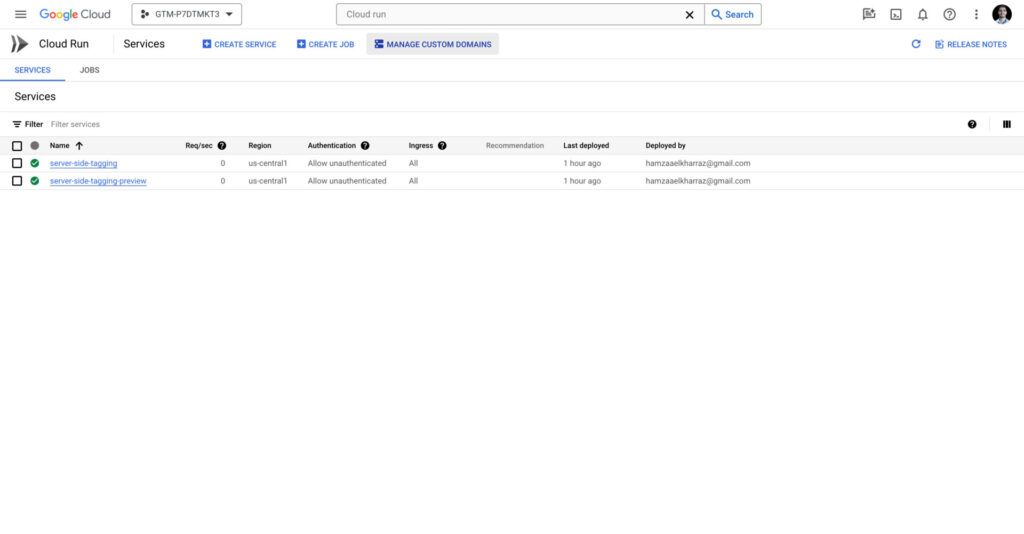
In the search bar, look for “cloud run”. You will land on a page containing your tagging and preview server.
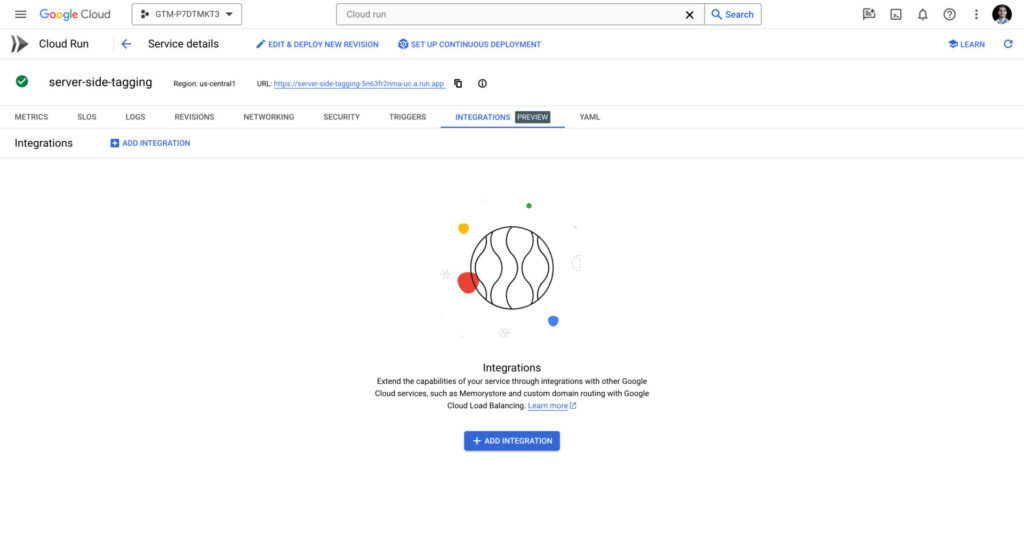
Select “server-side-tagging” and browse to integrations.
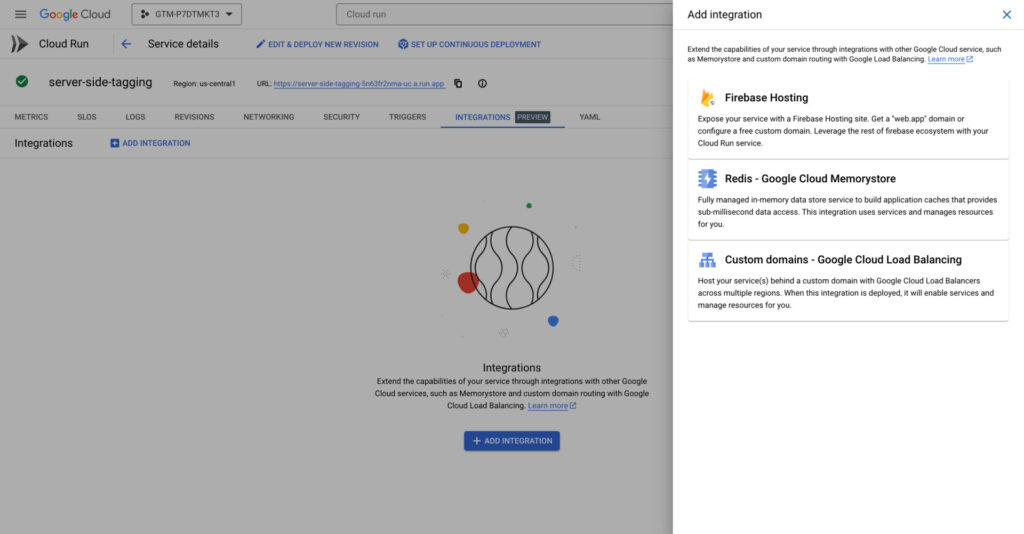
Click on add integration.
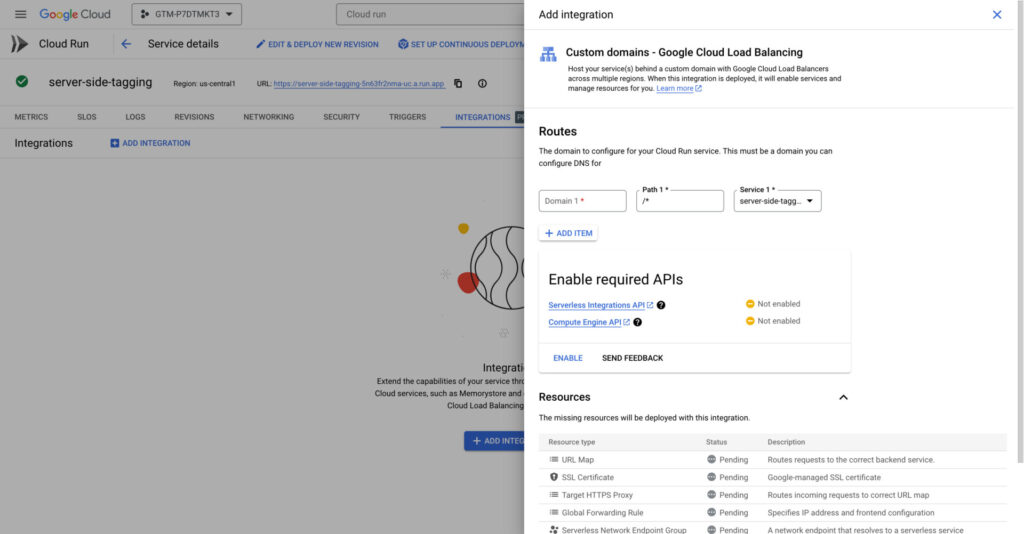
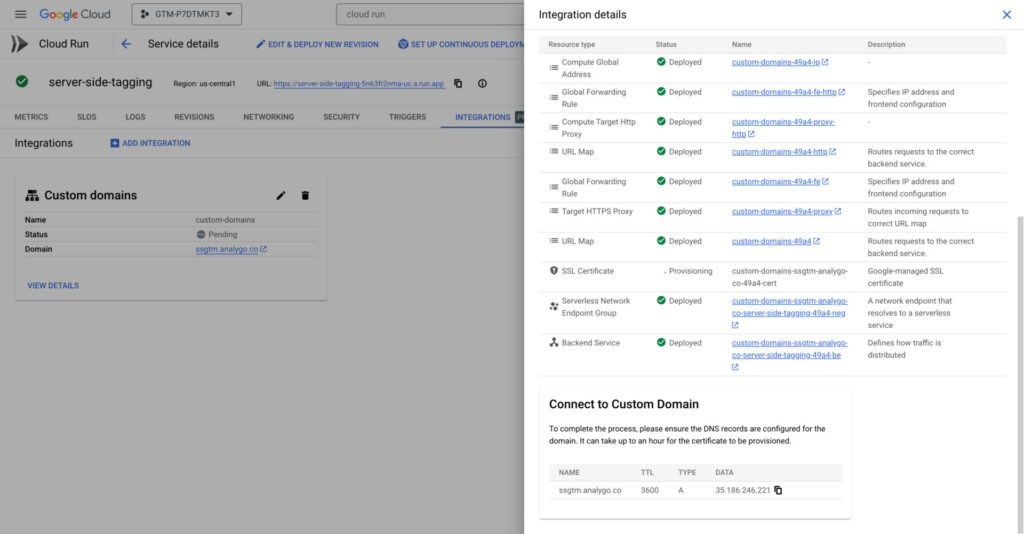
select Custom domains – Google Cloud Load Balancing
Add a new domain in our case we use ssgtm.analygo.co. make sure you are using a new subdomain just for the purposes of server side tagging (you can use this format: ssgmt.[yourdomain])
Enable the two APIs.
You need to go to your hosting provider and add the A records.
Note: the SSL certificate will stay on pending until your domain is verified. This might take up to 24 hours or more.
Finally, browse to your server container > Administration > Container settings. Replace the old URL with the new custom domain (i.e., https://ssgtm.analygo.co/)
Step 5: Adding your first client
We can start using the server container at last. A client processes the requests from your web container and makes them available to your server-side tags.
🎬 Your Turn
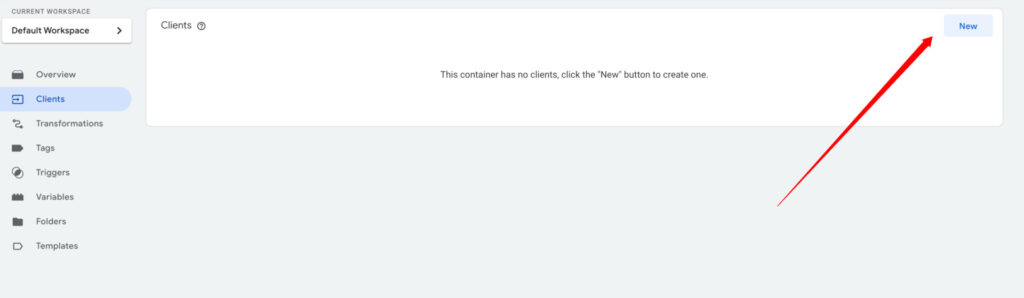
Create a client by browsing to the client section in your server-side container.
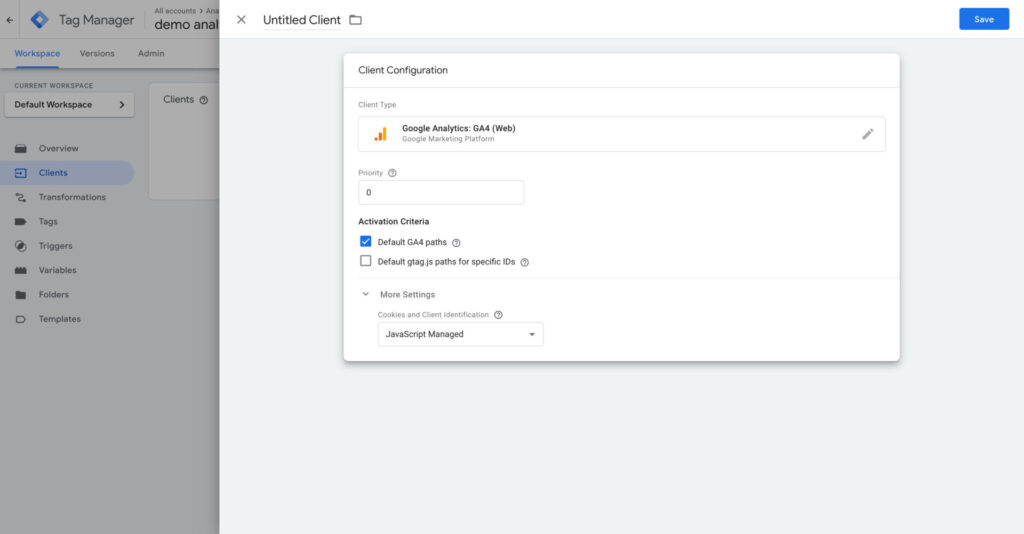
In the client template, make sure to:
Keep Default GA4 paths selected
Switch to JavaScript Managed for Cookies and Client Identification
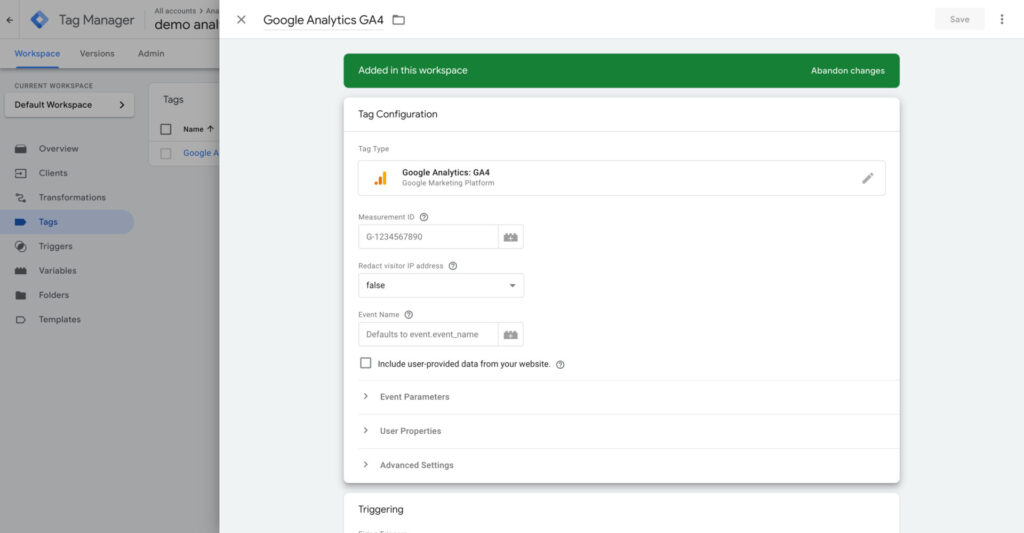
Step 6: Adding your first server-side tag
Tags receive the processed data from the client and fire according to the trigger. they work the same way web tags do.
🎬 Your Turn
Add a new GA4 tag and leave all fields with default values.
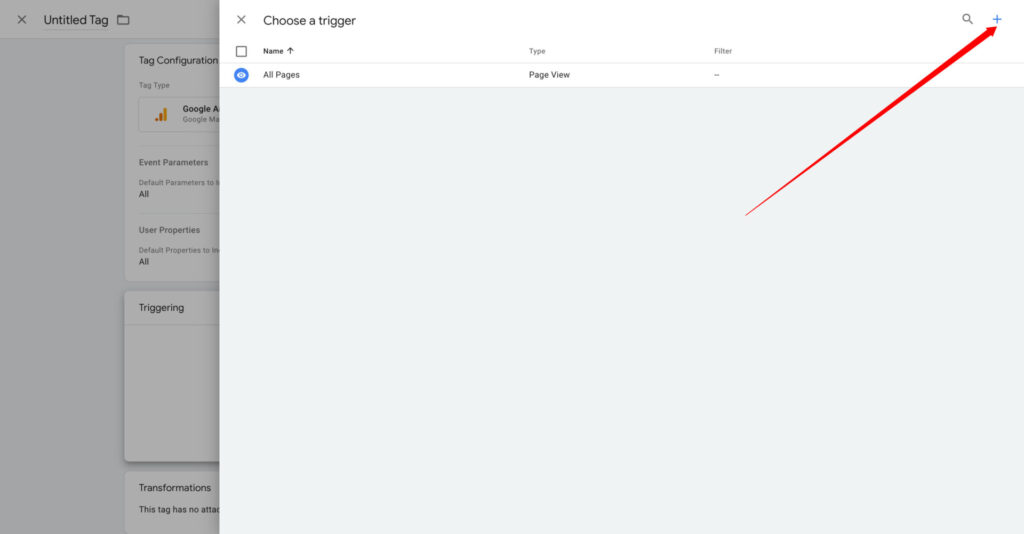
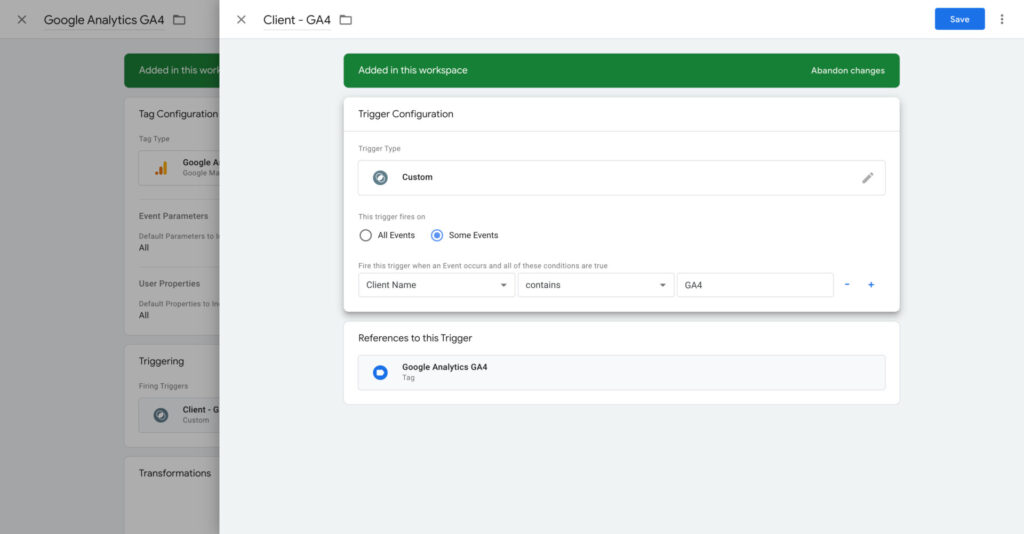
Add a new trigger and click on +.
Select Some events, and Choose Built-In Variable from the drop-down. add the Client name variable.
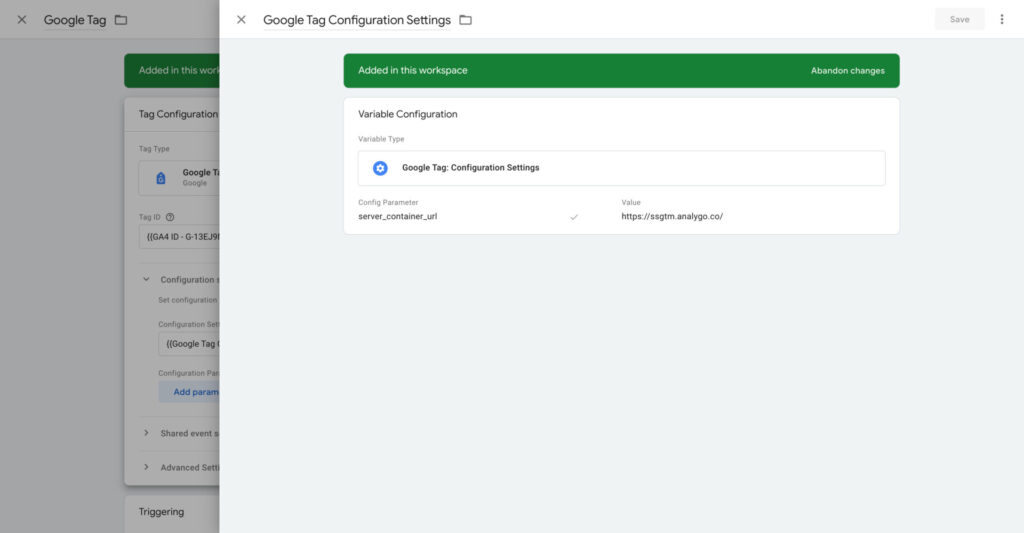
Step 7: configure your web tag container
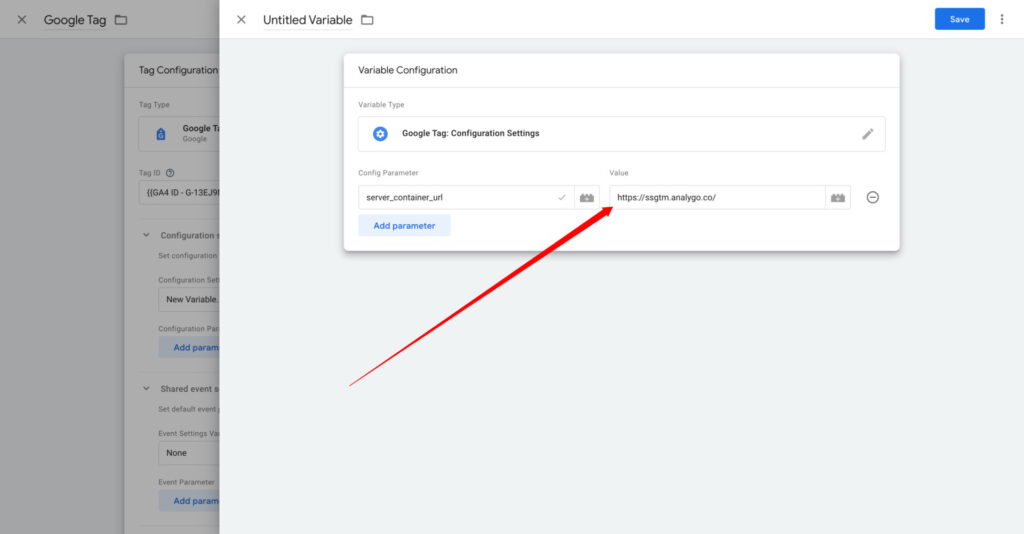
We need to add the URL of our server to the GA4 configuration tag.
note: we are now going to switch to the web container, so make sure you are not using server GTM
🎬 Your Turn
Open you GA4 configuration tag and select New variable under Configuration Settings Variable.
Step 8: Test your deployment
Now it’s time to test if everything is working as expected.
🎬 Your Turn
Open preview mode in both server and client containers. As you can see, the GA4 tag is working as expected.
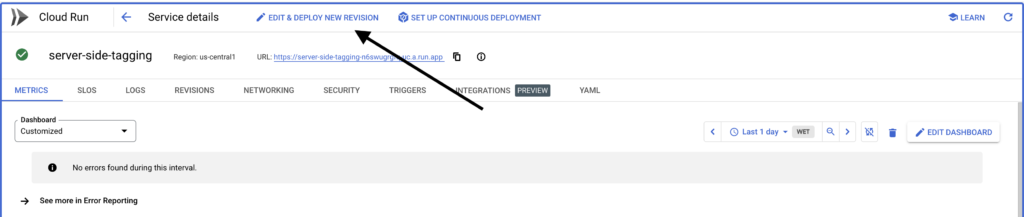
Step 9: Increase the number of servers
The last thing we need to do is to make our set ready to hand handle more traffic.
🎬 Your Turn
Go to the integrations section in Cloud run and select server-side-tagging. You need to click on EDIT & DEPLOY NEW REVISION.
Scroll all the way down to Revision autoscaling. Change the minimum to 2 and up to 10 instances. Finally, you can click on Deploy.
Join The Connected Dots Newsletter
Every week, we deliver 5 key insights, updates, or takes related to digital analytics to keep you updated.
Use promo code 👉🏻 agency to get 2 MONTHS FREE access to our agency community.